
How to Cut Glass Panels Safely and Precisely
Knowing how to cut glass panels is one of those DIY skills that feels intimidating until you actually do it. The glass sits there looking fragile and unforgiving, and the margin for error seems razor thin. But with the right tools, a clean workspace, and a clear process, cutting standard glass panels is completely manageable for a careful beginner. This guide walks you through everything: the tools you need, how to score glass correctly, what happens when you push too hard, and the one type of glass you should never attempt to cut yourself.
Table of Contents
- Key takeaways
- How to cut glass panels: tools and what they actually do
- Step-by-step process to score and snap glass
- Why you cannot cut tempered glass at home
- Common mistakes and how to fix them
- My honest take after years of watching DIYers cut glass
- Pre-cut tempered glass from Glassrailingstore
- FAQ
Key takeaways
| Point | Details |
|---|---|
| Use the right cutter | Tungsten carbide or diamond wheel cutters, plus cutting oil, are required for a clean score. |
| One score only | Never rescore the same line. A single clean pass is the only way to get a straight, controlled break. |
| Tempered glass cannot be cut | Attempting to cut tempered glass causes dangerous shattering. Order it pre-cut to size instead. |
| Sound tells you everything | A light scraping sound means a good score. A grinding noise means too much pressure. |
| Safety gear is non-negotiable | Wear cut-resistant gloves and safety glasses every time you handle or cut a glass panel. |
How to cut glass panels: tools and what they actually do
You do not need a garage full of specialty equipment. The core DIY glass toolkit runs between $25 and $70 and covers most straight cuts on standard float glass.
Here is what you need before you start:
- Glass cutter. A tungsten carbide wheel cutter handles most home projects. A diamond wheel cutter lasts longer and scores harder glass more consistently. Both work on standard window glass and float glass panels.
- Running pliers. These apply even, centered pressure along the scoreline to snap the glass cleanly. Without them, your break is likely to wander.
- Straight edge or T-square. A metal ruler or aluminum straight edge works best. Never guide a glass cutter along a wooden edge since the cutter can drift.
- Cutting oil. Light machine oil or dedicated glass cutting oil. Apply it before every single cut, no exceptions.
- PPE. Cut-resistant gloves and safety glasses. Glass fragments are unpredictable and small shards travel farther than you expect.
- Work surface. A flat, padded surface like a carpet-covered workbench prevents scratches on the glass underside and holds it steady.
One detail beginners consistently overlook is cutter grip style. Pistol-grip cutters are easier to control on long, straight cuts. Pencil-grip cutters give you more feedback and maneuverability on curves or detailed work. Picking the wrong grip is one of the most common reasons DIYers end up with off-center scores and ragged breaks.
Pro Tip: Apply a thin line of cutting oil directly to the wheel of your cutter before each score. The oil does more than lubricate. It prevents microscopic cracks from resealing after the score is made, which is what allows the glass to snap cleanly rather than crumbling.
Regarding glass thickness: standard float glass runs from 1.5 mm to 25 mm. Thin glass under 3 mm needs only about 5 to 6 pounds of pressure. Anything over 6 mm requires 20 or more pounds of steady, even force. Knowing your glass thickness before you start lets you calibrate your grip and choose the right cutter.
Step-by-step process to score and snap glass
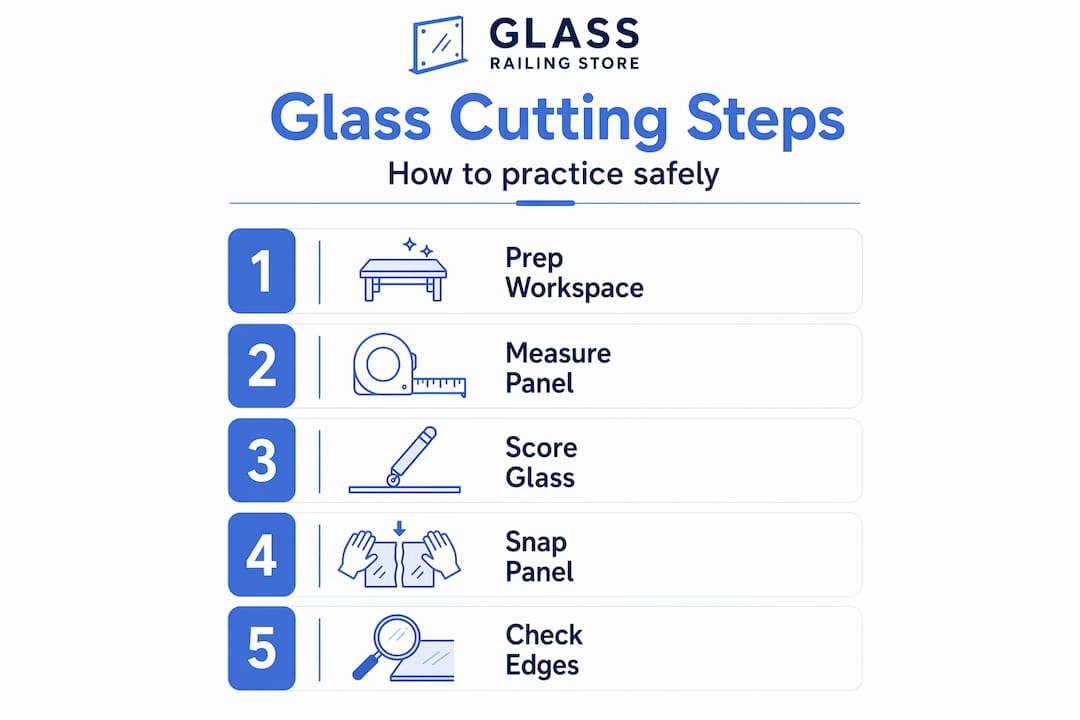
Clean, controlled cuts come from preparation, not force. Work through these steps in order and do not skip ahead.
- Clean the glass. Wipe both sides with a dry cloth. Dust, grit, or residue under the cutter wheel causes the score to skip, which ruins the line.
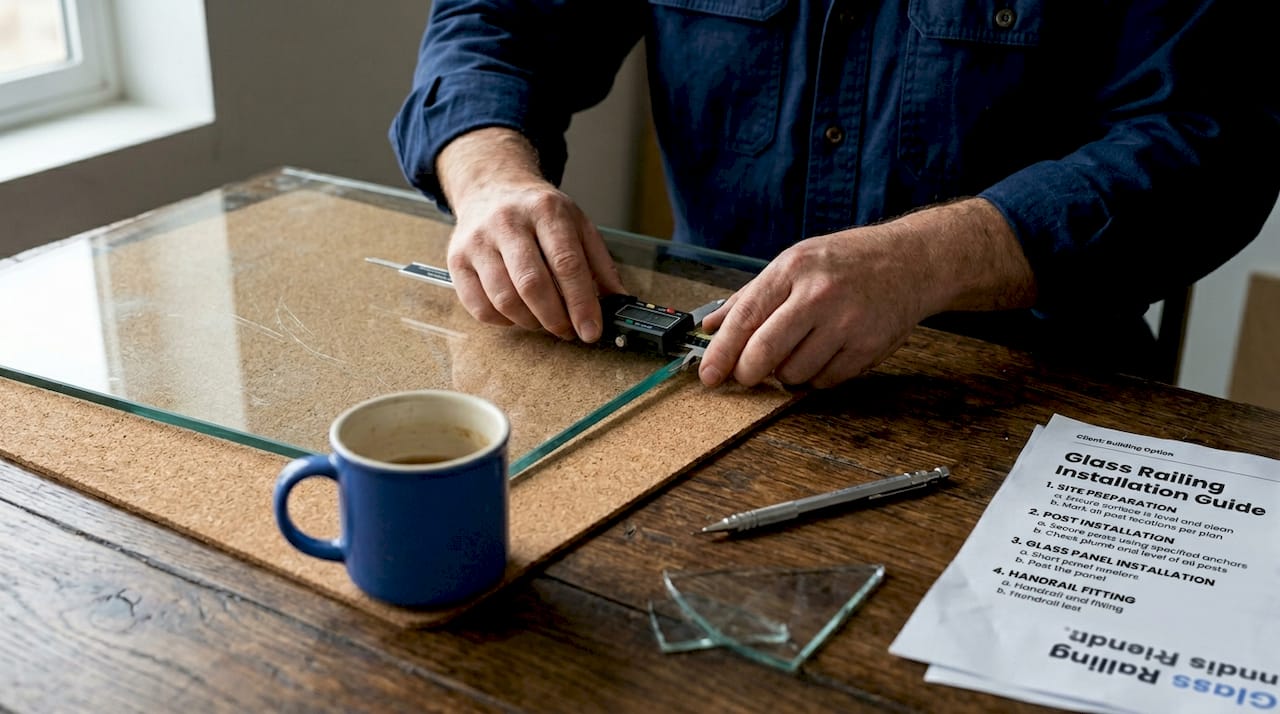
- Mark your cut line. Use a felt-tip marker or a grease pencil to draw a clear, visible line. Measurement accuracy is a top failure point. Measure each dimension twice before marking.
- Position your straight edge. Offset the edge slightly to account for the width of the cutter wheel so your wheel tracks exactly on the line, not beside it.
- Apply cutting oil to the wheel. A small drop is enough. Re-apply for each new score.
- Score the glass in one pass. Place the cutter at the far edge of the glass, press firmly and steadily, and draw it toward you in one continuous motion. Start and end the score at the edge of the glass. Do not lift mid-stroke.
- Listen to the glass. A consistent light screeching sound means your score is clean. A grinding or crunching sound means too much pressure. A nearly silent pass means not enough.
- Snap immediately. Do not wait. The longer you delay after scoring, the harder the snap becomes. Use running pliers centered on the scoreline for panels wider than about 2 inches. For narrow strips, grip both sides of the score and snap with a quick, even downward motion.
- Smooth the edges. Run a carborundum stone or 120-grit wet-dry sandpaper along all cut edges to remove sharp burrs. Work in one direction only, not back and forth.
Pro Tip: For curves, score the curve first, then make a series of straight relief cuts from the curve edge outward to the glass edge. Running pliers handle each straight segment, freeing the curved piece in stages rather than all at once.
Straight cuts are the foundation. Once you can execute a clean straight cut three times in a row on scrap glass, you are ready to cut a real panel.
Why you cannot cut tempered glass at home
This is the section that will save you from a genuinely dangerous mistake. If your project involves tempered glass, including most glass railing panels, shower enclosures, and sliding doors, the cutting rules above do not apply.
Here is how to identify tempered glass before you try anything:
- Look for a small etched bug stamp in one corner. This typically shows the manufacturer name, safety rating, and glass type.
- Check the edges. Tempered glass has smooth, polished edges, not the raw sharp edges of cut float glass.
- Hold it up to polarized sunlight or view it through polarized sunglasses. You will see faint stress patterns across the surface.
Warning: Tempered glass cannot be cut, drilled, or reshaped after the tempering process. The glass is under internal compression stress throughout its entire surface. Any attempt to score or snap it releases that stress instantly, causing the entire panel to shatter into hundreds of small, blunt pieces. There is no technique or tool that changes this.
The only way to work with tempered glass is to order it pre-cut to size before tempering. This is exactly why glass railing panels, pool fence glass, and safety glazing products are manufactured to spec by the supplier. For anything structural or safety-related, working with pre-cut tempered panels is not just safer. It is the only legal and practical option in most building applications. Check the glass railing building codes that apply to your project before ordering.
Common mistakes and how to fix them
Even experienced DIYers make these errors. Knowing them in advance keeps your waste pile small and your fingers intact.
Rescoring the same line. If your score is off, do not run the cutter over it again. A second pass on an existing score creates a rough, unpredictable break. Rotate the glass and score from the opposite edge, or set that piece aside for a smaller cut and start fresh.
Too much pressure, too fast. Pressing harder does not make a better score. It makes a worse one. The cutter wheel should glide with firm, consistent pressure, not dig or grind. If you hear grinding, lighten up immediately.
Using a dull cutter. Glass cutter wheels wear out. A dull wheel skips across the surface instead of scoring it. If you are not hearing that clean screeching sound and the oil is not spreading evenly along the score, the wheel is likely done. Replacement wheels are inexpensive.
Waiting too long to snap. Score and snap in quick succession. Waiting even a few minutes allows microscopic tension to equalize slightly, making the break less predictable.
- After cutting, always smooth every edge with a sharpening stone before handling the panel bare-handed.
- If a panel is too large for your workspace, cut it down in stages rather than attempting one long diagonal snap.
- Know when to call a professional. Anything over 1/4 inch thick, any curved architectural piece, or any glass destined for a safety application belongs in a professional shop.
Pro Tip: Before cutting your actual panel, practice on three or four scrap pieces of the same thickness. The muscle memory for consistent pressure builds fast, and scrap glass is far cheaper than a ruined panel. Knowing how to safely size glass panels also helps you order the right thickness from the start.
My honest take after years of watching DIYers cut glass
I have watched a lot of people attempt glass cutting for the first time, and the pattern is almost always the same. They either press too hard because glass feels like it should need force, or they are so nervous about breaking it that they score too lightly and nothing snaps. Both errors come from the same source: they never practiced on scrap first.
Here is what I have actually learned. The score does all the work. The snap is just releasing what the score already set up. Once you internalize that, your whole approach changes. You stop fighting the glass and start working with it.
The other thing beginners consistently underestimate is how much difference a clean workspace makes. One piece of grit under the glass can cause the panel to snap unevenly and send a shard sideways. Glass does not forgive a messy table.
My honest advice on tempered glass: do not chase workarounds. I have seen the results of people trying to sand or score tempered panels, and it is not a minor failure. It is a violent, sudden one. Ordering pre-cut tempered panels to your exact dimensions costs more upfront, but it saves you the risk, the waste, and potentially the trip to urgent care. When I see people trying to avoid that cost, I always think about glass railing installation mistakes that could have been avoided with a $50 better decision early on.
Patience and preparation are genuinely the whole skill here. Not technique secrets, not expensive tools. Just a clean surface, a sharp cutter, proper oil, and a few practice cuts before you touch anything you care about.
— Fuanne
Pre-cut tempered glass from Glassrailingstore

If your project uses glass in any safety application, including railings, balcony barriers, or pool fences, you need tempered glass cut to size before it is tempered. That is not optional. Glassrailingstore supplies exactly that. Their 46-inch tempered glass panels are manufactured to precise dimensions, meet safety standards, and arrive ready to install. No cutting required on your end, which means no risk of catastrophic breakage and no compromised safety ratings. If you are planning a railing project and need to understand thickness requirements or compliance specs, their building codes resource covers the regulations that apply in most U.S. jurisdictions. Getting the glass right from the start is faster and safer than trying to modify it later.
FAQ
1. Can you cut tempered glass panels at home?
No. Tempered glass shatters completely when scored or snapped because of the internal compression stress locked in during manufacturing. All cuts must be made before tempering by the supplier.
2. What tools do you need to cut glass panels?
The basics are a tungsten carbide or diamond wheel glass cutter, running pliers, a metal straight edge, cutting oil, and cut-resistant gloves with safety glasses. A full starter kit typically costs $25 to $70.
3. How do you know if your glass score is correct?
A correct score produces a consistent light screeching sound as the cutter travels across the glass. A grinding sound signals too much pressure. A silent pass means too little.
4. How do you identify tempered glass before cutting?
Look for a small etched stamp in the corner of the panel, check for smoothly polished edges, or view the glass through polarized sunglasses to see faint stress patterns. Any of these confirm the glass is tempered and cannot be cut.
5. When should you hire a professional instead of cutting glass yourself?
Call a professional for glass thicker than 1/4 inch, curved architectural cuts, or any panel destined for structural or safety use. The cost of professional cutting is almost always lower than the cost of a ruined panel or an injury.
Recommended
- Avoid these glass railing mistakes for a safe, stylish home – The Glass Railing Store
- Choosing safe and stylish glass thickness for railings – The Glass Railing Store
- Glass Railing Installation Guide – The Glass Railing Store
- DIY glass stair railing: A complete homeowner’s guide – The Glass Railing Store