
Avoid these glass railing mistakes for a safe, stylish home
Glass railing projects look straightforward until you’re facing a failed inspection, a wobbling panel two feet above ground level, or a surprise bill to tear out work you just paid to install. These outcomes are more common than you’d think. Many homeowners fail inspections or are forced to rebuild due to building code violations in their glass railing projects. Whether you’re upgrading a deck, a staircase, or a balcony, understanding where things go wrong before you break ground will save you real money and serious headaches. This article walks through the five most common glass railing mistakes and exactly how to avoid every one of them.
Table of Contents
- Mistake 1: Overlooking building codes and regulations
- Mistake 2: Choosing improper glass type or thickness
- Mistake 3: Poor installation alignment and support
- Mistake 4: Neglecting environmental factors and maintenance
- Mistake 5: DIY overreach — When to call an expert
- Why small mistakes cause big problems in glass railing projects
- Avoid mistakes with expert glass railing solutions
- Frequently asked questions
Key Takeaways
| Point | Details |
|---|---|
| Follow local codes | Checking and understanding your building codes prevents costly violations and ensures safety. |
| Choose the right glass | Select glass that meets safety standards for type, thickness, and engineering to protect your investment. |
| Install with precision | Proper alignment and support are key to avoiding wobbly panels and future repairs. |
| Maintain for longevity | Regular inspections and climate-aware maintenance keep railings clear, strong, and attractive. |
| Know when to hire experts | Certified professionals handle complex or code-critical tasks that DIY cannot safely fulfill. |
Mistake 1: Overlooking building codes and regulations
With safety top of mind, the first and perhaps most critical mistake to avoid is missing essential building code requirements. Glass railings are structural safety systems. They aren’t just decorative features you can install however you like. Every local jurisdiction applies specific rules covering height, panel gaps, load capacity, and glass type. Skipping these rules doesn’t just risk a fine. It can void your homeowner’s insurance, tank your home’s resale value, and put your family at genuine physical risk.
Common code-related mistakes include:
- Installing railings below the required height (often 36 inches minimum for residential, 42 inches for commercial or elevated decks)
- Leaving gaps between panels or at the base that exceed the 4-inch maximum, which is a choking and entrapment hazard for children
- Using non-tempered or non-laminated glass panels that don’t meet American glass railing codes
- Failing to account for lateral load requirements, meaning the railing can’t resist the force of a person leaning or falling into it
- Not pulling a permit before construction starts, which can trigger forced removal and rebuilding
Here’s a quick compliance checklist before you order a single panel:
- Confirm minimum railing height with your local building department
- Verify required glass type and minimum thickness
- Check maximum allowable gaps at the bottom and between panels
- Calculate required load capacity for your specific location and use
- Review state-specific requirements such as Illinois glass railing requirements if applicable
- Apply for the correct permit before any installation begins
Pro Tip: Download your local building code before you purchase materials. Requirements vary significantly even between neighboring counties, and knowing your specs upfront means your order will be right the first time.
Mistake 2: Choosing improper glass type or thickness
Building code knowledge gives you a foundation, but the next common pitfall is not choosing the right type or thickness of glass for your railing. This isn’t a subtle or theoretical problem. Using glass that is too thin or the incorrect type can result in failures and serious safety hazards, especially in high-traffic or elevated locations.
The two primary choices are tempered glass and laminated glass. Each has strengths and weaknesses depending on the application.
| Feature | Tempered glass | Laminated glass |
|---|---|---|
| Strength | 4-5x stronger than standard glass | Slightly lower than tempered |
| Breakage pattern | Shatters into small blunt pieces | Holds together when broken |
| Best use | Enclosed or low-risk locations | Overhead, elevated, or high-risk areas |
| Cost | Lower | Higher |
| Code compliance | Meets most residential codes | Required in some overhead/elevated applications |
| Clarity | Excellent | Very good, slight tint possible |
Most residential deck and stair railings can use 3/8-inch or 1/2-inch tempered glass, but the right choice depends on panel span, expected load, and local building code requirements. Larger unsupported panels or applications near pools often require thicker or laminated options.
Scenarios where you should lean toward laminated glass or extra thickness:
- Any railing above 30 feet of elevation
- Pool fences where children are the primary users
- Locations with high wind loads, such as coastal or mountain properties
- Overhead glass applications where falling shards pose a severe risk
Pro Tip: Always request engineering test data for the specific glass panels you’re ordering. Reputable suppliers provide certified test results showing load ratings and compliance with ASTM or IBC standards. If a vendor can’t produce this data, that’s a red flag worth taking seriously.
Mistake 3: Poor installation alignment and support
Beyond product selection, even the best materials can fail if installation isn’t precise. Alignment and support errors are surprisingly common, and they’re often invisible to the untrained eye until something goes seriously wrong. Misaligned glass panels or insufficient anchoring are leading causes of railing instability and costly post-installation repairs.
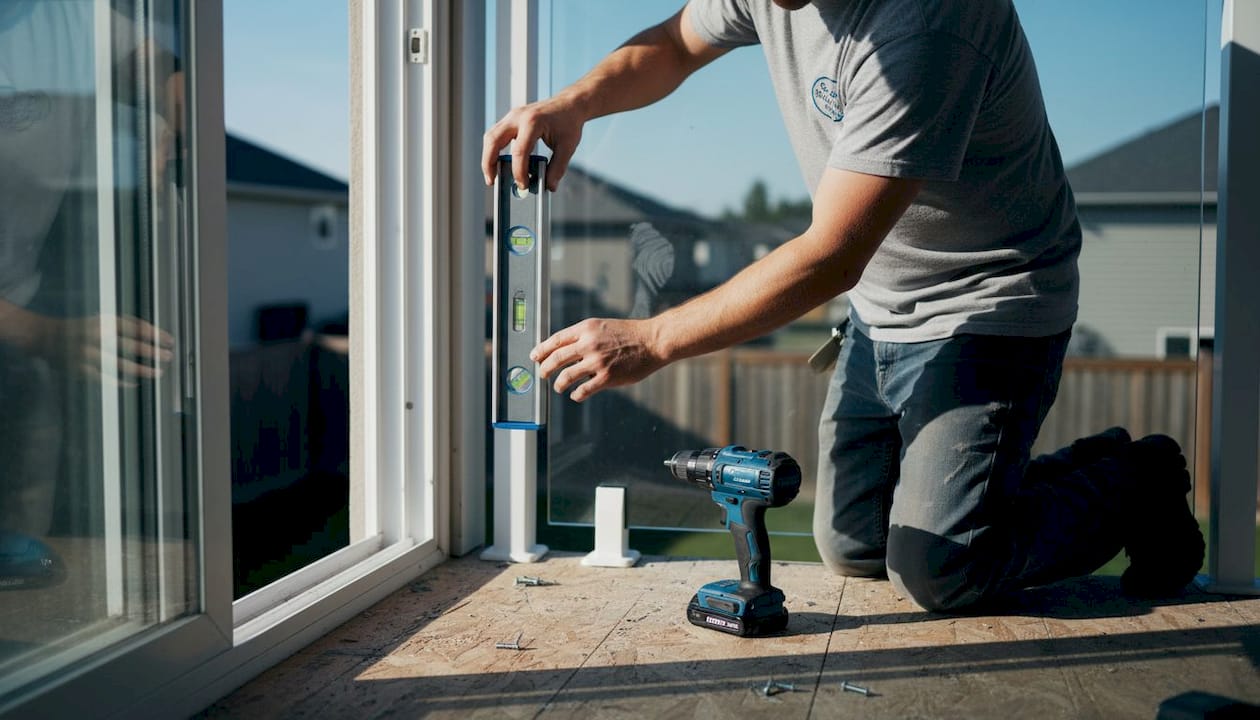
Typical alignment mistakes include setting posts out of plumb (meaning not perfectly vertical), spacing base shoe channels unevenly, and over-tightening or under-tightening glass clamps. Each of these causes visible rippling in the glass line or, worse, stress fractures over time. In regions with strict setback rules like those governed by Utah glass railing code, poor anchoring also creates inspection failures that cost you time and money.
Here are the standard installation tolerances you should stay within:
| Measurement | Acceptable tolerance |
|---|---|
| Post verticality (plumb) | Within 1/8 inch per 3 feet |
| Glass panel gap at base | No more than 4 inches |
| Gap between adjacent panels | No more than 4 inches |
| Top rail level | Within 1/4 inch per 10-foot span |
| Anchor bolt depth | Per manufacturer spec, typically 3.5 inches minimum |
Follow these steps for precise, stable installation:
- Snap a chalk line along the full railing run before drilling any holes so you establish a perfectly straight reference line.
- Confirm substructure integrity first. Any rotted wood, cracked concrete, or corroded steel framing must be repaired before base hardware goes in.
- Pre-drill anchor points at exact spacings according to your system’s engineering specs, not by eye.
- Install base shoe channels or posts, check plumb in two directions using a quality level, and secure anchors fully before inserting glass.
- Insert glass panels with rubber setting blocks at the bottom to distribute load evenly and prevent point stress.
- Tighten clamps and set screws gradually and evenly. Don’t fully torque one side before the other is snug.
- Do a final alignment check of the full run before any cap rail or trim is installed.
“Double-check every anchor point before the glass goes in. Once panels are set and clamps are torqued, correcting alignment problems means starting over. A few extra minutes of verification at the anchor stage saves hours of rework.” — Glass Railing Store installation team
Mistake 4: Neglecting environmental factors and maintenance
Even after a perfect installation, neglecting long-term upkeep or not preparing for your site’s climate can undermine your investment faster than you’d expect. Failure to account for exposure including corrosion, weather, and environmental changes lowers railing performance and appearance over time.
The specific risks vary significantly by region. If you’re in a coastal area like Georgia or South Carolina, saltwater and humid air accelerate corrosion on any hardware that isn’t truly marine-grade stainless steel. Cold climates create freeze-thaw cycles that can work base shoe fasteners loose over multiple winters. High UV environments cause rubber gaskets and seals to dry out and crack within just a few years if they’re not replaced on schedule. Reviewing Georgia weatherproofing requirements is a smart starting point if your project sits in a humid coastal climate.
Common maintenance mistakes that shorten railing life include:
- Ignoring early signs of surface rust on hardware, which spreads rapidly once started
- Using abrasive or acidic cleaners on glass panels, leaving permanent etching
- Applying metal polish directly to glass surfaces, which clouds the glass permanently
- Not replacing worn rubber gaskets in base shoe channels, which allows moisture to pool and freeze
- Skipping annual checks of anchor bolt torque, letting fasteners work loose over time
- Allowing dirt and debris to pack into channel bases, which traps moisture and corrodes from below
A consistent maintenance routine doesn’t have to be complicated. Clean glass with a mild soap and water solution and a soft squeegee. Wipe hardware with a clean cloth and check for early corrosion spots every season. Inspect gaskets and seals annually, and replace them at the first sign of cracking.
Pro Tip: Schedule a full quarterly inspection during the first year after installation, then shift to twice-yearly once you know how your specific environment affects the system. Catching a loose anchor bolt or cracked gasket early costs almost nothing to fix. Waiting until structural failure is expensive and dangerous.
Mistake 5: DIY overreach — When to call an expert
There’s real pride in tackling a project yourself, but understanding your limits prevents disaster and potential legal issues. Not every part of a glass railing project is DIY-friendly, and the consequences of getting critical tasks wrong go well beyond a cosmetic problem.
Certain code-compliance and engineering tasks are best handled by certified professionals, and trying to manage them without the right credentials or tools creates liability you don’t want to carry.
Tasks that are generally best left to certified professionals:
- Custom engineering calculations for large panel spans or high-load applications
- Structural assessments of the substructure the railing will attach to
- Permit application and code interpretation when local rules are complex or ambiguous
- Multi-story installations where a failure could mean a serious fall
- Staircase railing layouts that require precise angle cutting and load calculations
- Final inspections and sign-off processes in jurisdictions that require licensed contractor involvement
Even in regions with accessible standards like Ontario glass railing standards, certain installation phases require verified credentials before a building department will pass an inspection.
The smart approach is a hybrid model. Handle the prep work, measurements, and straightforward flat-run panel installation yourself if you’re comfortable with it. Bring in a certified installer for the structural anchor work, staircase sections, or any configuration that involves custom engineering. This keeps your costs manageable while making sure the safety-critical parts are done right.
Pro Tip: Get at least three quotes from certified installers before making a decision. Ask specifically about code compliance, permit handling, and what their process looks like if the first inspection reveals issues. A professional who can’t answer those questions clearly isn’t the right hire.
Why small mistakes cause big problems in glass railing projects
Here’s something most installation articles won’t tell you directly: glass railing mistakes don’t stay small. They compound. A single panel installed 1/4 inch out of plumb shifts load distribution across the entire run. That stress accelerates gasket wear, loosens anchors, and eventually causes visible movement in the glass. What started as a minor alignment issue becomes a failed inspection, a structural hazard, and a full reinstall.
Homeowners consistently underestimate glass railing complexity compared to wood or aluminum systems. With those materials, a small mistake is often fixable with a saw and a few screws. With glass, common code mistakes often mean the entire panel is non-compliant and must come out. That’s not a minor inconvenience. On a typical residential project, forced removal and reinstallation can run $3,000 to $8,000 depending on scope and local labor rates.
The counterintuitive truth is that investing in professional oversight, proper materials, and a code review upfront is almost always cheaper than fixing problems afterward. A $200 consultation with a certified installer before you order materials can prevent a $5,000 rebuild. A $50 permit fee prevents a stop-work order that leaves your project frozen for months.
Glass railings are worth doing right. They add genuine property value, enhance sightlines, and outlast virtually every other railing material when maintained properly. But they earn all of those benefits only when installed with precision, the right materials, and full code compliance. Cutting corners on any of those three elements eliminates the advantages that made you choose glass in the first place.
Avoid mistakes with expert glass railing solutions
Planning a glass railing project and want to get it right the first time? Start with the right foundation of knowledge and the right products working together.
At Glass Railing Store, we’ve built our entire platform around helping homeowners and contractors avoid exactly the mistakes covered in this article. Our complete building code guide breaks down requirements by state so you know what you need before you order. Our engineering testing resources give you the certified data to back up every glass specification. Every panel we sell is made from tempered safety glass and paired with marine-grade stainless steel hardware designed to perform in real outdoor conditions. Whether you’re tackling a straightforward deck rail or a complex multi-level stair system, our team is available to help you plan, specify, and source everything correctly from the start. Reach out for a personalized quote and let us take the guesswork out of your project.
FAQs
1. What is the required height for residential glass railings?
Residential glass railings are typically required to be at least 36 inches high, though some states require 42 inches. Always check your local code since minimum height requirements vary by jurisdiction.
2. Can I use regular glass for my railing project?
No. Safety and building codes require tempered or laminated safety glass for all railings to prevent injuries. Using the wrong glass type is both a code violation and a serious safety risk.
3. How often should glass railings be inspected?
Glass railings should be inspected at least twice a year and after any severe weather event. Regular inspections help catch loose anchors, worn gaskets, and other issues before they become structural problems.
4. Do I need a permit to install a glass railing?
Most jurisdictions require a building permit for glass railing installations. Permits are required under most glass railing codes, so always confirm with your local authority before construction begins.
5. Is professional installation necessary for glass railings?
For complex, code-driven, or multi-story applications, hiring a certified installer ensures both compliance and safety. Professionals are best equipped for the engineering and structural tasks that carry the most risk if done incorrectly.
Recommended
- Montana Building Code for Glass Railings – The Glass Railing Store
- Oregon Building Code for Glass Railings: Essential Rules for Safety an – The Glass Railing Store
- New Jersey Glass Railing Codes: What You Need to Know Before You Build – The Glass Railing Store
- Glass Railings San Francisco – The Glass Railing Store
- 7 Smart Steps for a Home Safety Checklist Every Buyer Needs | ReVroom