
Glass Railing Square Layout Method: A Complete Guide
The glass railing square layout method is a systematic approach to measuring, marking, and installing glass panels in a grid-aligned formation to produce safe, code-compliant, and visually clean railing systems. Getting this right matters more than most installers expect. A single misaligned bracket or an unmeasured substrate can cause loose rails, failed inspections, and costly rework. This guide walks you through every stage, from first measurements to final panel placement, with reference to residential load standards, bracket spacing requirements, and Glassrailingstore’s product and testing resources.
What Is the Glass Railing Square Layout Method?
The square layout method is the industry’s standard framework for aligning glass panels in a consistent, perpendicular grid across a railing run. The formal term used by building professionals is square layout installation, and it applies to decks, balconies, staircases, and pool fences alike. The method prioritizes two things above all: structural alignment and repeatable spacing. When both are achieved, the result is a railing that passes code inspection and looks intentional from every angle.
The method works because it forces you to establish a fixed reference line before a single bracket goes in. Every panel position, every post location, and every connector placement derives from that line. Skipping this step is the most common reason square layouts end up looking slightly off, even when individual components are installed correctly.
How to Measure and Prepare for a Square Layout Installation
Accurate measurement is the foundation of every successful square layout. Measure the total opening width at multiple points, specifically at the top, middle, and bottom of the opening, then work from the smallest dimension. That smallest number is your controlling measurement. Using the largest dimension instead is a common error that results in panels that simply will not fit.
Establishing Your Reference Points
Start by identifying your fixed structural points: walls, posts, landings, and level changes. Mark a chalk line along the intended railing path and confirm it is level with a spirit level. For stair sections, account for the pitch angle before calculating panel height. A panel sized for a flat deck will be too short or too tall on a staircase unless you adjust for the rake.
Substrate Assessment
Substrate verification is non-negotiable before any hardware goes in. Confirm that concrete or timber framing can structurally support the required loads before setting any hardware. A substrate that looks solid can still fail under dynamic load if it has rot, voids, or inadequate fastener depth. Check for solid blocking behind deck boards, and probe concrete for cracks or spalling near anchor zones.
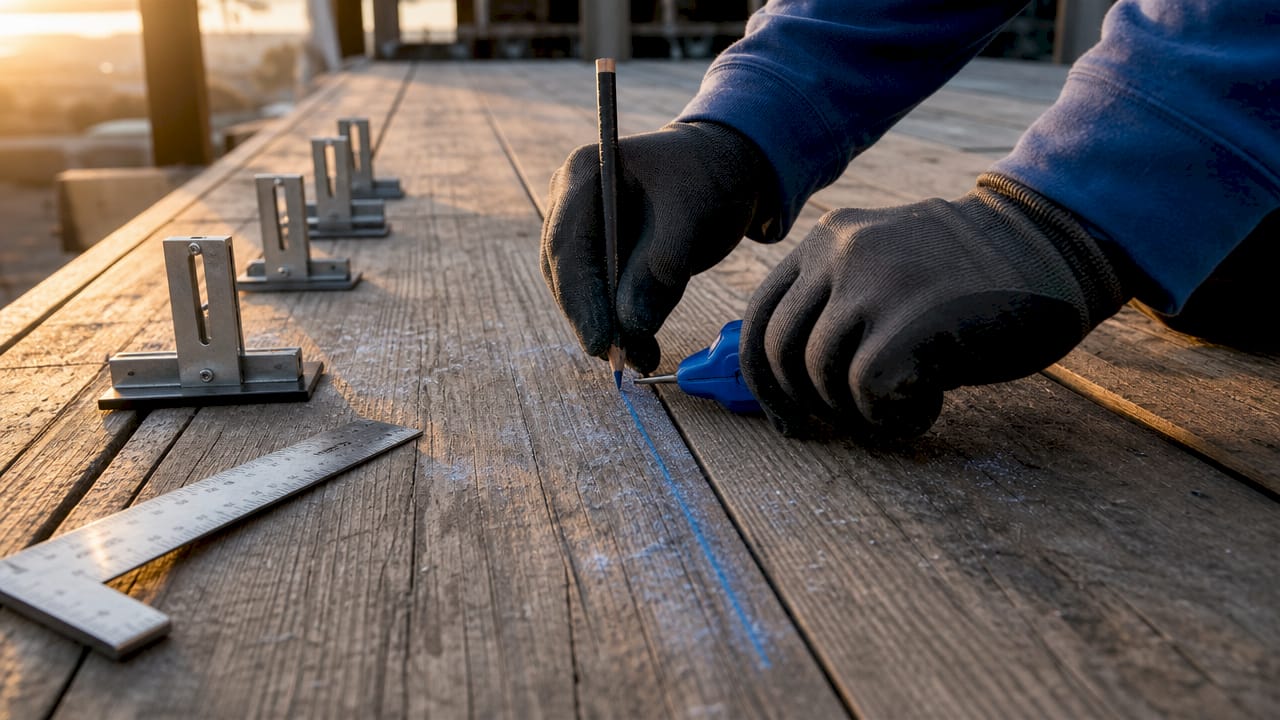
Pro Tip: Mark all bracket positions on the substrate with a pencil before drilling anything. Walk the full run and verify spacing visually. Catching an error at the pencil stage costs nothing. Catching it after drilling costs time and materials.

Tools You Need on Site
Gather these before starting:
- Tape measure and folding rule
- Spirit level and chalk line
- Drill with masonry and wood bits
- Torque wrench for hardware fasteners
- Rubber mallet for panel seating
- Neoprene setting blocks (one pair per bracket position)
What Are the Main Installation Methods for Square Layouts?
Glass railings can be mounted using top, core, fascia, or shoe-mounted systems, and each method affects how precisely you can maintain square alignment across a run. The three most common for square layouts are top-mount bracket, continuous aluminum profile, and concealed channel.
Top-Mount Bracket Systems
Top-mount brackets attach directly to the top surface of a deck or landing. They are the most accessible method for DIY installers because the hardware is visible and adjustable after installation. Bracket spacing for square layouts typically falls in the 600–800mm range between centers. Tighter spacing increases rigidity; wider spacing reduces hardware visibility but demands a thicker glass panel.
Continuous Profile and Concealed Channel Systems
Continuous aluminum profiles run the full length of the railing base and distribute load across the entire substrate rather than at discrete points. Concealed channel systems embed the glass into a floor-level track, producing the cleanest visual result. Both methods require a flatter, more uniform substrate than bracket systems. Any substrate variation greater than a few millimeters will cause the profile to rock, which breaks the square alignment.
Panel Spacing and Setting Blocks
Neoprene rubber setting blocks sit at the base of each bracket so the glass panel rests on rubber, not bare metal. This protects the glass edge from chipping and distributes the panel’s weight evenly. Panel-to-panel gaps should fall between 3/4 inch and 2 inches per standard spacing requirements. Never close this gap to zero. Glass expands with heat, and a zero-gap installation will stress the panels in summer.
Pro Tip: Use a spacer block cut to your target gap width when setting panels. Slide it between each panel as you work down the run. This keeps spacing consistent without measuring every gap individually.
| Installation type | Best substrate | Typical bracket spacing | Visual result |
|---|---|---|---|
| Top-mount bracket | Timber or concrete | 600–800mm | Hardware visible |
| Continuous profile | Flat concrete or steel | Full-length run | Minimal hardware |
| Concealed channel | Flat concrete | Full-length run | No visible hardware |
What Are the Code Compliance Requirements for Square Layout Railings?
Building codes set the minimum performance floor for every glass railing installation. Residential glass railings must withstand a horizontal line load of 0.74 kN/m at the top of the rail. That load requirement exists because a railing must stop a person from falling, not just stand upright under its own weight. Square layouts that use undersized glass or incorrectly spaced brackets will fail this test.
“Panel spacing should never exceed 4 inches to comply with code and safety standards.” — Glassrailingstore building codes guide
The 4-inch rule exists to prevent finger and limb entrapment, particularly for children. A gap wider than 4 inches between panels or between a panel and a post creates a safety hazard that most residential building inspectors will flag immediately.
Common code violations in square layout installations include:
- Brackets fastened into blocking that was not verified for load capacity
- Panel gaps that exceed 4 inches at any point along the run
- Missing or incorrect tempered glass certification markings
- Handrail height below the minimum required by local code (typically 36 inches for residential, 42 inches for commercial)
- Substrate anchors that do not penetrate into structural framing
State codes add requirements on top of the national baseline. Virginia’s glass railing code and Utah’s building code for glass railings both include specific provisions for tempered glass thickness and post embedment depth. Always check your local jurisdiction before finalizing a design.
Design Tips for Clean, Modern Square Glass Railing Layouts
The best square layout glass railing designs share one quality: every component looks like it belongs. Achieving that requires more than correct installation. It requires deliberate choices about handrail profile, connector type, and gap consistency.
Square profile handrails produce the cleanest visual result for square layout systems. Their flat faces align naturally with the vertical edges of glass panels, creating a continuous geometric line from post to post. Round or oval handrails introduce a visual contrast that can look unintentional against square-cut glass.
Clamped glass systems use stainless steel clamps on the base rail and handrail to grip panels firmly while keeping hardware minimal. For square layouts, square caprail straight connectors join handrail sections end-to-end without visible seams. At corners, square caprail corner connectors maintain the same profile geometry through the turn.
Pro Tip: Before ordering panels, photograph your installation site from the angle a visitor would see it most. Look at the background. A railing with consistent gaps and aligned handrail joints will frame that view cleanly. One misaligned panel will draw the eye every time.
Additional best practices for a polished result:
- Use a single glass thickness throughout the run. Mixing 3/8-inch and 1/2-inch panels creates visible height differences at the handrail.
- Confirm all bracket positions are plumb with a spirit level before tightening any fasteners.
- Apply a consistent torque to all clamp hardware. Over-tightening stresses glass edges; under-tightening allows movement.
- Review common installation mistakes before starting, not after something goes wrong.
Key Takeaways
The glass railing square layout method succeeds when measurement accuracy, substrate integrity, correct bracket spacing, and code-compliant panel gaps are all addressed before the first panel goes in.
| Point | Details |
|---|---|
| Measure from the smallest dimension | Take width at top, middle, and bottom; use the smallest number to size panels. |
| Verify substrate before drilling | Confirm framing can support 0.74 kN/m horizontal load to avoid loose rails and code violations. |
| Space brackets at 600–800mm | This range balances rigidity and hardware visibility for square layout systems. |
| Keep panel gaps under 4 inches | Gaps wider than 4 inches fail building code and create entrapment hazards. |
| Use neoprene setting blocks | Rubber blocks protect glass edges and distribute panel weight evenly at each bracket. |
Why Substrate Quality Is the Variable Most Installers Underestimate
I have reviewed dozens of glass railing installations that looked correct on paper but failed inspection or developed movement within a year. In nearly every case, the root cause was not the glass, the brackets, or the handrail. It was the substrate.
Timber decks built before current framing codes often lack the blocking depth that modern glass railing hardware requires. Concrete slabs near pool decks can have surface deterioration that looks cosmetically minor but provides almost no anchor strength. Installers who skip the substrate verification step are essentially building on an assumption. That assumption holds until it does not.
The square layout method is only as good as what it is attached to. A perfectly measured, perfectly spaced panel run will still fail if the anchors pull out under load. My strongest advice for both DIY installers and professionals is to treat substrate assessment as a separate phase, not a checkbox. Probe, test, and document before you order a single panel. If the substrate is marginal, address it first. The cost of adding blocking or patching concrete is a fraction of the cost of reinstalling a railing after a failed inspection.
The other pattern I see repeatedly is measurement errors on stair sections. Flat runs are forgiving. Stairs are not. The rake angle changes every panel dimension, and installers who measure only the horizontal run end up with panels that are visually inconsistent. Measure the actual panel height along the rake, not the vertical height from the tread. That single habit eliminates most stair-section rework.
— Fuanne
Professional-Grade Components for Your Next Glass Railing Project
Glassrailingstore carries the full range of components a square layout installation requires, from tempered glass panels to connectors and engineering testing services.
For projects where code compliance documentation is required, Glassrailingstore’s glass railing engineering testing service provides load verification that satisfies residential and commercial inspection requirements. The product catalog includes 46-inch tempered glass panels sized for standard deck and balcony applications, along with the full range of square caprail connectors and stainless steel hardware. Free shipping applies to orders over $3,000, and the Glassrailingstore team offers planning support and quotes for both DIY and contractor projects.
FAQs
1. What is the glass railing square layout method?
The glass railing square layout method is a systematic installation approach that aligns glass panels in a perpendicular grid using fixed reference lines, consistent bracket spacing, and code-compliant panel gaps. It applies to decks, balconies, staircases, and pool fences.
2. How far apart should brackets be spaced in a square layout?
Standard bracket spacing for square layout glass railings falls between 600mm and 800mm on center. Tighter spacing increases structural rigidity; wider spacing requires thicker glass panels to maintain load compliance.
3. What is the maximum gap allowed between glass panels?
Building code requires that panel gaps never exceed 4 inches to prevent entrapment hazards and meet safety standards. Most square layout installations target a gap of 3/4 inch to 2 inches for both compliance and aesthetics.
4. Why do glass railings need neoprene setting blocks?
Neoprene setting blocks sit between the glass panel and the bracket base to protect glass edges from chipping and distribute the panel’s weight evenly. Glass resting directly on metal is vulnerable to edge stress fractures under load or thermal expansion.
5. What load must a residential glass railing withstand?
Residential glass railings must resist a minimum horizontal line load of 0.74 kN/m at the top of the rail. This requirement reflects the force a person exerts when leaning or falling against the railing, and it is the baseline standard for code compliance across most U.S. jurisdictions.