

Glass Railing Shimming Techniques for Installers & DIYers
The correct way to shim a glass railing base shoe is to level and support every anchor point with noncompressible shims sized for a slight friction fit, keeping the shoe very close to level before final torque. Miss even one bolt location and the shoe twists, the glass tilts, and you’ve created a point load on tempered glass that wasn’t designed to take it. The quick workflow: assess the substrate, select shim material, place shims at every bolt gap, stack thicker shims below thinner ones, torque to spec, then recheck plumb.
Key alignment tolerances to ensure before fastening:
- Maximum angular variation for the base shoe is 0.4° (side-to-side and front-to-back)
- Plumb tolerance within ±1/8" (3.2 mm) at 42" extended height
- Small angular deviations translate to visible lean at the top edge over typical glass heights
Table of Contents
- Why uneven surfaces are a real structural problem for glass railings
- What substrate irregularities you’re actually dealing with
- How to measure and map the mounting surface before you start
- Shimming materials and methods: what works and where
- Step-by-step per-anchor shimming and leveling procedure
- Shim fit, stacking rules, and tolerances you need to know
- Essential tools and materials for a reliable shimming job
- Building-code and safety considerations for U.S. installations
- Common shimming mistakes and how to fix them on site
- Rough time and cost estimate for a typical residential run
- Key Takeaways
- The part most installers underestimate
- Glassrailingstore has the shim kits and hardware to get this right
- Useful sources for deeper reading and verification
A base shoe that bridges a gap without a shim underneath it doesn’t just look bad. It bends. When you torque the anchor bolts, the unsupported section deflects downward, twisting the shoe out of plumb and concentrating stress at the bolt edges. Tempered glass panels follow the base shoe exactly, so a twisted shoe means a twisted panel — and tempered glass under sustained bending stress can fail without warning.
Small angular errors amplify fast. A 0.4° deviation at the base shoe translates to 5/16" (8 mm) of displacement at 42" of height. That’s the difference between a panel that looks plumb and one that visibly leans. Beyond aesthetics, a leaning panel compresses gaskets unevenly, accelerates hardware wear, and can compromise the system’s ability to resist the lateral loads guardrails are required to handle.
Common consequences of skipping or misplacing shims:
- Point loads on the glass edge where the shoe contacts without full support
- Gasket compression errors that allow water infiltration in exterior systems
- Premature wear on set screws and anchor hardware from constant micro-movement
- System twist that compounds across a multi-panel run
Pro Tip: Before you place a single shim, check the base shoe behavior on a dry run — hand-tight bolts only. You’ll see exactly where the gaps are and how much the shoe wants to rock.
What Substrate Irregularities Are You Actually Dealing With?
Most mounting surfaces fall into one of four categories, and each one demands a slightly different approach.
- Continuous slope along the run. The deck or slab pitches in one direction. Every anchor needs a shim, but the thickness increases progressively from the high end to the low end. This is the most predictable scenario and the easiest to correct.
- Single low or high spots at bolt locations. A warped board, a proud fastener head, or a concrete pour that settled unevenly creates an isolated gap at one or two anchors. The rest of the shoe sits flat. Per-anchor shimming handles this without touching the rest of the run.
- Warped or twisted rim joists. The joist has a crown or a twist along its length, so the mounting surface isn’t a consistent plane. You’ll need to map every anchor point individually — end-to-end leveling alone won’t catch the variation in between.
- Concave or convex slabs. A concave slab creates a high-centering risk: the shoe contacts only at the center while both ends float. A convex slab does the opposite. Both require shims placed at the outer edges of the shoe, not the center.
Warped rim joists and concave slabs usually require full re-leveling of the base shoe from scratch. A simple slope or isolated low spot can be corrected with per-anchor shimming after the shoe is roughly positioned.
How to Measure and Map the Mounting Surface Before You Start
Guessing shim thickness wastes time and creates callbacks. A five-minute measurement pass before you drill anything saves an hour of re-shimming later.
- Clean the surface. Sweep or blow off debris, then wipe anchor locations with a rag. Grit under a shim creates false readings.
- Mark the bolt pattern. Snap a chalk line along the shoe centerline and mark every anchor location. Typical spacing is 12" on center for most base shoe systems.
- Take end-to-end level readings. Lay a straightedge or digital level (the PAL tool or equivalent) along the full run. Record the high end and low end.
- Measure at every planned bolt location. Use feeler gauges or a dial indicator to measure the gap between the straightedge and the substrate at each anchor mark. Record each measurement.
- Check front-to-back plumb. Orient the level perpendicular to the shoe’s length at three or four points. Note any forward or backward lean.
Tools you need for this step: digital level (PAL or equivalent), 4’ straightedge, tape measure, feeler gauges, chalk line, marker.
Sample measurement table — 10-foot run, 12" anchor spacing:
| Anchor # | Gap (in) | Shim Thickness Needed | Angular Offset |
|---|---|---|---|
| 1 (high end) | — | None | — |
| 2 | — | 1/64" strip | — |
| 3 | — | 1/32" strip | — |
| 4 | — | 1/16" horseshoe | — |
| 5 | — | 3/32" (stack) | ~0.4° |
| 6 | — | 1/8" horseshoe | ~0.5° — re-level |
At 0.5° you’re past the 0.4° acceptance limit, which means you need to re-level the shoe starting at that anchor rather than just shimming through it.
Shimming Materials and Methods: What Works and Where
Not all shims are equal, and the wrong material in the wrong environment will fail quietly over years before you notice.
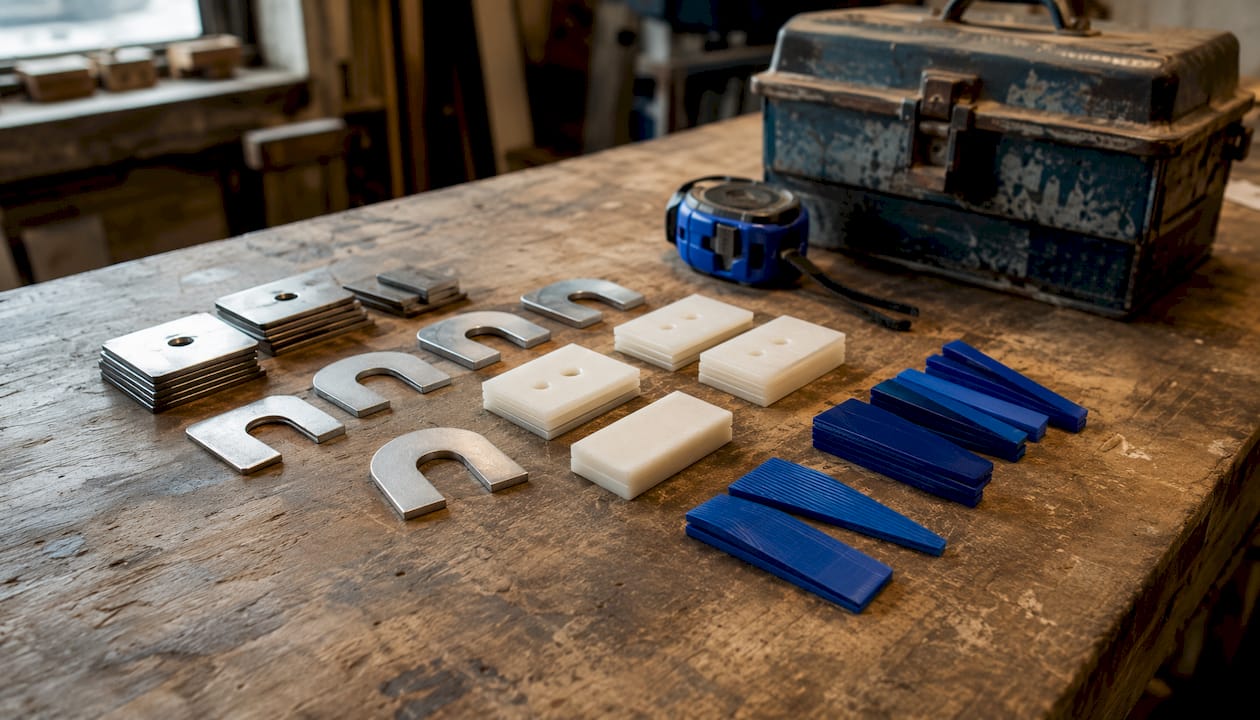
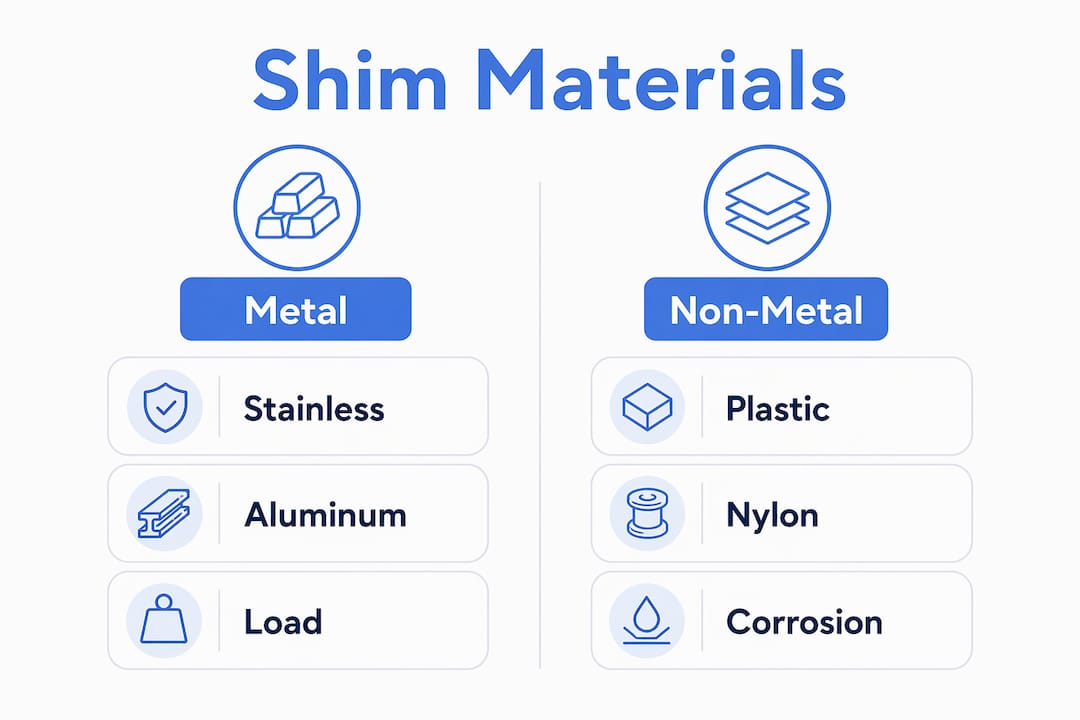
Stainless steel shim plates handle the heaviest loads and resist corrosion in coastal or wet environments. They’re the right call for concrete or steel substrates where compressive loads are high. The tradeoff is cost and the limited range of available thicknesses.
Aluminum horseshoe shims and shim strips are the workhorses of glass railing leveling. Horseshoe shims (available in 1/16", 1/8", and 1/4" thicknesses) handle coarse corrections; shim strips (1/64" to 1/16") handle fine vertical plumb adjustment. They’re easy to cut, widely available, and work well in most residential applications. Avoid them in marine environments where galvanic corrosion between aluminum and stainless steel hardware is a real risk.
Plastic/HDPE packers are noncompressible, moisture resistant, and UV stable — a solid choice where corrosion or rot is a concern. They don’t carry the same compressive load as metal, so they’re better suited to lighter panel systems and interior applications.
Tapered nylon Taper-Loc style shims serve a different function. They don’t level the base shoe — they lock the glass panel inside it. These tapers expand when compressed with the TLK12 installation tool, mechanically gripping the glass and base shoe simultaneously. They’re self-centering and self-plumbing, which means a correctly leveled base shoe often eliminates the need for wood wedges entirely.
| Shim Type | Best Use | Load Capacity | Corrosion Resistance | Precision |
|---|---|---|---|---|
| Stainless steel plates | Heavy loads, coastal/wet | High | Excellent | Moderate |
| Aluminum horseshoe/strips | General leveling, residential | Medium | Good (avoid marine) | High |
| Plastic/HDPE packers | Wet/interior, light loads | Low-Medium | Excellent | Medium |
| Tapered nylon (Taper-Loc) | Glass locking in base shoe | N/A (locking) | Good | Self-adjusting |
Setting blocks (L-shaped or flat) support the glass panel’s bottom edge inside the shoe pocket and are spaced roughly 12"–14" on center per manufacturer guidance. They’re separate from leveling shims and should never be confused with them.
Step-by-Step Per-Anchor Shimming and Leveling Procedure
Follow this sequence and you won’t need to re-do it.
- Start at the highest elevation. Position the first base shoe section at the high end of the run. Hand-tighten anchor bolts only — do not torque yet.
- Level end-to-end. Place the digital level along the shoe’s length. Identify the low end.
- Shim the low end first. Slide horseshoe shims or shim strips under the low end until the shoe reads level. Keep shims close to the outer edges of the shoe bottom — the concave base shoe design means center contact causes high-centering and twist.
- Check plumb front-to-back. Orient the level perpendicular to the shoe. Adjust with shim strips until the shoe is within ±1/8" (3.2 mm) at 42" extended height.
- Place shims at every bolt location. Walk every anchor point and insert shims wherever a gap exists between the shoe and the substrate. Both sides of the shoe must contact the mounting surface or shims before you torque — any unsupported span will twist the shoe when bolts are tightened.
- Torque anchor bolts to manufacturer spec. Use a calibrated torque wrench. Tighten in sequence (not all at one end first) to distribute load evenly.
- Recheck level and plumb after torque. Torquing can shift the shoe slightly. Confirm the shoe is still within 0.4° and ±1/8" at 42".
- Install setting blocks. Place L-setting blocks in the shoe pocket at the correct spacing before lowering glass panels.
- Insert Taper-Loc tapers. Partially insert one taper set at each end of the panel, squeeze lightly, and push down. Use the TLK12 tool to drive tapers to final depth and lock the glass.
- Lock both ends first, then fill in between. Check alignment before locking intermediate tapers.
Checklist before torquing:
- Shoe pocket is clean and free of debris
- Shims are placed at every bolt location, not just the ends
- Shims contact the outer bearing edges of the shoe bottom
- Shim stacks kept at a reasonable height for stability
- Level reads within 0.4° along the full length
Shim Fit, Stacking Rules, and Tolerances You Need to Know
The fit test is simple: a correctly sized shim slides in with slight resistance. If it drops in freely, it’s undersized and will allow movement. If you need a hammer to drive it, you’re overstressing the shoe or the substrate.
Stacking rules that matter in practice:
- Thicker shim at the bottom, thinner on top. This creates a stable base and lets you fine-tune with the thinnest piece at the top of the stack.
- Keep stacks to three pieces or fewer. Taller stacks are less stable under lateral load and harder to keep aligned during torque.
- Use the same alloy throughout a stack. Mixing aluminum and stainless steel in an exterior stack creates a galvanic cell. Apply a thin coat of anti-seize between shims in wet or coastal environments.
- Never use compressible materials. Wood, rubber, and foam shims compress under load and allow the shoe to shift over time.
Pro Tip: To convert angular variation to linear offset at your actual glass height, multiply the height in inches by tan(angle in degrees). At 42", tan(0.4°) × 42" ≈ 5/16". If your glass is taller, the offset grows proportionally — for example, a 48" panel at 0.4° shows even more lean at the top edge.
Essential Tools and Materials for a Reliable Shimming Job
Arriving on site without the right tools means improvising, and improvised shimming is where callbacks come from. Build this kit before you leave the shop.
Measurement and leveling:
- Digital level (PAL tool or equivalent) for both horizontal and plumb readings
- 4’ straightedge for end-to-end surface mapping
- Feeler gauges for measuring gaps at anchor locations
- Laser level with target for leveling across multiple base shoe sections
- Tape measure and chalk line
Installation tools:
- Calibrated torque wrench (set to manufacturer-specified value)
- Dead-blow hammer for seating shims without damaging the shoe
- TLK12 installation/removal tool for Taper-Loc systems
- Marker or paint pen for labeling shim stacks
Shim kit components:
- Aluminum horseshoe shims (1/16", 1/8", 1/4" thicknesses)
- Aluminum shim strips (1/64", 1/32", 1/16")
- Tapered nylon taper sets (for glass locking)
- L-setting blocks and flat setting blocks
- Stainless steel shim plates for heavy corrections or coastal environments
- Anti-seize compound for exterior stacks
Material selection by environment:
- Exterior residential: aluminum horseshoe shims and strips work well in most climates
- Coastal or high-moisture: marine-grade stainless steel plates; avoid aluminum-stainless mixing
- Interior or light-load: HDPE/plastic packers are a practical, corrosion-free option
Noncompressible shims secured before fastener tightening are the baseline requirement for any permanent support application.
Building Code and Safety Considerations for U.S. Installations
Glass railings in the U.S. function as guardrails, which means they’re subject to load requirements under the International Building Code (IBC) and International Residential Code (IRC), administered locally by jurisdictions that adopt and amend those standards. The IBC and IRC require guardrails to resist a 200-pound concentrated load applied in any direction at the top rail, among other criteria. Shimming directly affects whether the base shoe can transfer those loads to the substrate without deflecting.
Tolerances to track and document:
- 0.4° maximum angular variation for the base shoe (side-to-side and front-to-back)
- ±1/8" (3.2 mm) plumb at 42" extended height
- Glass thickness per code (typically 3/8" or 1/2" tempered for guardrail applications — confirm with your local AHJ)
Safety checklist during shimming and glass installation:
- Use a panel lift or two-person carry for glass panels over 50 lbs — never drag tempered glass across the shoe pocket
- Wear cut-resistant gloves and safety glasses whenever handling tempered glass
- Never hammer directly on glass or gaskets — use a dead-blow hammer on the installation tool only
- Lock temporary taper sets at both ends of each panel before releasing any support
- Inspect shim stacks visually before torquing — a displaced shim can cause sudden shoe movement
For inspection and long-term maintenance, document the shim materials and stack heights at each anchor location on the as-built drawing. Schedule a visual check after the first full season (freeze-thaw cycles can shift substrates) and after any significant weather event. Check for Building Code and Safety Considerations for U.S. Installations requirements in your jurisdiction before finalizing the installation.
Common Shimming Mistakes and How to Fix Them on Site
Most shimming failures trace back to a handful of repeatable errors.
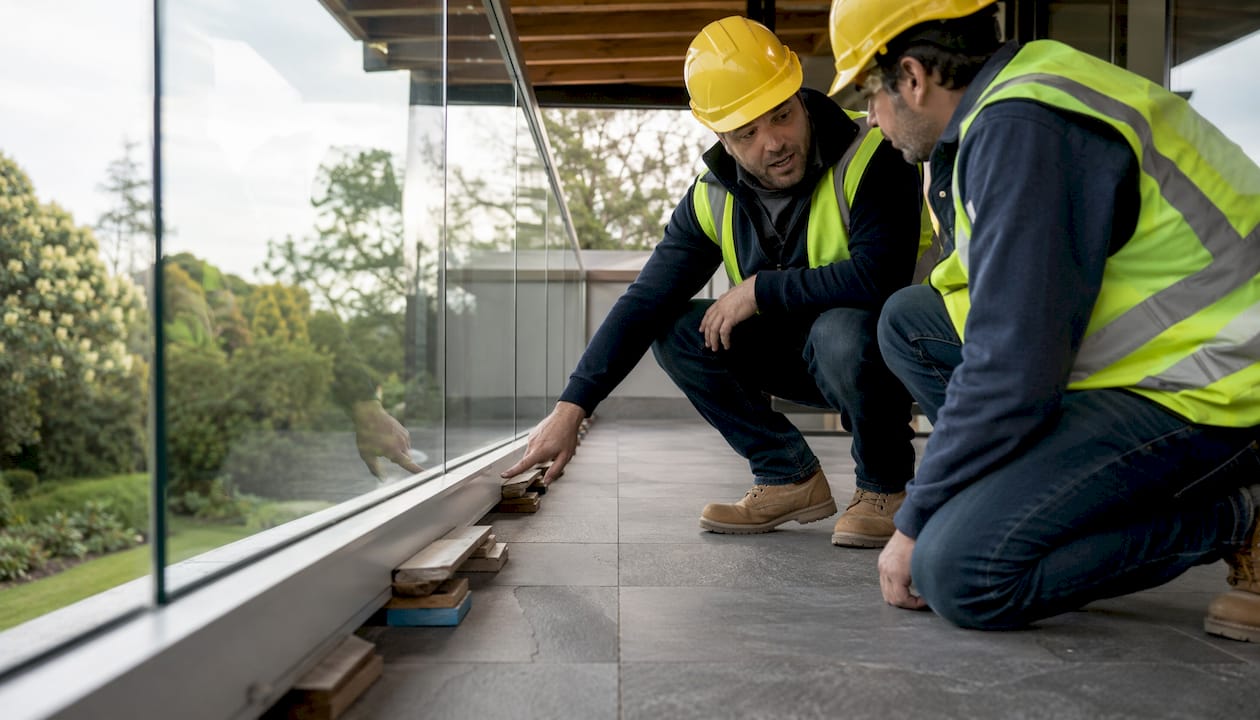
Missing shims at intermediate bolt locations. Installers often shim the ends and assume the middle will be fine. It won’t. Torquing an unsupported mid-span bolt pulls the shoe down and twists it. Fix: loosen all bolts, slide feeler gauges along the full length, and insert shims wherever a gap exists before re-torquing.
Tall, unstable shim stacks. A four- or five-piece stack under a single anchor is a wobble point. The stack shifts during torque and the shoe ends up out of plumb. Replace tall stacks with a single machined spacer or a thicker horseshoe shim. One piece is always more stable than five.
Mixing alloys in exterior installations. Aluminum shims under stainless steel bolts in a wet environment will corrode at the contact point over a few seasons. Swap to stainless shim plates or use anti-seize and inspect annually.
Over-tightening before shims are fully seated. Driving anchor bolts to final torque before confirming shim contact at every location locks in whatever twist exists at that moment. Always hand-tighten first, verify shim contact, then torque in sequence.
High-centering on a concave shoe bottom. If shims are placed at the center of the shoe rather than near the outer edges, the shoe rocks on the shim and both outer edges float. The shoe appears level but twists under load. Move shims to the outer bearing edges.
When you encounter a substrate that’s too far out of plane for shims alone — more than 1/4" variation across a single shoe section, or a structurally compromised rim joist — shimming is the wrong tool. That’s a substrate repair job: sister the joist, grout the slab, or use a machined standoff spacer. See structure reinforcement guidance for when remediation is the right call. For a broader look at what goes wrong during frameless installs, common DIY installation errors covers the full picture.
Rough Time and Cost Estimate for a Typical Residential Run
For a solo installer working a standard 10-foot residential run with six to eight anchor points on a moderately uneven surface:
- Surface measurement and mapping: 20–30 minutes
- Shimming and leveling the base shoe: 30–60 minutes depending on substrate condition
- Glass panel installation with Taper-Loc system: 30–45 minutes for two panels
- Total shimming and leveling time per 10-foot run: roughly 1–1.5 hours for an experienced installer; 2–3 hours for a first-time DIYer
Material costs vary by shim type and environment:
- Aluminum horseshoe shim assortment (covers a typical 10-foot run): $15–$35
- Aluminum shim strip pack: $10–$25
- Stainless steel shim plates (coastal/heavy-duty): $30–$80 per pack
- Tapered nylon taper sets: typically included with the base shoe system or sold per panel
Factors that push cost and time up: poor substrate condition requiring multiple re-leveling passes, heavy panels requiring a two-person crew, coastal environments requiring marine-grade stainless throughout, and laser leveling equipment rental if you don’t own a PAL tool. For budgeting context, common glass railing budgeting mistakes covers the line items installers most often underestimate.
Key Takeaways
Correct glass railing shimming requires noncompressible shims at every anchor point, a base shoe within 0.4° of level, and a verified plumb of ±1/8" at 42" before any panel goes in.
| Point | Details |
|---|---|
| Shim every bolt location | Unsupported gaps twist the base shoe under torque — no exceptions, even if the gap looks small. |
| Hold the 0.4° tolerance | Angular variation beyond 0.4° equals more than 5/16" of lean at 42" — past the acceptance limit. |
| Stack thicker below, thinner on top | Stable stacks use the thickest piece at the base; keep total stack count to three or fewer pieces. |
| Match alloys in exterior installs | Mixing aluminum and stainless in wet conditions causes galvanic corrosion — use anti-seize or match materials. |
| Glassrailingstore shim kits | Glassrailingstore supplies horseshoe shims, shim strips, setting blocks, and compatible base shoe hardware for the full leveling workflow. |
The Part Most Installers Underestimate
The shimming step gets treated as a five-minute afterthought on most residential jobs. It shouldn’t be. The base shoe is the only thing standing between a level, code-compliant railing and a glass panel that’s slowly working itself loose under seasonal movement and lateral load.
The detail that saves the most callbacks isn’t the shim material or even the tolerance number. It’s documentation. Mark every shim stack with a paint pen before the glass goes in: the anchor number, the total stack thickness, and the material. Take a photo. That record is worth its weight when a homeowner calls two years later because a panel looks slightly off after a hard winter. You’ll know exactly which anchor to check and what was there originally.
The other thing worth saying plainly: when a substrate is genuinely too far out of plane for shimming to fix, shimming it anyway is a liability. A 3/8" gap under a single anchor on a 4" base shoe is not a shimming problem — it’s a substrate problem. Grout it, sister the joist, or use a machined standoff. Shimming past the system’s design range doesn’t make the railing safer; it just hides the problem until the next inspection.
For safe glass handling during installation, the professional glazing safety protocols guide covers panel lifting, temporary support, and PPE in detail worth reviewing before a heavy-panel job.
Glassrailingstore Has the Shim Kits and Hardware to Get This Right
Skip the hardware store guessing game. Glassrailingstore stocks the specific shim components that match the tolerances and procedures in this guide: aluminum horseshoe shims for coarse leveling, shim strips for fine plumb adjustment, L-setting blocks for proper glass support inside the shoe pocket, and tapered nylon sets for locking panels without wood wedges.

Every shim kit is matched to compatible base shoe hardware, so you’re not mixing materials or hoping dimensions line up. The 46" tempered glass panels are cut to work with standard base shoe pocket dimensions, and the full hardware lineup includes connectors, caprail, and setting blocks sized for the same system. If you need project-specific torque values, anchor spacing, or shim set counts for your glass width, Glassrailingstore’s technical support team can walk you through it. Get a quote or browse the full hardware catalog at glassrailingstore.com.
Useful Sources for Deeper Reading and Verification
These are the primary documents behind the tolerances, procedures, and material recommendations in this guide.
- CRL TAPER-LOC Installation Instructions — Contains the 0.4° angular tolerance, ±1/8" plumb at 42" spec, shim thickness selection chart, PAL tool usage, and step-by-step taper installation sequence. The primary reference for any Taper-Loc base shoe system.
- GRS Dry Glaze Taper-Loc System Tech Doc — Covers concave base shoe geometry, outer-edge shim placement, and the 5/16" offset calculation at 42". Use this alongside the CRL instructions for system-specific details.
- ACHIEVE Frameless Glass Railing Instructions (FHC) — Provides setting block spacing (12"–14" on center), shim set counts per glass lite width, and front-to-back leveling sequence. Useful for frameless systems that don’t use Taper-Loc.
- Industrial Shim Guide (AIMS) — Covers shim material selection, stacking best practices, galvanic corrosion avoidance, and the fit-resistance rule. Not glass-railing specific, but the material science applies directly.
- ICC (International Code Council) — Source for IBC and IRC guardrail load requirements. Confirm which code edition your local jurisdiction has adopted before finalizing any installation.
Recommended
- Working with Uneven Surfaces: Tips for Glass Railing Installation – The Glass Railing Store
- Glass Railing Square Layout Method: A Complete Guide – The Glass Railing Store
- DIY Frameless Glass Railing: Spigot Layout Guide – The Glass Railing Store
- DIY Glass Railing Installation: Complete Guide for Homeowners 2026 – The Glass Railing Store