

Handrail Integration Guide: U.S. Codes and Installation
A compliant, well-integrated handrail must meet IRC, IBC, or ADA/U.S. Access Board height rules within the range required by code above the stair nosing, run continuously where codes require, and anchor to structural backing or rated hardware. Get those three things right, and you’ve covered the core of what inspectors check and what keeps people safe.
TL;DR — do these before anything else:
- Set handrail height according to code requirements above the stair nosing, measuring vertically from the nosing along the pitch line
- Make rails continuous on both sides for commercial/public stairs under IBC and ADA
- Anchor brackets to studs or a solid wood backer; use structural toggles rated for at least 200 lb shear when no stud is available
- Space support brackets no more than 48" apart (the industry 4-foot rule)
- After installation: confirm graspability, check 1.5" wall clearance, and test for deflection by pushing and pulling the rail firmly
Table of Contents
- What a handrail is, and what this guide covers
- U.S. codes that govern handrail integration
- Exact dimensions and graspability rules you need on site
- Rules for continuous handrails and required extensions
- Choosing materials and design tradeoffs for handrail integration
- How to lay out, join, and fasten handrails correctly
- Common installation mistakes and how to catch them before inspection
- Fabrication-ready checklist and drawing items for pros
- How to maintain handrails and keep them safe over time
- Where to read the codes and verify local requirements
- Key Takeaways
- What experienced installers know that the code books don’t say
- Glassrailingstore makes handrail integration straightforward
- Authoritative sources and further reading
What a Handrail Is, and What This Guide Covers
A handrail is the graspable element you hold for balance and support while using a stair or ramp. It is not the same as a guardrail. A guardrail is a fall-protection barrier at an open edge, like the side of a deck or a mezzanine. Confusing the two leads directly to noncompliant designs, because each component has different height requirements, structural load expectations, and code sections.
Three standards govern handrail integration in the U.S.:
- IRC (International Residential Code): applies to one- and two-family dwellings and townhouses
- IBC (International Building Code): applies to commercial, multi-family, and most non-residential buildings
- ADA Standards for Accessible Design (U.S. Access Board): applies to public accommodations and commercial facilities; does not apply to private single-family homes
This guide covers integration essentials: code requirements, dimensions, installation technique, material tradeoffs, and fabrication detailing for both residential and commercial projects in the United States. It does not cover state-specific exemptions or full structural engineering calculations, both of which require a licensed professional for your jurisdiction.
U.S. Codes That Govern Handrail Integration
Getting the right code on the table first saves you from redesigning later. The three codes below each address a different project type, and their requirements overlap in some areas while diverging sharply in others.
| Code | Applies to | Height | Continuity | Key extras |
|---|---|---|---|---|
| IRC | Residential (1–2 family, townhouses) | 34"–38" above nosing | One side required on stairs with four or more risers | Graspable profile; returns at walls |
| IBC | Commercial, multi-family, institutional | 34"–38" above nosing | Both sides on stairs of sufficient width | Load resistance; sphere rule for infill |
| ADA (U.S. Access Board) | Public/commercial accessible routes | 34"–38" above nosing, measured vertically on stairs and ramps | Continuous on both sides | Graspability (Type I or II); extensions at top and bottom; no sharp projections |
A few points worth calling out:
- The ADA requires handrails on both sides of stairs in public and commercial spaces, with no interruptions at landings on a continuous flight
- IBC commercial stairs 44" or wider require handrails on both sides; stairs under 44" wide require at least one
- The 4-inch sphere rule (no infill gap that allows a 4" sphere to pass) applies to guardrail infill under IBC, not directly to the handrail itself, but it affects how you detail glass panels below a caprail
- Local municipal amendments frequently modify these defaults; always confirm with your local Building Department before finalizing drawings
For a deeper look at how these rules apply to glass railing projects specifically, Glassrailingstore’s railing code compliance guide walks through the most common inspection issues.
Exact Dimensions and Graspability Rules You Need on Site
Height is the measurement inspectors check first, and it trips up more installers than any other dimension. The measurement should comply with code as measured vertically from the stair nosing. On a ramp, measure from the ramp surface. On a landing, the handrail height is typically measured from the landing floor level.
How to measure correctly:
- Measure vertically from the leading edge of the tread nosing to the top of the handrail
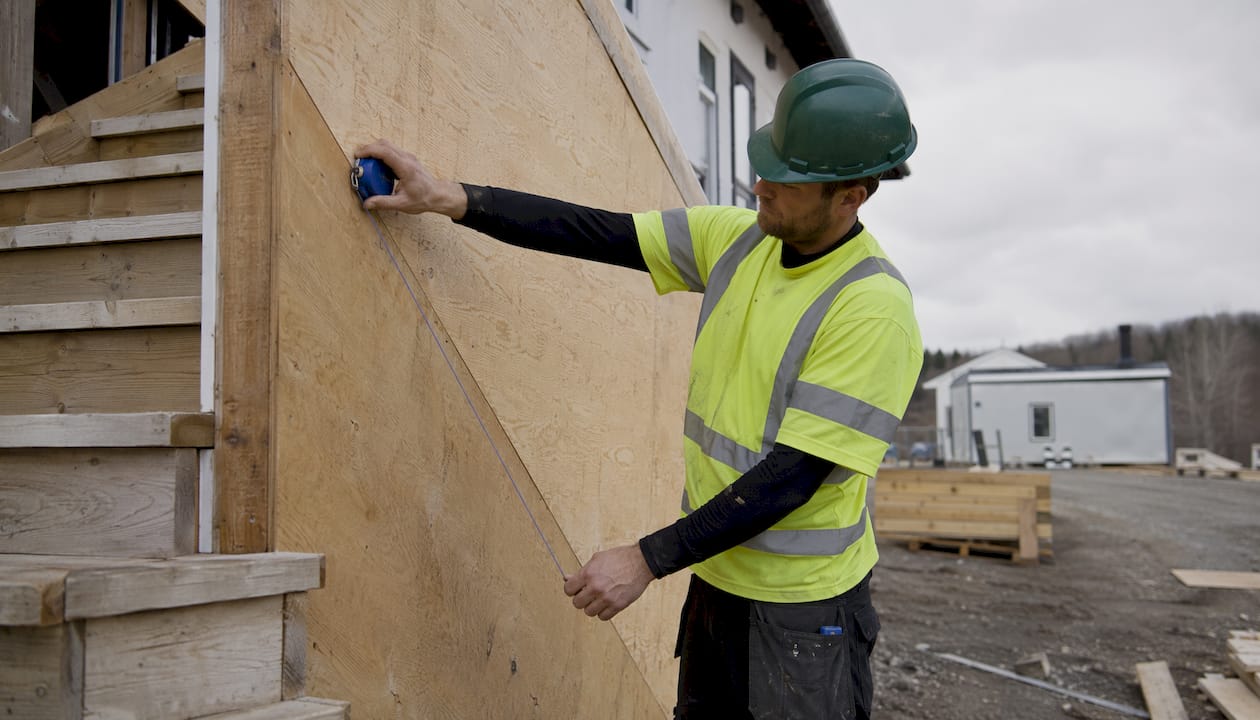
- Always measure along the rake (pitch line), not the horizontal run; measuring horizontally on a steep stair can put you inches off
- On curved or winding stairs, measure at each nosing point and confirm the rail stays within the 34"–38" band throughout
Clearance and graspability:
- Minimum clearance between the rail and any adjacent wall or surface as required by code
- Type I profile: circular cross-section, 1.25"–2" outside diameter; the most common residential choice
- Type II profile: non-circular (square, rectangular) with a graspable finger recess; must meet specific perimeter and projection dimensions under ADA and IBC
- Rail ends must return to the wall, post, or floor; open ends that project into a walking path are a code violation and a snagging hazard
Pro Tip: Mark the pitch line on your wall with a chalk line before setting any brackets. It takes two minutes and eliminates the most common height error: brackets set at inconsistent heights because the installer measured from the tread surface rather than the nosing.
Rules for Continuous Handrails and Required Extensions
Continuity is where residential and commercial requirements diverge most sharply. Under the IRC, a handrail on a residential stair must run the full length of the stair flight, but it can terminate at the newel post at the top and bottom. Under IBC and ADA, the rail must extend horizontally past the top riser and past the bottom riser before terminating, and those extensions must return to the wall or post.
ADA extension requirements (public/commercial):
- At the top of a stair flight: extend horizontally at least 12" beyond the top riser
- At the bottom: extend at the slope of the stair flight for a horizontal distance equal to one tread depth, then continue horizontally at least 12"
- Extensions must not project into a circulation path in a way that creates a hazard
At landings between flights, ADA-compliant handrails must remain continuous or, if interrupted, must meet the extension rules at each interruption point. For switchback stairs, the inside rail at the landing can be continuous around the turn; the outside rail terminates and restarts with the required extensions.
On ramps, the same continuity logic applies: the rail must run the full length of the ramp run without interruption, with extensions at the top and bottom. Grip must be uninterrupted across the entire run, which rules out decorative breaks or mid-run newel posts on accessible routes.
Choosing Materials and Design Tradeoffs for Handrail Integration
Material choice affects not just aesthetics but bracket type, fabrication tolerances, and how the rail connects to glass infill below. Each option has a real tradeoff.
- Wood: warm, easy to shape and sand to a custom profile, and forgiving for field cuts. Downsides are moisture sensitivity, finish maintenance, and the fact that wood rails on exterior stairs need annual inspection for rot and fastener corrosion.
- Steel/stainless steel: strong, available in thin elegant profiles, and weldable for seamless transitions. Grade 316/316L stainless is the right call for coastal or high-humidity environments; 304 stainless works fine inland. Stainless caprail over glass panels is one of the cleanest-looking integrations available.
- Aluminum: lightweight, corrosion-resistant, and available in powder-coated finishes. It doesn’t weld as cleanly as steel, so connections rely on mechanical fittings. Good for long exterior runs where weight matters.
- Glass infill with caprail: delivers unobstructed sightlines and a modern look, but the detailing is more complex. Glass infill systems require specifying glass type and thickness (typically laminated safety glass), channel or clamp fixing systems, and more careful structural calculations than steel picket systems.
One issue that catches projects off guard: mixing manufacturers for rail-to-post or glass-to-handrail components often creates compatibility and tolerance problems. Matched systems or engineered transition pieces reduce field headaches significantly. For glass railing projects, Glassrailingstore’s hardware selection guide covers which connectors and caprail hardware work together as a system. You can also browse modern handrail material examples to see how different materials perform in real builds.
How to Lay Out, Join, and Fasten Handrails Correctly
The most expensive handrail mistakes happen before the first bracket goes in. A fabrication-ready drawing package, produced before you order material, is the single biggest risk reducer on any project. Lack of a complete technical drawing is the leading cause of costly site rework.
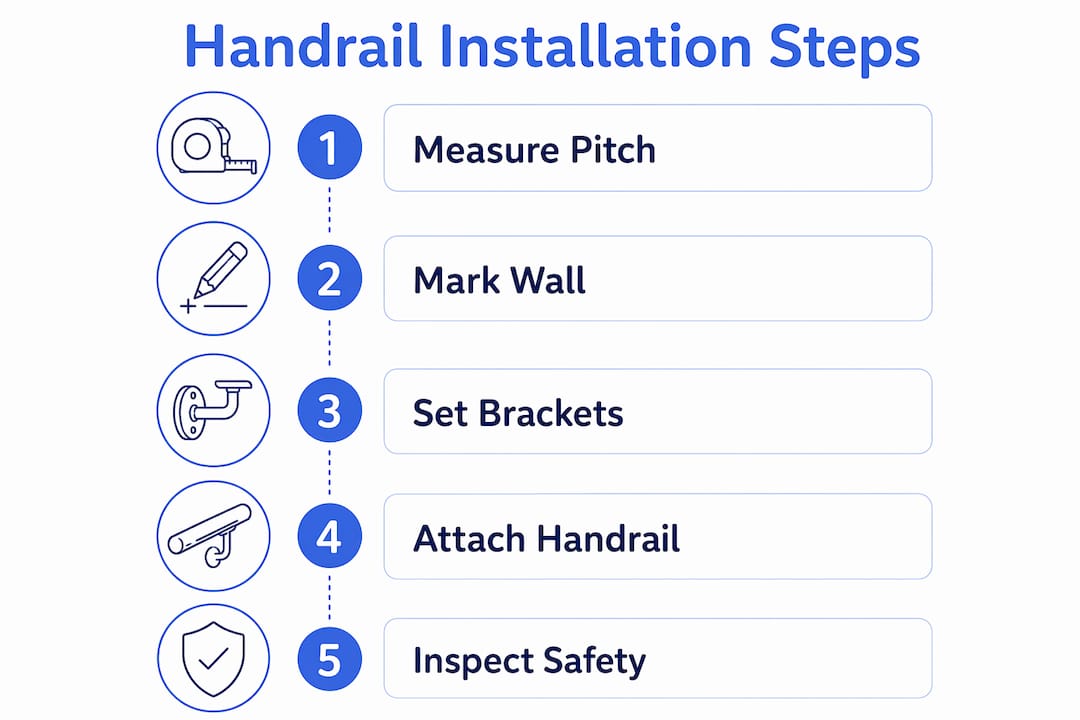
Step-by-step installation sequence:
- Measure the stair pitch and calculate the rake angle; record it on your drawing
- Mark the pitch line on the wall at 34"–38" above each nosing point; snap a chalk line
- Locate studs with a stud finder; mark stud centers on the wall
- Where no stud falls at a bracket location, install a solid wood backer board spanning two studs, or plan for structural toggle anchors rated for at least 200 lb shear
- Mark bracket positions along the pitch line, spacing them no more than 48" apart; high-traffic commercial stairs may require tighter spacing
- Pre-drill pilot holes; attach brackets with structural screws into studs or backer
- Set the rail into brackets, confirm height at multiple nosing points, and tighten
- Test: push and pull the rail firmly; it should not deflect more than the code allows, and no bracket should feel loose
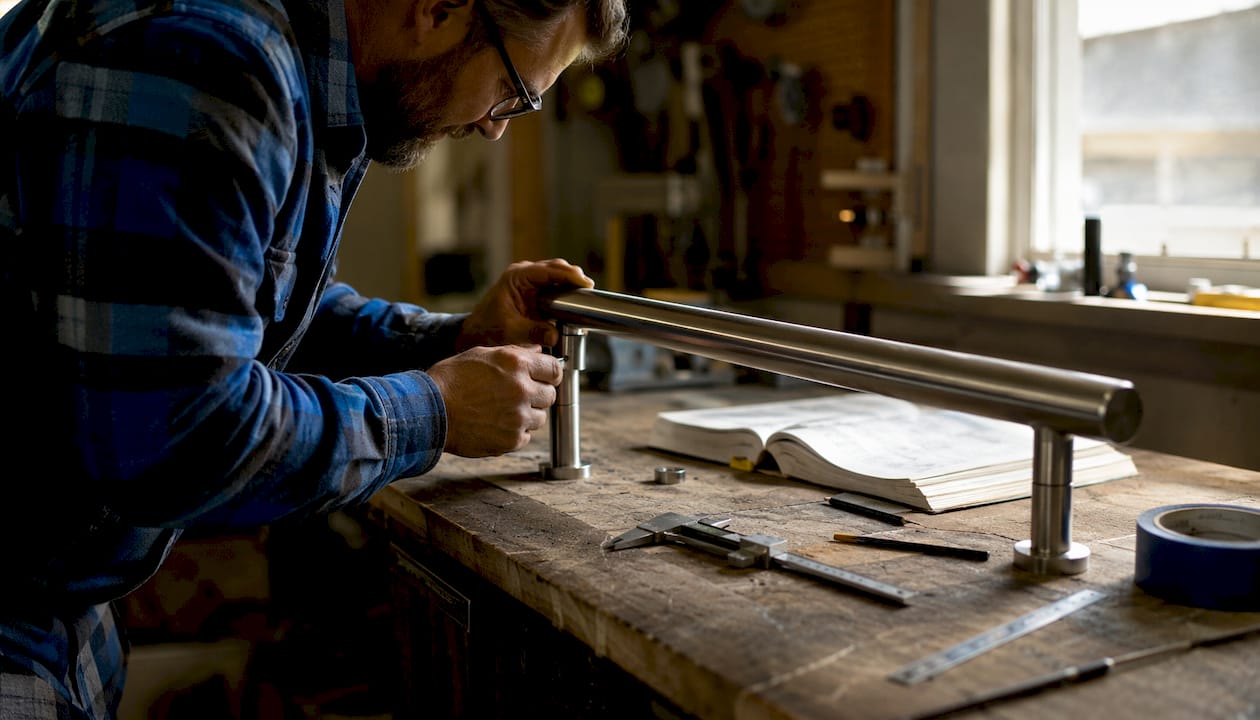
On splices and joins: place any splice directly over a bracket, never between supports. For stainless rails, internal sleeves give a seamless look and avoid the visual disruption of external splice plates. Avoid field welding unless it’s specified in the drawings and the welder is qualified; an unspecified field weld on a stainless rail can compromise the finish and the structural integrity of the connection.
Tools you’ll need: stud finder, laser level or chalk line, drill/driver, appropriate drill bits for your wall material, torque wrench for final fastener tightening, tape measure, and a digital angle finder for rake measurement.
Pro Tip: Order rails slightly longer than your field measurement, then trim to final length on site after confirming the actual pitch. A rail cut 1/4" short in the shop can’t be extended without a visible splice.
For digital takeoff and measurement coordination before fabrication, construction takeoff tools can reduce the measurement errors that cause expensive remakes.
Common Installation Mistakes and How to Catch Them Before Inspection
Most failed handrail inspections trace back to a short list of repeatable errors. Knowing them in advance is faster than fixing them after the fact.
Frequent mistakes:
- Measuring height from the tread surface instead of the nosing; this consistently produces rails that are too low
- Mounting brackets into drywall without structural backing; drywall alone cannot hold the required loads
- Bracket spacing exceeding 48", especially on long straight runs where installers skip a stud
- Missing the 1.5" wall clearance, usually because the bracket projection wasn’t checked against the rail profile
- Open rail ends that project into a walking path instead of returning to the wall or post
- Using mismatched hardware from different manufacturers, which creates tolerance gaps at connections
Inspection checklist (run this before calling for inspection):
- Measure handrail height at the top, middle, and bottom nosing points; all must read 34"–38"
- Confirm bracket spacing; no gap should exceed 48"
- Pull each bracket by hand; none should move or feel loose
- Push and pull the rail at mid-span; check for excessive deflection
- Measure clearance from the wall at each bracket; confirm 1.5" minimum
- Check rail profile for graspability; run your hand along the full length
- Inspect both ends; confirm returns to wall or post with no open projections
- On glass infill systems, verify glass type and fixing tightness at each clamp or channel
For glass-specific installation errors, Glassrailingstore’s guide on common glass railing installation mistakes covers the issues that show up most often on job sites.
Fabrication-Ready Checklist and Drawing Items for Pros
A drawing package that reaches the fabricator with every callout in place prevents the two most expensive outcomes: remakes and field modifications. A complete handrail detail includes plan, elevation, section/connection details, material callouts, weld symbols, and bracket/fixing specifications.
Essential drawing callouts:
- Rail profile type and outside dimensions (diameter for Type I; perimeter and projection for Type II)
- Rake angle, measured and confirmed on site before drawing is issued
- Bracket type, projection dimension, and fixing method (screw into stud, backer, or toggle)
- Stud or backer locations dimensioned from a fixed reference point
- Splice locations, always shown over a bracket
- Finish specification (e.g., #4 brushed, mirror polish, powder coat color)
- Weld symbols where shop welds are required; note “no field welding” where applicable
- Glass type, thickness, and fixing system for glass infill panels
Recommended fabrication tolerances:
| Dimension | Recommended tolerance |
|---|---|
| — | ±1/8" |
Mixing hardware from different manufacturers is the fastest way to blow these tolerances; a matched system from a single source keeps all dimensions compatible. Coordinate tolerances with your glass hardware vendor before the fabrication package is issued.
Glassrailingstore’s planning and quote service can help produce fabrication-ready drawings matched to their hardware dimensions, which eliminates the guesswork on glass-to-rail transitions. Their railing planning service explains exactly what that process looks like.
For subcontractors managing multiple trades, common takeoff measurement errors is worth a read before you finalize your drawing package.
How to Maintain Handrails and Keep Them Safe Over Time
Installation is the beginning, not the end. Handrails take daily mechanical stress, and the fixings that felt tight on day one can loosen over months of use.
Maintenance schedule by material:
- Stainless steel (inland): annual visual inspection for corrosion, fastener tightness, and finish damage; clean with a mild detergent and rinse thoroughly
- Stainless steel (coastal/marine): inspect every six months; salt air accelerates surface oxidation even on 316L; re-passivate if pitting appears
- Wood: check finish annually; any cracking or peeling finish lets moisture in and accelerates rot at bracket contact points; re-coat before the finish fails completely
- Aluminum (powder-coated): inspect annually for chips or scratches in the coating; touch up promptly to prevent corrosion at exposed aluminum
Quick on-site tests:
- Push/pull test: apply firm lateral force at mid-span; the rail should not deflect visibly or feel loose at any bracket
- Fastener check: attempt to turn each visible screw or bolt by hand; any that move need re-torquing
- Visual scan: look for rust streaks, finish bubbling, or white oxidation at connection points
- Cable re-tension (if applicable): check cable tension with a tension gauge annually; cables relax over time
For commercial properties: keep a written inspection log with the date, inspector name, and findings for each inspection. Many jurisdictions require documented maintenance records for commercial handrails, and a log protects you if a liability question arises later.
Where to Read the Codes and Verify Local Requirements
The authoritative sources are publicly available, and reading the actual code text is faster than relying on a summary.
- U.S. Access Board (ADA Standards): the ADA stairways chapter covers handrail requirements for public and commercial spaces in plain-language format with diagrams; start here for any project with an accessible route
- ADA 2010 Standards (full text): available at ada.gov for the complete regulatory text
- IRC and IBC: both codes are published by the International Code Council (ICC); your state’s adopted edition may differ from the current ICC edition, so check which version your jurisdiction has adopted. Many public libraries carry the ICC codes, and the ICC website sells current editions
- Local amendments: search “[your city] municipal code” or contact your local Building Department directly; ask specifically which edition of the IRC or IBC has been adopted and whether any local amendments affect handrail requirements
- OSHA standards: for workplace stairs and handrails in general industry, OSHA 1910.25 sets separate requirements that apply to commercial and industrial facilities
Glassrailingstore’s glass railing building codes guide is a useful companion for projects that combine glass infill with handrail systems, covering the most common code questions for frameless and semi-frameless configurations.
Key Takeaways
Compliant handrail integration requires correct height (34"–38" from the stair nosing), structural anchoring, continuous rails where codes demand them, and a fabrication-ready drawing package before any material is ordered.
| Point | Details |
|---|---|
| Height is non-negotiable | Set handrails at 34"–38" above the stair nosing, measured vertically along the pitch line. |
| Anchor to structure | Mount brackets into studs or a solid backer; use structural toggles rated for at least 200 lb shear when no stud is present. |
| Bracket spacing limit | Place supports no more than 48" apart; high-traffic commercial stairs may require tighter spacing. |
| Continuity under IBC/ADA | Commercial and public stairs require continuous rails on both sides, with code-specified extensions at the top and bottom of each flight. |
| Glassrailingstore | Offers matched tempered glass panels, caprail connectors, and a planning service to produce fabrication-ready drawings and compatible hardware. |
What Experienced Installers Know That the Code Books Don’t Say
The code tells you what the finished rail must measure. It says nothing about the three surprises that cause most change orders.
The first is pitch measurement. Architects often draw handrails at a nominal angle, but the actual stair pitch on site differs from the drawings by a degree or two. That gap compounds over a long flight and can put the rail outside the 34"–38" band at the bottom nosing even when it’s perfect at the top. Pros take a digital angle reading on site before the fabrication drawing is issued, not after.
The second is wall obstructions. Electrical conduit, plumbing, and fire blocking hide behind drywall at exactly the heights where brackets need to go. A stud finder catches studs but not conduit. The fix is to probe with a small drill bit at each bracket location before committing to the layout. It takes five minutes and avoids the scenario where a bracket hits a pipe mid-installation.
The third is tolerance mismatch between glass hardware and rail hardware from different sources. A caprail channel machined to one vendor’s glass thickness won’t seat cleanly on another vendor’s panel. The solution isn’t to force it; it’s to specify a matched system from the start and hold a tolerance coordination meeting with the fabricator and glass supplier before anything is cut. Order rails slightly longer than the field measurement so you can trim to the actual pitch on site. Place every splice over a bracket, without exception. And produce the full drawing package before you order, not after.
Glassrailingstore Makes Handrail Integration Straightforward
Getting from a code-compliant design to a finished installation is where most projects lose time, usually because the hardware doesn’t match the drawings or the glass panels don’t fit the caprail channel. Glassrailingstore solves that at the source.

Their product line covers the full integration: tempered glass panels sized for railing applications, wall connectors for wall-mounted transitions, 90-degree connectors for corner detailing, and square caprail straight connectors for continuous top rail runs. Every component is engineered to work together, which means the tolerances you specify on your drawing are the tolerances you get in the field. Free shipping applies on orders over $3,000, and the planning team can help produce a fabrication-ready quote matched to your project dimensions. Request a frameless glass railing quote to get started with matched hardware and a drawing-ready specification.
Authoritative Sources and Further Reading
- U.S. Access Board, ADA Stairways Chapter: access-board.gov/ada/guides/chapter-5-stairways — plain-language guide with diagrams covering handrail height, continuity, graspability, and extensions for public/commercial stairs
- ADA 2010 Standards (full regulatory text): ada.gov — complete standards document for accessible design
- IRC and IBC (International Code Council): purchase or view your jurisdiction’s adopted edition at iccsafe.org; confirm the adopted edition and local amendments with your Building Department
- OSHA 1910.25 (workplace stairs): osha.gov — applies to general industry facilities; separate from IRC/IBC
-
Glassrailingstore technical resources:
- Glass railing building codes guide
- Handrail design for decks and stairs
- Railing planning service overview
- Frameless glass railing quote page
Recommended
- How to Select Handrail Design for Decks and Stairs – The Glass Railing Store
- Glass Railing Safety Standards: US vs Canada Compared – The Glass Railing Store
- A Full Guide to Glass Railings That Meet ADA Standards – The Glass Railing Store
- Glass Railing Building Codes: Complete 2025 Compliance Guide – The Glass Railing Store