
How to install deck railing for a safe, stylish deck
Your new deck is finished, the boards are down, and the view is everything you imagined. Then you look at the edge and realize the railing still needs to go up. Suddenly the project feels more complicated: What height is required? Will glass even pass inspection? Can you do it yourself without cracking an expensive panel? These are exactly the right questions to ask, and the good news is that modern glass deck railings make it entirely possible to satisfy safety codes and create a stunning outdoor space. This guide walks you through building codes, tools, materials, and every installation step so you can tackle the project with confidence.
Table of Contents
- Understanding deck railing codes and safety standards
- What you need: Tools, materials, and planning checklist
- Step-by-step: How to install glass deck railing
- Inspection, troubleshooting, and common mistakes
- The DIY truth: Why following glass railing codes is safer and simpler than you think
- Ready for a secure, stunning deck? Get expert-approved glass railings and support
- Frequently asked questions
Key Takeaways
| Point | Details |
|---|---|
| Always verify local codes | Minimum height and design requirements for deck railings can vary, so check with your city or state before starting. |
| Choose certified glass and hardware | Use tempered glass panels and engineered connectors to ensure safety and code compliance. |
| Prepare with a detailed checklist | Gather all required tools and materials up front to avoid costly delays or mistakes during your install. |
| Follow step-by-step installation best practices | Careful measurement, layout, and gentle handling of glass will result in a sturdy and attractive railing. |
| Inspect thoroughly before enjoying your new deck | Double-check all connections and measurements against code to ensure lasting safety and peace of mind. |
Understanding deck railing codes and safety standards
Before you pick up any tools, let’s review why railing codes matter and what you need to know to keep your deck project safe and legal.
Building codes around deck railings exist for one reason: falls from elevated decks are a leading cause of serious residential injuries every year. A railing that looks fine but wobbles under pressure is not a railing at all. Understanding the rules before you buy anything saves money, time, and serious headaches at inspection.
When is a guardrail even required?
Not every deck needs a guardrail. As detailed in building code requirements for glass installations, the trigger point in most U.S. jurisdictions is deck height. If your deck surface sits more than 30 inches above grade (the ground below), a guardrail is mandatory. Below that threshold, you may have flexibility, but a railing still adds safety and property value.
Minimum height rules
The deck railing height codes across residential U.S. builds typically set the floor at 36 inches measured from the deck surface to the top of the rail. However, many localities, especially those that have adopted more recent model codes or serve higher-traffic areas, require 42 inches. The difference matters: if you build to 36 and your inspector requires 42, you are pulling posts and starting over.
Here is a quick reference for common code thresholds:
| Deck height above grade | Guard required? | Typical minimum rail height |
|---|---|---|
| 0 to 30 inches | Usually no | Optional |
| 30 to 72 inches | Yes | 36 inches (verify locally) |
| Over 72 inches (commercial) | Yes | Often 42 inches |
Load requirements
Codes do not just care about height. Your railing system must handle serious force. A fully code-compliant railing must resist concentrated loads of at least 200 pounds applied in any direction at the top rail. This load travels through the posts and into the deck framing, not through the glass panels themselves. That distinction is critical when choosing post anchors and hardware.
Key reminder: Always confirm the exact requirements with your local building department or review the American code for glass railings before purchasing materials. National model codes are starting points, not final answers.
What you need: Tools, materials, and planning checklist
With code basics in mind, make your project smoother by assembling exactly what you need before starting.
Walking onto a job site missing one drill bit or the wrong-length fastener kills momentum fast. Treat the prep phase as seriously as the install.
Essential tools
- Power drill with masonry and wood bits
- Impact driver
- Bubble level (and a laser level if you have one)
- Tape measure and chalk line
- Rubber mallet
- Torque wrench (critical for glass clamps)
- Safety glasses and thick work gloves
- Pencil and marking tape for layout
Materials you will need
- Tempered safety glass panels (typically 3/8" or 1/2" thick for exterior use)
- Stainless steel or marine-grade aluminum posts
- Base shoe channels or post bases for mounting to deck framing
- Glass clamps and standoff connectors
- Stainless steel top rail (optional in frameless systems)
- Structural fasteners rated for your decking material
Comparing panel thickness options
| Panel thickness | Best for | Notes |
|---|---|---|
| 3/8 inch | Residential decks, standard spans | Lighter, cost-effective |
| 1/2 inch | Wider spans, higher-wind areas | Greater rigidity, heavier |
| 5/8 inch | Commercial or code-required upgrade | Maximum strength |
Knowing your local code details will tell you which thickness your jurisdiction accepts. If you are in a state like Vermont, the Vermont code details page outlines specific panel and hardware requirements that apply to your project.
Staging and measurement checklist
- Measure each railing run twice and record exact lengths
- Note any corners, stairs, or grade changes that require custom cuts
- Confirm post spacing (typically 36 to 48 inches on center for glass systems)
- Verify your deck framing can accept structural post anchors
- Lay out all materials in order before opening packages
Pro Tip: Order at least 10% more glass panels than your measurements call for. Tempered glass cannot be cut on site. If a panel breaks during handling or one measurement is slightly off, having extras on hand saves days of waiting for a reorder.
The railing must transfer applied forces through posts into deck framing, which is why post anchor placement and framing condition matter more than almost anything else at this stage.
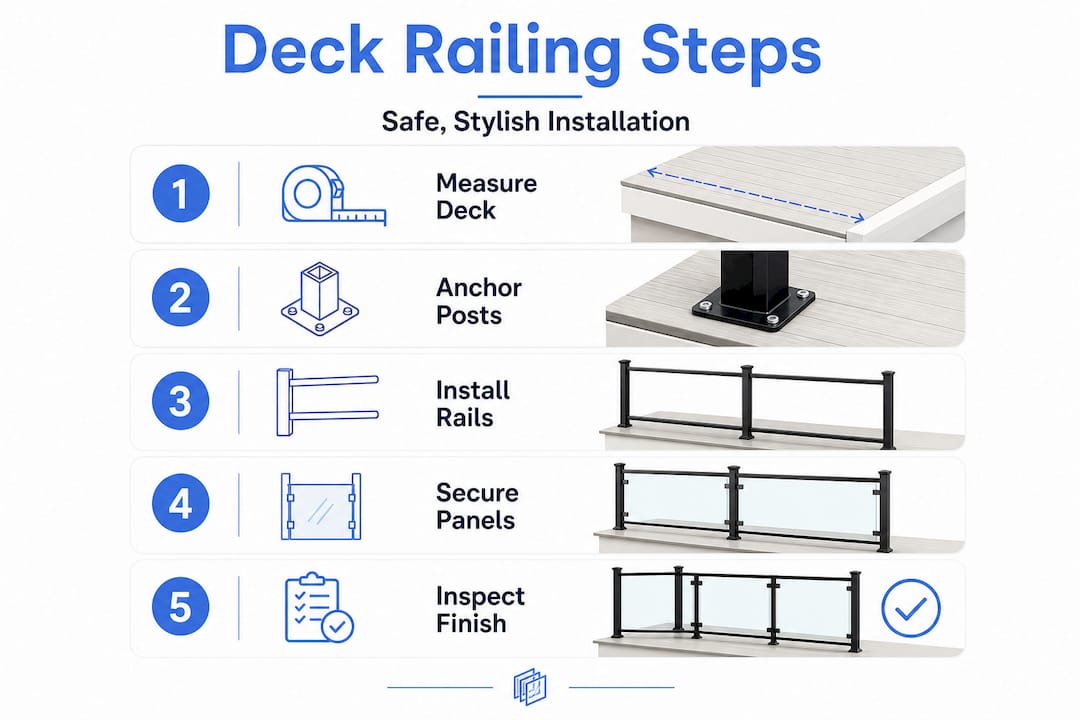
Step-by-step: How to install glass deck railing
Now you’re organized, let’s break down installation into clear, actionable steps any careful DIYer can follow.
Glass railing installation rewards patience and precision. Rushing any step risks cracking a panel or creating a wobbly system that fails inspection. Move methodically and you will be rewarded with a result that looks professionally installed.
-
Mark your post locations. Use your chalk line and tape measure to mark post positions along the deck edge. Standard spacing for glass panel systems is 36 to 48 inches on center. Double-check that each post location lands over solid framing, not just decking boards.
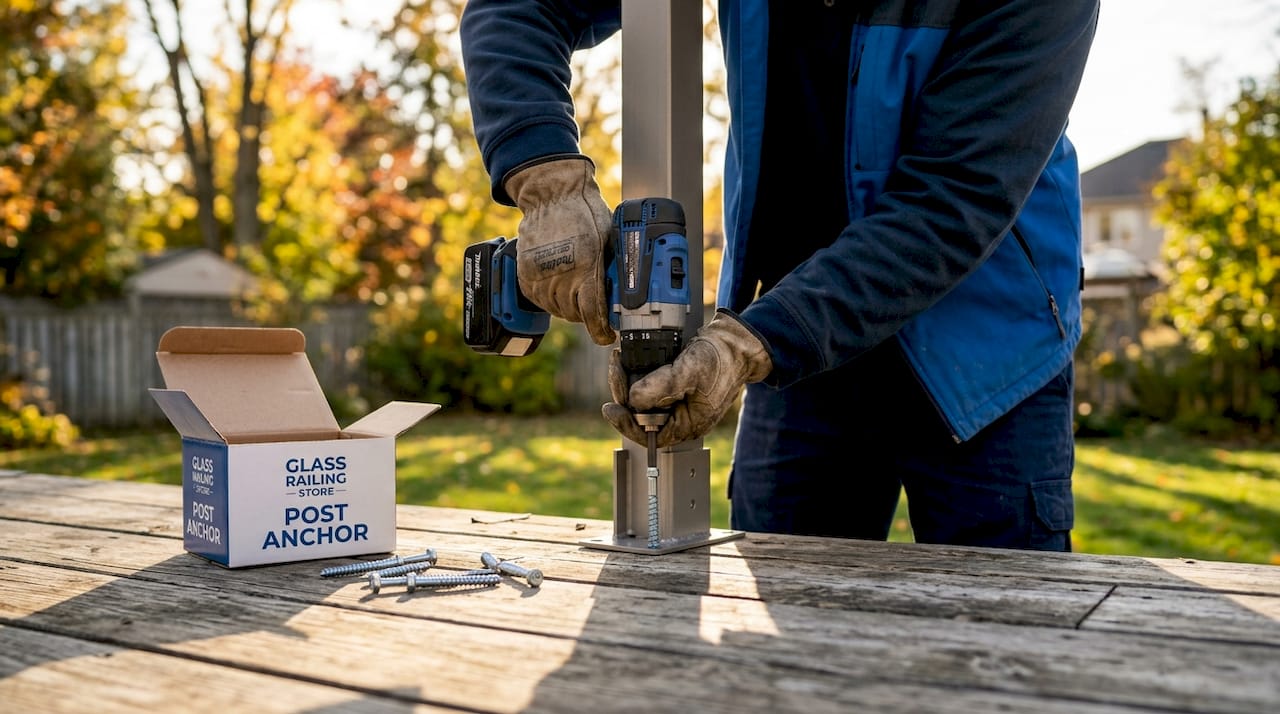
-
Install post bases or base shoe channels. Depending on your system, you will either bolt individual post bases or a continuous aluminum base shoe to the deck. Use structural lag screws rated for your framing lumber. Do not use drywall screws or deck screws here; the load requirements demand fasteners engineered for shear force.
-
Set and plumb each post. Slip posts into bases and use your bubble level on two adjacent faces to confirm each post is perfectly plumb (true vertical). Tighten base hardware while holding the post in position. A post that is even slightly out of plumb will cause visible misalignment when glass panels go in.
-
Insert glass panels into base shoe or clamps. If you are using a base shoe channel system, slide panels into the channel from the top. If you are using individual glass clamps, position the panel first and then snug up the clamps. Always use the rubber or neoprene gaskets that come with your hardware. Glass must never make direct metal-to-metal contact.
-
Align panels vertically and laterally. Step back and view each panel from multiple angles. Glass should sit perfectly vertical and flush with neighboring panels. Small adjustments are possible before fasteners are fully tightened.
-
Tighten all hardware to spec. This is where many DIYers go wrong. Use the torque values specified by your hardware manufacturer, typically 8 to 15 foot-pounds for glass clamps. Do not estimate by feel.
-
Install top rail if applicable. In systems that use a continuous top rail, slide it over post caps or snap it into rail receivers. Miter or cope corners carefully. A clean top rail tie improves both aesthetics and lateral rigidity.
- Perform an immediate physical check. Push firmly on each panel and post before moving on. Nothing should flex, shift, or creak. If anything moves, locate the loose fastener and address it now.
Safety note: Glass railing systems are designed so posts carry the structural load, not the glass panels themselves. The panels are infill. Every load demand your rail faces flows through posts and into framing, as required by code standards for lateral load resistance.
Pro Tip: Never overtighten glass clamps. Excess torque creates stress concentrations in tempered glass that can cause spontaneous shattering days or even weeks after installation. Snug, not tight, is the rule. If you are unsure about load requirements in your state, the Tennessee code for glass railing page is a solid example of how load and hardware specs are broken down by state.
Inspection, troubleshooting, and common mistakes
Once your railing is up, it’s time for the most important step: checking your work for lasting safety and code compliance.
A railing that passes visual inspection can still fail a physical one. Take 30 minutes after install to systematically test everything before scheduling your official inspection.
Final inspection checklist
- Measure rail height at three points along each run. All measurements must meet or exceed your local minimum.
- Push laterally on posts at the top with steady force. No movement allowed.
- Check that no glass panel has visible stress marks, chips at the edges, or cracked corners.
- Confirm all fasteners are fully tightened and no hardware is missing.
- Verify required clearances from wall surfaces and gate openings.
Common DIY mistakes and how to avoid them
| Mistake | Why it happens | How to prevent it |
|---|---|---|
| Rail height too low | Measuring from wrong reference point | Measure from finished deck surface, not framing |
| Posts not anchored to framing | Anchors miss joists | Map framing before marking post locations |
| Glass cracked during install | Overtightening or no gaskets | Use torque wrench, install rubber gaskets always |
| Wrong hardware grade | Using interior hardware outdoors | Specify marine-grade stainless steel from the start |
| Skipping permit/inspection | Assuming small project is exempt | Check with local building department before starting |
The top code violation
The single most cited violation in residential deck railing inspections is rail height below the local minimum. Homeowners building to the 36-inch national model standard get caught in jurisdictions that require 42 inches. This is easy to avoid: one phone call to your building department before purchasing materials eliminates this risk entirely.
As guardrail requirements confirm, height rules vary by occupancy type and local jurisdiction. Never assume the national model code is your final answer. The Delaware code for glass railing page is a useful example of how one state layers its own requirements on top of model code minimums.
What to do if you spot an error after install
If your rail height is short, repositioning post anchors is usually the fix. If hardware is undersized, replace it before inspection. Most issues discovered before an official inspection can be corrected in a few hours. Discovered after a failed inspection, they still get corrected quickly, but you will pay for a re-inspection. Catching problems yourself is always faster and cheaper.
The DIY truth: Why following glass railing codes is safer and simpler than you think
Here is something we see repeatedly: homeowners spend far more time worrying about building codes than actually dealing with them. The fear of bureaucratic complexity causes people to either skip the permit process entirely (a serious legal and insurance risk) or hire out work they are fully capable of doing themselves.
The reality is that modern glass railing systems are specifically engineered for compliance. Reputable manufacturers build products to meet or exceed the most common residential code thresholds. The hardware specifies torque values, the panels come in code-accepted thicknesses, and the installation guides walk you through the exact measurements your inspector will check.
Codes are not a mystery. The core requirements, height minimums, load ratings, and infill specs, are widely published and verified through official channels. A five-minute conversation with your local building department tells you exactly what applies to your address. That single call removes almost all of the uncertainty that causes project paralysis.
The genuine risk is not complexity. It is assumption. Homeowners who skip the local verification step and build to a “standard” they read online are the ones who fail inspection and rebuild posts. The solution is not expertise, it is preparation: verify your local requirements, match your materials to those requirements, and follow the manufacturer instructions. You will pass inspection on the first try more often than not.
We built our glass railing code overview resource for exactly this reason: to give homeowners a real, state-by-state reference that removes guesswork before a single fastener goes in. Code compliance and beautiful design are not competing goals. When you use the right system and follow the process, they reinforce each other perfectly.
Ready for a secure, stunning deck? Get expert-approved glass railings and support
If you’re ready to get started, save time and stress with resources and products that streamline the process.
At Glass Railing Store, every product we offer is built to meet the structural and aesthetic expectations of real residential installations. Our panels and hardware have gone through engineering and load testing that supports code compliance across most U.S. jurisdictions.

Whether you need a complete system for a simple rectangular deck or hardware for a complex multi-level layout, our team is ready to help you plan and order the right materials. Review the glass railing code details for your state to confirm what applies to your project, then browse our product catalog. If your project involves complex geometry or you prefer professional installation, our network of certified installers can take it from plan to finished railing. Free shipping on orders over $3,000 makes stocking a full deck project more affordable than you expect.
FAQs
1. How high does my deck railing need to be?
Most U.S. residential codes require deck rails to be at least 36 inches for decks more than 30 inches above grade, but your local building department may require 42 inches, so always confirm before installing.
2. Do I need special hardware for glass deck railings?
Yes, you need engineered glass clamps and post anchors rated to handle concentrated loads of at least 200 pounds at the top rail, because standard wood or aluminum railing hardware is not designed for glass panel systems.
3. Can I install glass railing systems myself, or do I need a professional?
Many DIYers successfully install modern glass railing systems, but complex layouts, multi-level decks, and high-wind areas may benefit from a certified installer who knows local requirements.
4. What’s the most common code violation with deck railing installs?
The most common violation is building rails below the required local minimum height, often because a homeowner followed a national 36-inch standard without verifying whether their jurisdiction requires 42 inches.
Recommended
- How to install glass railing | Glass Deck Railing – The Glass Railing Store
- How to install glass railings | Glass Railing – The Glass Railing Store
- Avoid these glass railing mistakes for a safe, stylish home – The Glass Railing Store
- Choosing safe and stylish glass thickness for railings – The Glass Railing Store