
Glass Railing Wood Deck Attachment: A Builder's Guide
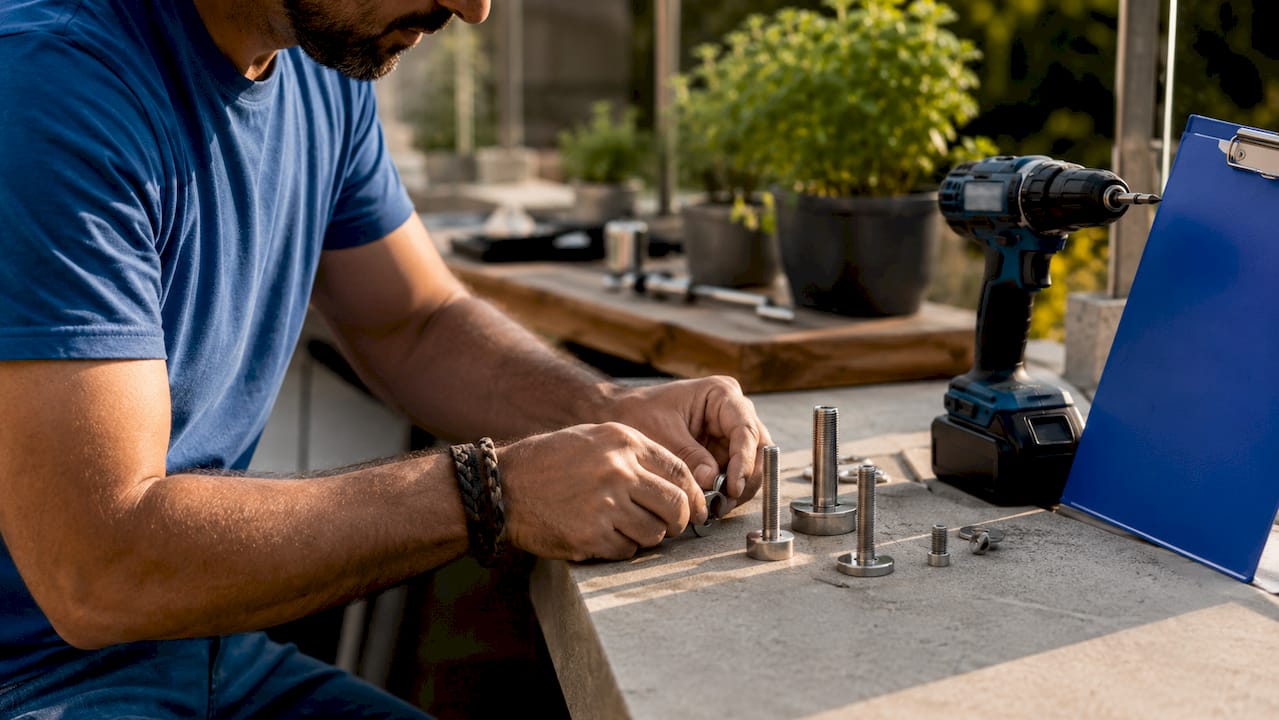
Glass railing wood deck attachment is the process of anchoring railing hardware through the deck surface and into the primary wood framing using through-bolted, lateral-load-rated fasteners. Done correctly, it creates a system that meets building code safety requirements while preserving the clean, open sightlines that make glass railings worth the investment. Done wrong, it produces a railing that looks great until someone leans on it. This guide covers code requirements, mounting methods, framing considerations, and step-by-step installation practices for homeowners and deck builders who want to get it right the first time.
What Are the Building Code Requirements for Glass Railing Wood Deck Attachment?
The International Residential Code (IRC) sets the baseline every builder must meet. Under IRC R301.5, residential deck guards must resist a 200 lbs concentrated lateral load and a uniform load of 50 lbs per linear foot. That means a person pushing hard against your railing at a single point, or a crowd pressing along its full length, cannot cause it to fail.
These numbers have real consequences for how you attach hardware. Fastening into deck boards alone does not satisfy these requirements. The load path must run from the glass panel through the hardware and into the rim joist, blocking, or structural framing below. Deck boards are not structural members. They flex, compress, and split under concentrated loads.
Two additional standards govern the glass itself. ASTM E2353 covers the performance of glass in railing systems under load testing, and ANSI Z97.1 sets safety glazing requirements. Both standards require that glass panels hold up under impact and, if they do break, do so in a way that minimizes injury risk.
Key code compliance points to verify before you start:
- Hardware anchorage: All post bases, base shoes, and spigots must be through-bolted into structural framing, not screwed into decking.
- Fastener grade: 316-grade stainless steel is required in coastal or high-humidity environments. In drier inland climates, 304-grade stainless is acceptable.
- Glass type: Tempered or laminated safety glass is mandatory. Standard annealed glass does not meet ANSI Z97.1.
- Railing height: Most jurisdictions require a minimum 36 inches for decks under 30 inches above grade and 42 inches for higher decks.
Pro Tip: Check your local jurisdiction’s amendments to the IRC before ordering hardware. Some states and counties add requirements beyond the base code, particularly for coastal zones and elevated decks.
Which mounting method works best for wood deck attachment?
Three main mounting methods exist for glass railings on wood decks: base shoe continuous channel, spigot standoff point-fix, and fascia mounting. Each transfers load differently, and each suits different deck layouts and aesthetic goals.
| Method | Load transfer | Best for | Key limitation |
|---|---|---|---|
| Base shoe | Continuous along panel bottom | Flat top-deck installations | Requires very flat, level substrate |
| Spigot/standoff | Concentrated at discrete points | Open-look frameless systems | Higher stress at each anchor point |
| Fascia mount | Into rim joist face | Clean deck surface appearance | Rim joist must be structurally sound |
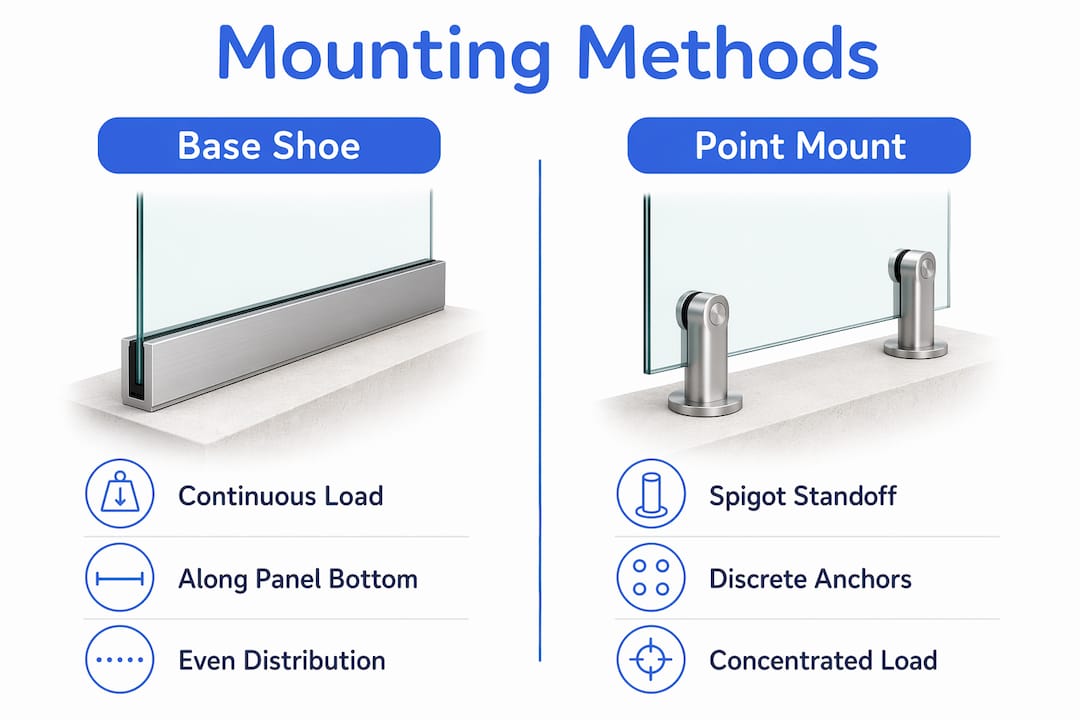
Base shoe systems distribute load continuously along the bottom edge of each glass panel. That spread-out load transfer is gentler on the wood substrate, but it demands a flat, solid mounting surface. Base shoe systems require the channel to be anchored through deck boards into blocking or structural curbs. Any movement in the substrate causes adjustment problems and, over time, noise from the glass shifting in the channel.
Spigot and standoff systems concentrate load at discrete anchor points, typically spaced 18–24 inches apart. The load at each point is higher than with a base shoe, so the blocking or framing at each location must be solid. The visual payoff is a truly frameless look with minimal hardware visible at the deck surface.
Fascia mounting positions the hardware on the face of the rim joist rather than on the deck surface. Fascia mounting generally offers stiffer anchorage than top-deck mounting because the rim joist is a primary structural member. It also keeps the deck surface clean and uninterrupted, which many homeowners prefer. The trade-off is that the rim joist must be in excellent condition, free of rot or checking.
Pro Tip: If your deck is composite or PVC decking over wood framing, fascia mounting is almost always the stronger choice. Composite boards compress under point loads and are not rated to carry guard loads.
How does wood deck framing affect glass railing performance?
Wood behaves differently than concrete or steel. It shrinks in dry weather, swells when wet, and flexes under load. These properties directly affect how glass railing structural anchoring performs over time.
The most important framing element is the rim joist. This is the outermost joist that runs along the perimeter of the deck, and it is where most glass railing hardware anchors. A rim joist that is undersized, notched, or showing signs of decay cannot reliably carry guard loads. Before ordering any hardware, probe the rim joist with a screwdriver. If it sinks in easily, you have rot and need to replace that framing before installation begins.
Blocking is the second critical element. Wood deck preparation often requires adding blocking at each mounting point, tied into the joists to create a solid substrate. Blocking prevents the rim joist from rotating or deflecting when lateral loads are applied. Without it, even correctly installed hardware can work loose over time as the wood cycles through seasonal movement.
Common failure modes tied to inadequate framing include:
- Hardware pull-out: Fasteners back out of soft or rotted wood over multiple seasons of swelling and shrinking.
- Rim joist rotation: An unsupported rim joist tips outward under lateral load, pulling the railing with it.
- Glass panel racking: When the substrate moves but the glass cannot, the panel rocks in its channel or spigot, eventually cracking or loosening the setting blocks.
Through-bolted attachments into blocking are the standard solution experienced builders use to accommodate wood movement while maintaining railing rigidity. A carriage bolt running through the hardware, the deck board, the rim joist, and a washer-and-nut on the back face creates a clamping connection that resists pull-out far better than lag screws alone.
Pro Tip: Add a bead of exterior-grade sealant around each bolt hole before tightening. This keeps water from wicking into the wood around the fastener, which is the most common starting point for rot at railing attachment locations.
What are the practical installation steps for securing glass railings on a wood deck?
A successful installation follows a clear sequence. Skipping steps or treating them as independent tasks is the most common cause of structural redesign after the fact. Treating mounting method, glass thickness, and substrate condition as a sequential interdependent system prevents costly rework.
-
Verify structural integrity: Walk the deck perimeter and check every joist, the ledger board, and the rim joist for rot, checking, or undersized lumber. Replace any compromised framing before proceeding.
-
Plan your layout and hardware selection: Decide on your mounting method (base shoe, spigot, or fascia). Measure your panel spans and confirm glass thickness. For frameless systems, laminated glass panels with thickness between 17.5 mm and 25.5 mm are standard for structural load resistance. The interlayer maintains post-breakage capacity, which is a requirement under ANSI Z97.1.
-
Add blocking at all mounting points: Cut solid lumber blocking to fit snugly between joists directly behind each hardware location. Nail or screw the blocking into the joists from both sides. This step is non-negotiable for spigot and standoff systems.
-
Mark and drill fastener holes precisely: Use a template or the hardware base plate itself to mark hole locations. Drill through the deck board and rim joist in a single pass to keep the holes aligned. Misaligned holes cause fastener stress and reduce pull-out resistance.
-
Install hardware with through-bolts and sealant: Apply exterior sealant around each hole, insert the carriage bolt or anchor bolt, and torque to the manufacturer’s specification. Do not over-torque into wood. Crushing the wood fibers around a bolt hole reduces its holding strength.
-
Set glass panels and adjust: Insert panels into base shoes or onto spigots with proper setting blocks at the base. Setting blocks prevent glass-to-metal contact, which causes stress fractures over time. Adjust panels to plumb and secure according to the hardware manufacturer’s instructions.
-
Install the top rail: The glass railing top rail attachment ties the panels together and adds a continuous graspable surface. Connect rail sections with straight connectors, 90-degree connectors, or adjustable connectors at corners and transitions.
-
Seal and maintain: Apply a bead of UV-stable silicone at the base of each panel where it meets the shoe or deck surface. Inspect fasteners, sealant, and wood condition annually. Tighten any hardware that has loosened and reapply sealant where cracking appears.
Pro Tip: Buy a torque wrench calibrated for inch-pounds before you start. Most glass railing hardware specifies fastener torque in that range, and guessing by feel is how you either strip threads or under-tighten connections that matter.
Key Takeaways
Secure glass railing wood deck attachment requires through-bolted hardware anchored into structural framing, code-compliant glass, and a substrate verified for integrity before any panel goes up.
| Point | Details |
|---|---|
| Code loads are non-negotiable | Hardware must resist 200 lbs concentrated and 50 lbs per linear foot per IRC R301.5. |
| Through-bolting is the standard | Lag screws into deck boards alone do not satisfy lateral load requirements. |
| Blocking prevents long-term failure | Add solid blocking between joists at every mounting point before installing hardware. |
| Mounting method affects substrate needs | Base shoe needs a flat, continuous surface; spigots concentrate load at discrete points. |
| Fastener grade matters by location | Use 316-grade stainless steel in coastal or high-humidity environments to prevent corrosion. |
Why I Always Start with the Load Path, Not the Glass
Most homeowners pick their glass railing system based on how it looks in a photo. That is a reasonable starting point, but it leads to trouble when the structural conversation happens after the order is placed. I have seen projects where a homeowner selected a beautiful frameless spigot system, ordered the hardware, and only then discovered that the rim joist was a single 2x8 with no blocking and a soft spot from years of water intrusion. The railing had to be redesigned from scratch.
The load path is the right place to start. Before you look at glass thickness or hardware finish, ask: where does a 200-pound lateral force go when someone pushes on this railing? Trace it from the glass panel through the hardware, through the fasteners, and into the framing. If that path is interrupted anywhere by weak wood, missing blocking, or undersized fasteners, the system will not perform.
The detail I see overlooked most often is seasonal wood movement. Builders who work primarily in concrete or steel sometimes underestimate how much a wood deck moves between a dry August and a wet November. Connections that feel tight in summer can develop play by spring. That is why through-bolting with a clamping connection is not optional. It is the only fastening method that stays tight through wood movement cycles.
My honest recommendation: if you are not certain about your rim joist condition or blocking layout, hire a structural engineer for a one-hour consultation before you order anything. That conversation costs far less than a rework after the glass is set.
— Fuanne
Get the Right Hardware and Guidance from Glassrailingstore
Glassrailingstore carries the full range of hardware, glass panels, and connectors you need for a code-compliant wood deck installation. Whether you are planning a base shoe system or a frameless spigot setup, the product pages include load ratings, fastener specifications, and installation guidance specific to wood deck applications.
Start with the engineering testing documentation to confirm that the system you select meets the lateral load requirements for your jurisdiction. For panel selection, the 46-inch tempered glass panel is a popular choice for standard residential deck heights. The building codes resource covers IRC requirements and state-specific amendments so you can verify compliance before installation begins. Glassrailingstore also offers free shipping on orders over $3,000 and direct support for project planning and quotes.
FAQs
1. What fasteners are required for glass railing wood deck attachment?
Through-bolts with lateral-load-rated hardware are required, anchored into rim joists or blocking rather than deck boards alone. In coastal or high-humidity environments, 316-grade stainless steel fasteners are the correct choice to prevent corrosion.
2. Can I attach glass railing hardware directly to composite decking?
No. Composite and PVC deck boards are not rated to carry guard loads. Hardware must be through-bolted into the wood framing beneath, and fascia mounting to the rim joist is often the most reliable approach on composite-surfaced decks.
3. What glass thickness is required for frameless glass railing systems?
Laminated glass panels between 17.5 mm and 25.5 mm thick are the standard for frameless systems, with an interlayer that maintains structural capacity after breakage, as required under ANSI Z97.1.
4. How do I prevent wood rot at railing attachment points?
Apply exterior-grade sealant around each bolt hole before tightening hardware, and reapply UV-stable silicone at the base of each panel annually. Keeping water out of the wood around fasteners is the most effective way to prevent rot at mounting locations.
5. Does fascia mounting or top-deck mounting provide stronger anchorage on wood decks?
Fascia mounting to the rim joist generally provides stiffer, stronger anchorage because the rim joist is a primary structural member. Top-deck mounting can match that strength when proper blocking is installed, but it requires more substrate preparation.