

Glass Railing Shoe Guide for Pros and DIYers
A glass railing shoe is the extruded aluminum or stainless-steel channel that grips the bottom edge of a tempered glass panel and transfers its load to the deck, fascia, or floor structure beneath it. For most residential decks, a top-mount aluminum base shoe in a standard 2" × 2" profile handles 1/2" glass cleanly and installs without specialized tooling. For exposed commercial balconies or coastal applications, a reinforced stainless-steel fascia shoe with a marine-grade finish is the right call.
Three decisions drive every base shoe selection:
- Mounting type: top-mount (deck surface), fascia-mount (face of framing), or inset/slot (embedded in concrete or composite decking)
- Glass thickness compatibility: the channel’s internal width must match your glass thickness plus gasket allowance
- Material and finish: aluminum for most residential work; 316 stainless or powder-coated aluminum for coastal or high-humidity environments
Table of Contents
- What base shoe profile fits your mounting condition?
- How do material and finish choices affect long-term durability?
- How do you match glass thickness to the right channel width?
- Which installation features actually matter when comparing shoes?
- What should you measure and specify before ordering?
- What do installers actually find in the field?
- How do Glassrailingstore base shoe options map to your project?
- What mistakes cause the most rework?
- Key Takeaways
- The detail most buyers overlook
- Glassrailingstore makes it easy to specify and order the right system
- Useful sources and technical references
What Base Shoe Profile Fits Your Mounting Condition?
The profile you choose is almost entirely determined by where the shoe attaches and what the finished sightline needs to look like.
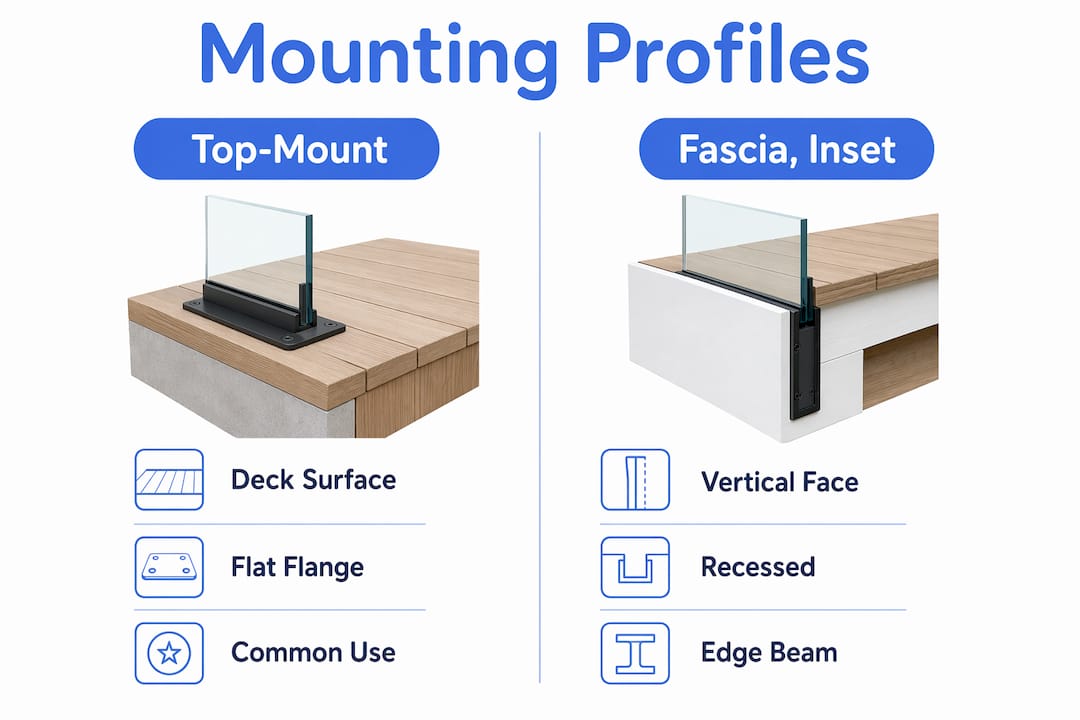
Top-mount (deck-mount) shoes sit flat on the deck surface and are fastened through the bottom flange into the framing below. They’re the most common choice for wood or composite decks because the substrate is accessible and the installation sequence is straightforward. Base shoe channels provide continuous glass support and are heavier-duty than spigot systems, making them the preferred solution for high-visibility residential and light commercial work.
Fascia-mount shoes attach to the vertical face of the rim joist or concrete edge beam. They push the glass outward to the deck perimeter, which maximizes usable deck area and creates a cleaner sightline from inside the home. The trade-off is that the fastener pattern must hit solid framing, so substrate verification matters more here.
Inset/slot (embedded) shoes are cast or routed into concrete slabs or composite decking systems before the glass goes in. They deliver the most minimal profile because the shoe is flush with the walking surface, but they require precise pre-planning. Once concrete is poured, there’s no adjusting the position.
Corner pieces and end caps are not optional accessories. They close the open ends of the extrusion, prevent water ingress, and give the installation a finished appearance. Corner connectors maintain the channel geometry at 90° turns; end caps seal the terminal cut. Order them with the shoe, not as an afterthought.
How Do Material and Finish Choices Affect Long-Term Durability?
Extruded aluminum is the workhorse of the base shoe category. It’s lightweight, corrosion-resistant in most climates, and available in anodized or powder-coated finishes that hold up well in typical residential environments. The limitation is galvanic corrosion when aluminum contacts dissimilar metals without isolation, and accelerated surface oxidation within a mile or two of saltwater.
Stainless steel, specifically 316-grade, is the right choice for coastal installations, pool surrounds, and any application where the shoe will be in regular contact with chlorinated or salt-laden water. The cost premium over aluminum is real, but so is the performance gap in those environments.
- Anodized aluminum: hard, integral finish that won’t peel; available in clear (mill), bronze, and black; resists UV degradation well
- Powder-coated aluminum: broader color range; susceptible to chipping at cut ends if not touched up; requires periodic inspection in high-UV climates
- 316 stainless (brushed or mirror): highest corrosion resistance; heavier; pairs well with glass interior door aesthetics when used indoors
- Painted cladding panels: snap over the structural shoe to match architectural finishes; replace without disturbing the glass
For cleaning, aluminum anodized shoes need only mild soap and water quarterly. Powder-coated surfaces benefit from a UV-protectant wax annually. Stainless steel in coastal environments should be wiped down with fresh water after salt exposure and polished with a stainless-specific cleaner every few months to prevent surface pitting.
Pro Tip: At cut ends of powder-coated extrusions, apply a matching touch-up paint immediately after cutting. Bare aluminum exposed at cut ends will oxidize and stain the adjacent surface within a single wet season.
How Do You Match Glass Thickness to the Right Channel Width?
Tempered glass panels for U.S. residential and commercial railings typically run from 3/8" to 3/4" thick, with 1/2" (12mm) the most common standard for residential guardrails. For most residential guardrails, 1/2" tempered glass offers a balance between cost, aesthetics, and structural performance; architects and engineers reserve laminated or thicker panels for higher wind-load or commercial requirements.
| Glass Thickness | Nominal Channel Width | Typical Gasket Allowance | Common Application |
|---|---|---|---|
| 3/8" | 1/2" | 1/16" per side | Interior stairs, light screens |
| 1/2" (12mm) | 5/8"–3/4" | 1/16" per side | Residential decks, balconies |
| 5/8" | 3/4" | 1/16" per side | Commercial guardrails |
| 3/4" | 7/8" | 1/16" per side | High-load commercial, wind-exposed |
A few sizing rules that prevent remakes:
- Measure actual glass thickness with calipers, not the nominal spec. Fabrication tolerances mean a “1/2” panel" can run 11.8mm–12.3mm.
- Polished edges add no width, but seamed (arrised) edges can have micro-burrs that affect gasket seating. Specify edge finish when ordering gasket kits.
- The channel’s internal clear width should equal glass thickness plus gasket thickness on both sides, plus 1/16" running clearance. Tighter than that and the panel won’t drop in; looser and the gasket can’t develop clamping pressure.
For detailed guidance on selecting the right panel thickness for your load conditions, Glassrailingstore’s glass thickness selection guide walks through the structural and code considerations.
Which Installation Features Actually Matter When Comparing Base Shoes?
Pre-drilled vs. undrilled: Standard extrusion lengths are commonly available at 118" (approximately 3m), supplied either pre-drilled or undrilled. Pre-drilled shoes save layout time when the hole pattern matches your anchor spacing. Undrilled extrusions give you full control over anchor centers, which matters on irregular framing or when the structural engineer specifies a non-standard pattern.
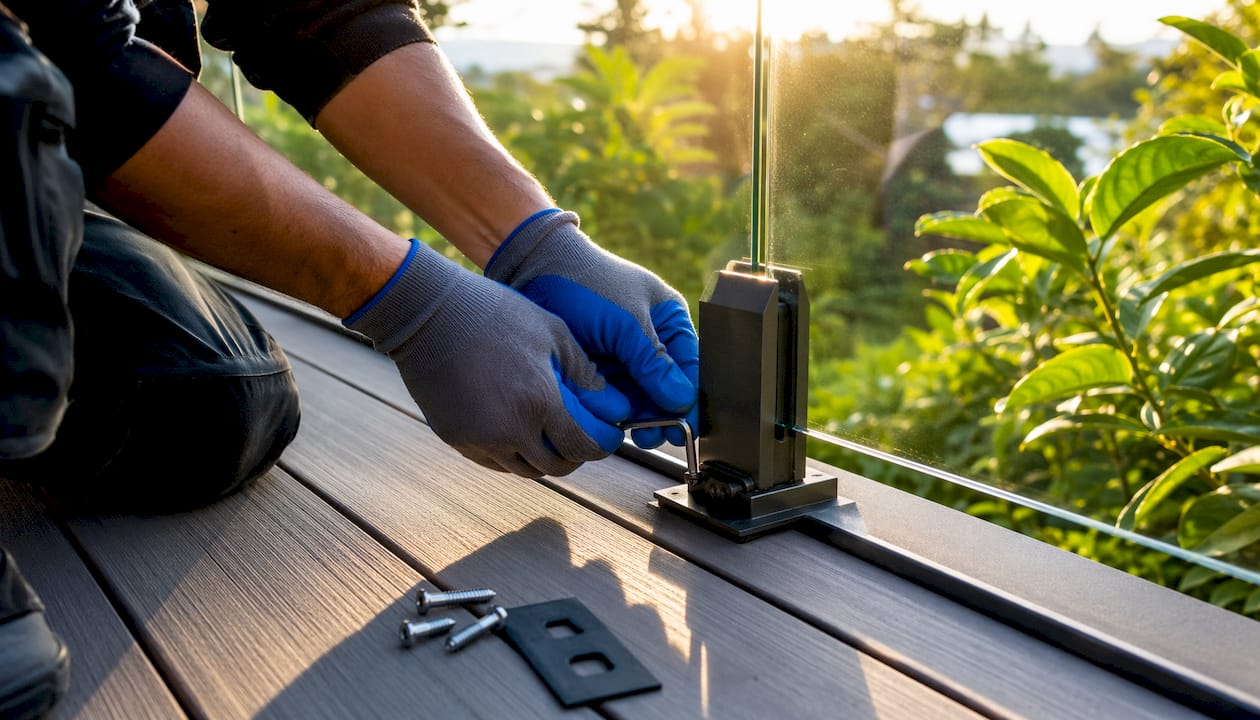
Adjustable tilt and locking systems are where modern base shoes earn their price. Systems with an intuitive locking mechanism allow glass tilt up to 2° for precise alignment and top-access tightening to reduce on-site shimming. That means you can set the glass plumb after it’s seated, then lock it from above without removing the panel.
Wedge discs and Q-discs grip the glass edge from both sides when tightened. They’re more forgiving of minor substrate irregularities than rigid-clamp systems and distribute load more evenly along the glass edge.
Drainage and sealing: Any shoe installed on a horizontal surface needs weep holes or drainage slots at the low points of the channel. Standing water accelerates gasket degradation and, in freeze-thaw climates, can crack the glass edge. Seal the shoe-to-substrate joint with a compatible silicone, but leave weep holes clear.
Anchor types: Concrete substrates take wedge anchors or sleeve anchors; wood framing takes structural lag screws with washers; steel framing takes self-drilling hex-head screws. Match the anchor to the substrate, and verify embedment depth against the load table in the shoe’s tech sheet.
Pre-order installation checklist:
- Confirm substrate type and verify structural capacity
- Determine anchor spacing from the tech sheet load table
- Decide pre-drilled vs. undrilled based on framing layout
- Verify tilt/locking mechanism type matches your leveling tolerance
- Check that drainage detail is compatible with the mounting surface
Pro Tip: If your substrate shows notable variation across the shoe run, correct it with a self-leveling compound or shim plates before setting the shoe. Trying to compensate with the glass tilt mechanism alone will exhaust its adjustment range and leave the glass under uneven stress.
What Should You Measure and Specify Before Ordering?
Get these numbers before you call or click:
- Total linear run: measure the full perimeter in inches, including corners; add 2"–3" per corner for overlap
- Finished glass width per panel: measure the opening, subtract the gasket allowance on both sides, and confirm with your glass fabricator
- Edge finish: polished, seamed, or flat-ground; affects gasket selection
- Anchor centers: lay out the hole pattern on paper before ordering pre-drilled extrusions
- Number of corners and end conditions: count 90° corners, 180° connectors, and terminal ends; order corner pieces and end caps to match
- Cladding requirement: if the shoe will be visible and needs to match a finish, specify cladding panel color and length at the same time
Ordering details to confirm with your supplier: extrusion length options (standard 118" vs. custom cut), pre-drill pattern and hole diameter, gasket kit compatibility, and whether end caps are included or sold separately. For modular or prefabricated projects, pre-drilled length ordering reduces site fabrication time and improves alignment.
Lead times for standard profiles are typically stock or short-lead. Custom-cut lengths and non-standard finishes can add production time, so confirm with your supplier before scheduling the installation crew.
What Do Installers Actually Find in the Field?
The industry has moved decisively away from labor-intensive shimming toward tilt-adjustable and wedge-disc locking systems. Professional installers report that top-access locking systems reduce installation time and risk, with alignment tabs and symmetric channels allowing mechanisms to be installed on either side for safety.
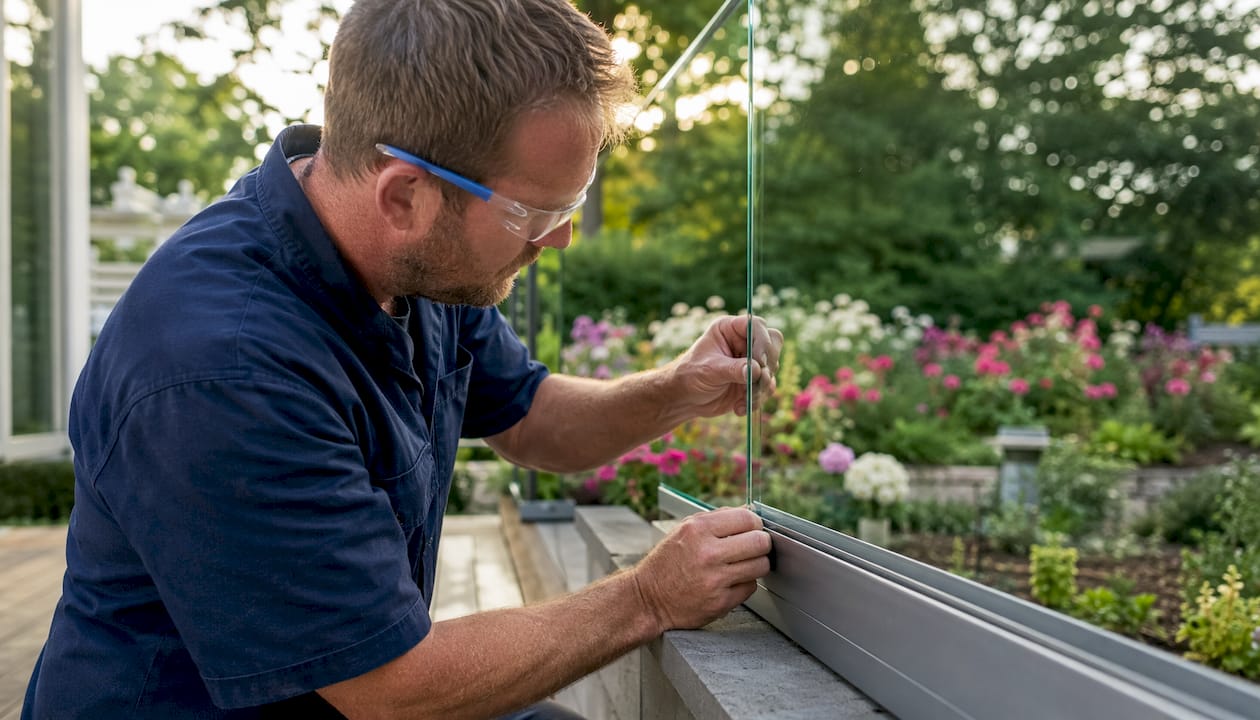
The most common DIY installation failure is poor leveling of the base shoe, which transfers uneven stress to the glass edge and the clamping mechanism. Even small angular errors concentrate stress at glass edges or clamp points. The fix is straightforward: use a 4’ spirit level, verify plumb before final tightening, and correct substrate irregularities before seating panels.
Other field issues worth knowing:
- Wrong gasket selection (too soft or too hard for the glass thickness) leads to rattling or cracking over time
- Skipping the drainage detail causes gasket failure within two to three seasons in wet climates
- Failing to specify the pre-drilled hole pattern forces on-site re-drilling, which can compromise finish cladding fit
Pro Tip: Frameless glass railing installation requires accurate leveling, specific tools, and two or more installers for safe panel handling. A 24" level works for individual panels; a 4’ level catches substrate bow across the full shoe run.
How Do Glassrailingstore Base Shoe Options Map to Your Project?
Glassrailingstore carries aluminum base shoe profiles suited to the most common U.S. project types. Here’s how the lineup maps to real scenarios:
- Residential deck (top-mount): Aluminum square base shoe, 1/2" glass channel, anodized or powder-coated finish, standard 120" extrusion length, pre-drilled or undrilled; pairs with 46" tempered glass panels for standard guardrail height
- Exposed balcony or coastal application: Powder-coated aluminum or stainless fascia shoe, 1/2"–5/8" glass channel, marine-grade finish; specify drainage slots and stainless fasteners throughout
- Interior stair: Aluminum channel base shoe, 3/8"–1/2" glass, clear anodized finish; lower load requirements allow a lighter profile
- Corner and continuous runs: 90° connectors and wall connectors complete the shoe run at corners and end conditions; order at the same time as the extrusion
Tech sheets and finish samples are available on request. Warranty and support details are listed on each product page. For non-standard lengths, custom glass dimensions, or engineered load requirements, Glassrailingstore’s quoting service can turn around a project-specific spec.
What Mistakes Cause the Most Rework?
Most remakes trace back to three errors made before the first anchor goes in.
Inaccurate glass thickness callout is the most expensive. Ordering a shoe sized for nominal 1/2" glass and receiving panels at the fabrication tolerance’s high end means the glass won’t seat. Always measure actual thickness and communicate it to both the shoe supplier and the glass fabricator.
Missing gasket tolerance is the second. Specifying channel width without accounting for gasket thickness on both sides produces a channel that’s either too tight to accept the glass or too loose to develop clamping pressure.
Ignoring anchor spacing and substrate prep is the third. The substrate reinforcement must be verified before ordering pre-drilled extrusions. If the framing layout doesn’t match the pre-drilled pattern, you’re re-drilling on-site.
When the project involves a commercial occupancy, a high wind-load zone, or a pool barrier, bring in a structural engineer before finalizing the shoe spec. Pre-engineered kits with stamped load tables are available and worth the cost when code compliance is non-negotiable.
Key Takeaways
Choosing the right glass railing shoe requires matching mounting type, glass thickness, and finish to your specific project conditions before ordering.
| Point | Details |
|---|---|
| Pick your mounting type first | Top-mount suits most wood decks; fascia-mount maximizes deck area; inset requires pre-planning before concrete is poured. |
| Match channel width to actual glass thickness | Measure with calipers, add gasket allowance on both sides, and confirm edge finish with your fabricator before ordering. |
| Choose material for the environment | Aluminum anodized works for most residential projects; 316 stainless or powder-coated aluminum is needed for coastal or pool applications. |
| Verify IBC guardrail requirements | U.S. guardrails must resist specified loads; confirm dimensions and requirements with local code before finalizing the spec. |
| Glassrailingstore for U.S. orders | Glassrailingstore stocks aluminum base shoe profiles, tempered glass panels, connectors, and accessories with wholesale pricing and a custom quoting service. |
The Detail Most Buyers Overlook
The base shoe category looks simple from the outside: a channel, some fasteners, a gasket. What most buyers underestimate is how much the shoe’s locking and adjustment mechanism determines the quality of the finished installation, not the glass, not the handrail.
A shoe with a rigid clamp and no tilt adjustment punishes every substrate imperfection. The installer compensates with shims, the shims compress unevenly over time, and two seasons later the glass is visibly out of plumb. A shoe with a 2° tilt mechanism and top-access locking lets the installer set the glass plumb after it’s seated and lock it there permanently. The glass doesn’t move; the substrate irregularity is absorbed by the mechanism.
The same logic applies to finish selection. Buyers routinely choose the least expensive powder-coat finish for a coastal deck, then spend more on refinishing within three years than the stainless upcharge would have cost. The math is straightforward once you run it, but most people don’t run it until after the first refinish.
For most residential projects, a quality aluminum top-mount shoe with a tilt-locking mechanism and anodized finish is the right call. For anything within a few miles of salt air, or any pool application, the stainless or marine-grade powder-coat option pays for itself.
Glassrailingstore Makes It Easy to Specify and Order the Right System
Skip the guesswork of sourcing base shoes, glass panels, and connectors from three different suppliers. Glassrailingstore ships complete glass railing systems, including aluminum base shoe profiles, tempered glass panels, corner and wall connectors, and gasket kits, direct to your job site across the U.S. Free shipping applies on orders over $3,000, and wholesale pricing is available for contractors and volume buyers.

Downloadable tech sheets, finish samples, and installation guides are available on each product page. For projects that need custom-cut lengths, non-standard finishes, or a full engineered system, request a custom glass railing quote and a Glassrailingstore specialist will turn around a project-specific spec. Browse the full base shoe and hardware catalog at glassrailingstore.com or contact the team directly for volume pricing and lead-time confirmation.
Useful sources and technical references
- Glassrailingstore — U.S. building codes for glass railings: overview of IBC guardrail height and load requirements
- Glassrailingstore — American building code reference: quick IBC reference for residential and commercial guardrails
- Glassrailingstore — glass railing safety and code compliance: practical compliance checklist for U.S. installations
- Jersey Tempered Glass — glass railing systems overview: tempered and laminated glass specifications for U.S. railing applications
- Wagner Companies — Level Lock Plus base shoe system: manufacturer tech sheet for tilt-adjustable locking base shoe profiles
- FabGlass and Mirror — DIY glass railing guide for U.S. homeowners: installer-sourced guidance on leveling, tools, and common field errors
This article is general technical information, not engineering or legal advice. Verify all load, height, and code requirements with your local authority having jurisdiction (AHJ) or a licensed structural engineer before finalizing your specification.
Recommended
- DIY glass stair railing: A complete homeowner’s guide – The Glass Railing Store
- Complete DIY Glass Railing Guide: Tools, Measurements and Mistakes – The Glass Railing Store
- Glass Stairs Railing: Handrail Height, 12mm Glass & Specs – The Glass Railing Store
- Glass Railing Installation Guide – The Glass Railing Store