
Staircase Glass Panel Fitting Guide for DIYers
Staircase glass panel fitting is the process of installing tempered or laminated glass panels as balustrades or railings along a staircase, combining structural safety with a clean, open aesthetic. Standard panels run 12mm to 21.5mm thick, tempered or tempered-laminated to meet impact resistance requirements under U.S. and international building codes. The industry term for this system is a glass balustrade, though “glass panel railing” is equally common in American residential construction. Getting it right means selecting the correct glass, following American building code requirements, and executing each installation step without shortcuts. Glassrailingstore supplies the tempered panels, stainless steel spigots, and connectors that make this kind of project achievable for both contractors and confident DIY homeowners.
What tools, materials, and safety gear do you need?
Every successful glass balustrade installation starts with having the right equipment on hand before you touch a drill. Missing one item mid-job forces you to stop, and stopping mid-drill on a stair tread creates alignment problems that are hard to fix.
Tools checklist
- Spirit level and laser level: Verifying plumb at every stage is non-negotiable.
- Tape measure: Measure at the top, middle, and bottom of each panel opening.
- Diamond core drill bit: Standard drill bits crack tempered glass. Use a diamond bit for any holes in masonry or concrete.
- Suction cup lifters: Glass panels are heavy. Suction cups let you position them without scratching edges or risking drops.
- Rubber mallet: Seats hardware without cracking glass or spigot bodies.
- Silicone sealant and caulking gun: Seals the base of spigots and standoff brackets against moisture.
- Cardboard or plywood template: Used for marking anchor positions before drilling.
Materials and safety equipment
| Item | Specification | Purpose |
|---|---|---|
| Tempered glass panel | 12mm–21.5mm thick | Main balustrade infill |
| Stainless steel spigots | Marine grade 316 | Hold glass rigidly at base |
| Rubber gaskets and wedges | Matched to spigot model | Cushion glass inside hardware |
| Concrete anchors or lag bolts | Rated for shear load | Secure spigots to stair structure |
| Safety glasses | ANSI Z87.1 rated | Eye protection during drilling |
| Cut-resistant gloves | Level A4 or higher | Hand protection when handling glass |
Never skip the gloves. Glass panel edges, even polished ones, can cause deep cuts under load. Compliance with local glass railing codes also requires that the installed system meets specific load ratings, so verify your hardware is rated before you buy.
How do you accurately measure your staircase for glass panels?
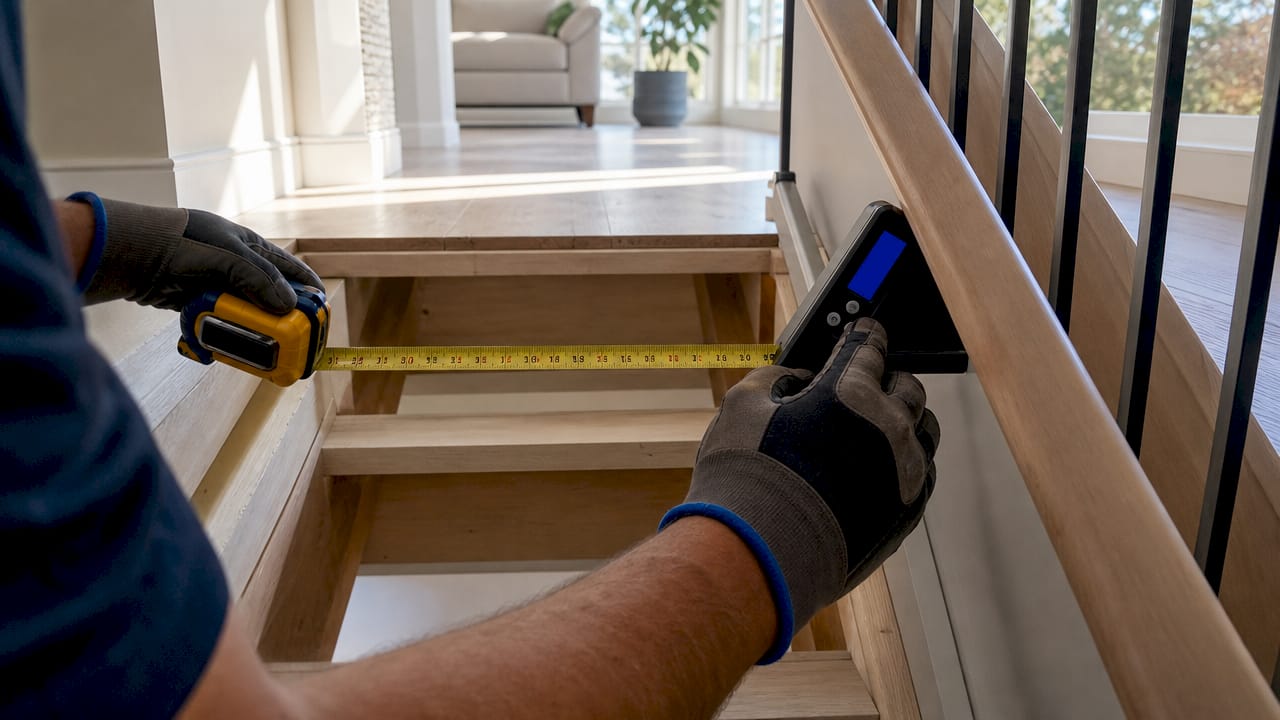
Measurement errors are the single most common cause of failed glass panel installations. Unlike wood, tempered glass cannot be trimmed on site. If your panel arrives 5mm too wide, it goes back to the factory.
Taking staircase measurements
Measure the width and height of each panel opening at three points: top, middle, and bottom. Use the smallest measurement as your working dimension, then subtract a fitting allowance so the glass seats properly inside the hardware without binding. Measure at multiple points because stair stringers are rarely perfectly parallel, and even a 3mm variance changes your order.
The pitch angle of your staircase also matters. Spigots installed along an incline must be set at the correct rake angle so the glass panels sit plumb rather than leaning with the slope. Mark a master reference line along the full stair run before drilling a single hole. Failing to verify plumb early creates alignment problems that cannot be corrected after hardware is anchored.
The 1-2 inch gap rule
Panels must sit with a 1–2 inch gap above the stair tread. This gap prevents the glass from catching debris, allows water to drain on exterior stairs, and eliminates a trip hazard at the base of each panel. That gap is not optional. It is a safety and maintenance feature built into every well-designed glass balustrade system.
Pro Tip: Make a full cardboard template of your stair run before ordering glass or drilling any holes. Lay it against the actual staircase and check every anchor point. Catching a misalignment on cardboard costs nothing. Catching it after drilling costs time, money, and structural integrity.
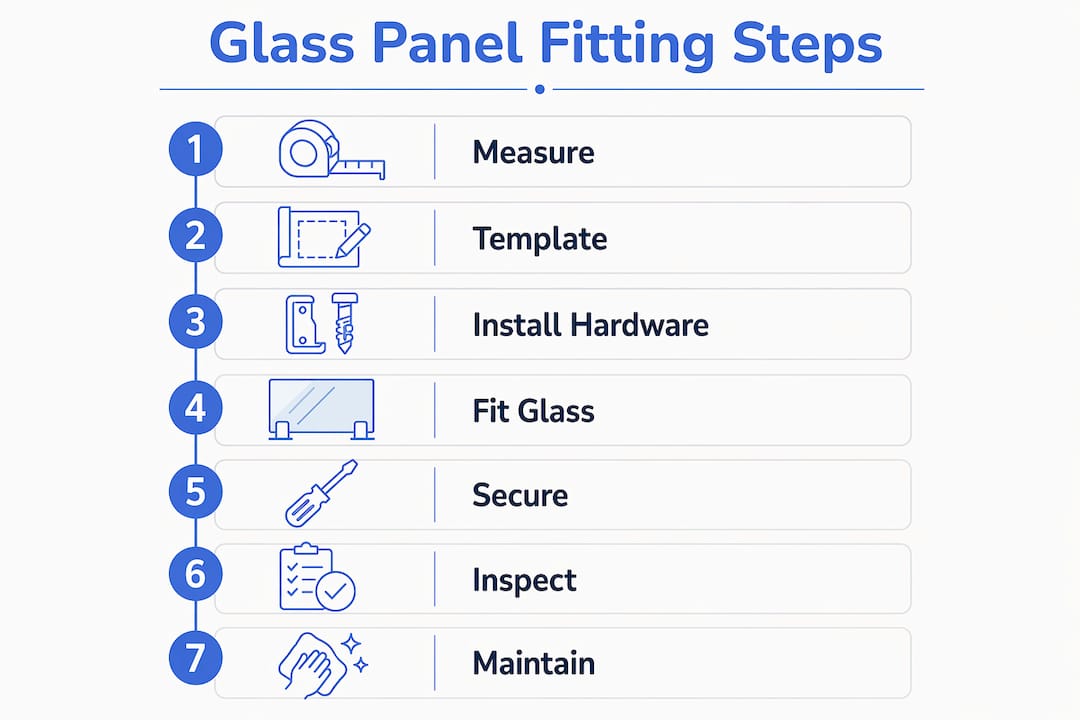
What are the step-by-step instructions to fit staircase glass panels?
The installation process follows a fixed sequence. Skipping steps or reordering them causes alignment failures that are visible from across the room.
Step-by-step installation
-
Create your drilling template. Cut a rigid cardboard or thin plywood template matching the exact spigot spacing for your panel layout. Mark anchor hole centers on the template. Precise templating before drilling is the industry standard for achieving the floating glass look with zero visible misalignment.
-
Mark anchor positions on the stair tread or stringer. Hold the template firmly in place and transfer hole centers with a marker. Double-check each mark against your master reference line before drilling.
-
Drill anchor holes. Use a diamond core bit for concrete or masonry treads. Use a standard wood bit for timber stringers. Drill to the depth specified by your anchor manufacturer. Vacuum out all dust before inserting anchors.
-
Install spigots or standoff brackets. Spigots are stainless steel clamps that hold glass panels rigidly using rubber gaskets and wedges. Larger panels typically need three spigots rather than two. Set each spigot at the correct rake angle, then torque anchor bolts to the manufacturer’s specification.
-
Lift and position the glass panel. Use suction cup lifters with at least two people. Slide the panel base into the open spigot jaws. Keep the panel plumb with a helper holding a level on the face of the glass.
-
Secure the glass in the hardware. Insert rubber wedges into the spigot jaws on both sides of the panel. Tighten the spigot clamp bolts gradually and evenly. Do not over-tighten. Over-tightening concentrates stress at the clamp point and can cause edge cracking weeks after installation.
-
Verify alignment and gaps. Check plumb on both faces of the panel. Confirm the 1–2 inch gap at the tread. Check that adjacent panels are flush and that no panel leans toward the open stair side.
Hardware types at a glance
| Hardware type | Best use | Key requirement |
|---|---|---|
| Base-mount spigots | Open tread staircases | Flat, level tread surface for anchor |
| Side-mount standoff brackets | Closed stringer staircases | Precise alignment along incline |
| Channel systems | High-traffic commercial stairs | Reinforced substrate beneath channel |
Different railing systems suit different stair configurations. Channel systems need a reinforced base. Spigot systems offer the cleanest look but demand the most precise anchor placement.
Pro Tip: Never use an impact driver to tighten spigot bolts. Use a torque wrench set to the manufacturer’s value. Tempered glass does not flex. Any hardware that shifts under vibration will transfer stress directly to the glass edge.
How do you troubleshoot and maintain staircase glass panels?
Most post-installation problems trace back to one of three causes: improper alignment, loose hardware, or inadequate gap management. Catching these early prevents costly panel replacements.
Common issues and fixes
- Glass rattles in the spigot: The rubber gasket has compressed or was installed incorrectly. Remove the wedges, reseat the gasket, and re-tighten evenly.
- Panel leans slightly: One spigot anchor has shifted. Loosen the affected spigot, re-plumb the panel, and re-torque the anchor bolt. If the substrate has cracked, the anchor must be relocated.
- Spigot shows surface rust: Standard 304-grade stainless steel corrodes in coastal or high-humidity environments. Replace with 316-grade marine stainless steel hardware. 316-grade marine stainless steel resists rust, pitting, and discoloration in outdoor conditions.
- Water pooling at panel base: The 1–2 inch gap is blocked by debris. Clear the gap and check that the tread surface drains away from the panel base.
Maintenance schedule
Clean glass panels with a microfiber cloth and standard glass cleaner. Avoid abrasive pads, which scratch the surface and make the glass harder to clean over time. Inspect spigot bolts annually, especially in high-traffic households. Check the glass railing engineering standards that apply to your installation to understand what load testing your system should meet over time.
Call a professional if you find a crack in the glass, a spigot anchor that has pulled from the substrate, or any hardware that cannot be re-torqued to spec. Cracked tempered glass must be replaced as a full panel. It cannot be patched.
Pro Tip: The 1–2 inch gap at the tread base is your best cleaning access point. Run a damp cloth along the gap monthly to prevent mineral deposits from building up around the spigot base, which can trap moisture and accelerate corrosion.
Key takeaways
Fitting staircase glass panels correctly requires tempered glass of the right thickness, precise anchor placement using a template, and hardware torqued to spec without over-stressing the glass.
| Point | Details |
|---|---|
| Glass thickness matters | Use 12mm–21.5mm tempered or laminated panels to meet safety codes. |
| Template before drilling | A cardboard template prevents misaligned anchors that cannot be corrected after drilling. |
| The 1–2 inch gap is mandatory | This gap prevents trip hazards, allows drainage, and simplifies cleaning. |
| Hardware grade affects longevity | Use 316-grade marine stainless steel spigots for outdoor or coastal installations. |
| Annual inspections protect safety | Check anchor torque and glass integrity every year, especially in high-traffic areas. |
What I’ve learned from watching DIYers rush this job
After years of working with glass railing installations, the pattern I see most often is this: homeowners nail the glass selection and then rush the anchor placement. They skip the cardboard template step because it feels like extra work. Two panels in, the spacing is off by 8mm, and the whole run looks crooked from the bottom of the stairs.
The floating glass look is genuinely beautiful. It opens up a staircase visually and makes even a modest home feel more open. But that look is unforgiving. A wood baluster that is slightly out of plumb is barely noticeable. A glass panel that leans 2 degrees is the first thing every visitor sees.
Building codes exist for exactly this reason. The load requirements in U.S. standards are not bureaucratic red tape. They reflect real-world testing of what happens when a person falls against a railing. Tempered laminated glass holds together after impact in a way that standard tempered glass does not. That difference matters in a home with children or elderly family members.
My honest advice: treat the measurement and template phase as the actual installation. The drilling and glass mounting are just executing a plan you already verified. If your template is right, the rest follows. If it is not, no amount of careful drilling saves you.
— Fuanne
Glassrailingstore has what your staircase project needs
Sourcing the right components is half the battle in any glass balustrade project. Glassrailingstore carries tempered glass panels built to U.S. safety standards, along with marine-grade stainless steel spigots, wall connectors, and cap rail hardware for complete stair railing systems.
For projects that need custom sizing or engineering documentation, Glassrailingstore offers a custom glass railing quote service that walks you through panel dimensions, hardware selection, and code compliance before you order. Free shipping applies on orders over $3,000, making it a practical choice for full staircase runs. Whether you are a contractor pricing a multi-unit job or a homeowner fitting a single stair run, the product range and support team are set up to help you get it right the first time.
FAQ
What glass thickness is required for staircase railings?
Staircase glass panels must be 12mm–21.5mm thick, tempered or tempered-laminated, to meet standard building code load requirements. Thicker glass is required for longer unsupported spans.
Can I fit staircase glass panels myself without a contractor?
Yes, with the right tools and a careful approach to measurement and templating, DIY installation is achievable. Complex stair geometries or commercial projects benefit from professional installation to meet code documentation requirements.
Why does my glass panel rattle after installation?
Rattling means the rubber gasket inside the spigot has compressed or was not seated correctly. Remove the wedges, reseat the gasket, and re-tighten the spigot bolts evenly to the manufacturer’s torque specification.
How far above the stair tread should the glass panel sit?
Panels should sit 1–2 inches above the tread surface. This gap prevents trip hazards, allows water and debris to drain, and reduces stress on the glass base.
How often should I inspect staircase glass railings?
Inspect anchor torque, hardware condition, and glass integrity at least once a year. High-traffic households or outdoor installations in coastal climates benefit from inspections every six months.
Recommended
- DIY glass stair railing: A complete homeowner’s guide – The Glass Railing Store
- Outdoor Staircase Glass Ideas That Combine Style and Safety – The Glass Railing Store
- Glass Railing Installation Guide – The Glass Railing Store
- Glass Panel Measurement Explained: A Practical Sizing Guide – The Glass Railing Store