

How to Lift Glass Railing Panels Safely on Any Job
Use a planned two-person team lift for panels under 44 lb (20 kg) per person, and a certified vacuum lifter or crane attachment for anything heavier. That is the short answer for glass railing panel lifting safely, and everything below builds on it. The 20-kg (44-lb) per-person guideline is the conservative industry standard for safe manual handling. Glassrailingstore supplies tempered safety glass panels and compatible hardware designed to work with both manual and mechanical lifting methods.
Before any lift, confirm two things:
- PPE is on: cut-resistant gloves, safety glasses, steel-toe shoes, long sleeves.
- Panel weight is known: if it exceeds 44 lb per person on your crew, bring in a mechanical lifter.
Table of Contents
- What does your pre-lift checklist look like?
- Step-by-step manual lifting procedure for small to medium panels
- When should you bring in mechanical lifting aids?
- How many people do you need, and when does manual lifting stop being safe?
- How should you store and transport panels on-site?
- What hazards should you watch for during a glass lift?
- What do you do if glass breaks or a lifter fails?
- What does lifting equipment typically cost and how long does it take?
- Which products make lifting and installation safer?
- Key Takeaways
- What pro installers actually correct on the job
- Glassrailingstore makes safe installs easier from the first order
- Authoritative resources for training and compliance
What Does Your Pre-Lift Checklist Look Like?
Getting this right before the glass moves is where most accidents are prevented. Safety starts before the glass arrives — a clutter-free work zone and staged storage matter as much as the lift itself.
PPE required:
- Cut-resistant gloves (Level A4 or higher)
- Safety glasses or a full face shield
- Steel-toe or safety shoes
- Long-sleeved clothing; add a high-visibility vest and hard hat when overhead work is involved
Tools and equipment to stage:
- Rated handheld suction cups (clean, dry, tested)
- Panel cart or A-frame dolly with edge protectors
- Setting blocks (neoprene, sized to panel thickness)
- Lifting straps, torque wrench, measuring tape, and a level
Site prep:
- Clear a clutter-free path from staging to the install point
- Check wind conditions; postpone outdoor lifts in gusts above 20 mph
- Designate one lift leader and at least one spotter
- Confirm a phone and first-aid kit are within reach
Pro Tip: Run a 30–60 second verbal role call before any lift. Each person states their position and confirms they understand the direction commands. Dropped panels almost always follow a communication gap, not a strength gap.
Step-by-Step Manual Lifting Procedure for Small to Medium Panels
Follow this numbered sequence for any panel your crew can safely carry manually.
- Inspect the panel. Check all four edges and both faces for chips, cracks, or surface contamination. A chipped edge under load can propagate into a full break. Set aside any damaged panel.
- Verify weight and PPE. Calculate weight using area (m²) × thickness (mm) × 2.5 = kg, then convert to lb (×2.2). Confirm your crew count matches the load.
- Attach suction cups. Clean and dry the glass surface. Attach two to four cups per panel, press firmly, and test each cup by pulling gently before committing weight.
- Stance and grip. Position feet shoulder-width apart. One hand on the lower suction cup handle, the other hand higher on the panel edge for balance. Back straight, knees bent.
- Lift with legs. Rise slowly and smoothly. Keep the panel close to your body and carry it at your side, never out in front. Carrying in front shifts the load onto your lower back and increases trip risk.
- Move with spotters. Walk slowly. The lift leader calls turns and height changes. Keep the panel below shoulder height wherever the path allows.
- Seat the bottom edge first. Lower the panel onto neoprene setting blocks before releasing any grip on the top. Never pivot the panel’s weight onto a single corner — that stress point causes immediate or delayed glass failure.
Pro Tip: Agree on three commands before the lift: “up,” “hold,” and “set.” Rehearse the motion once at ground level with no glass. Two people who have never lifted together will find their rhythm in that dry run.
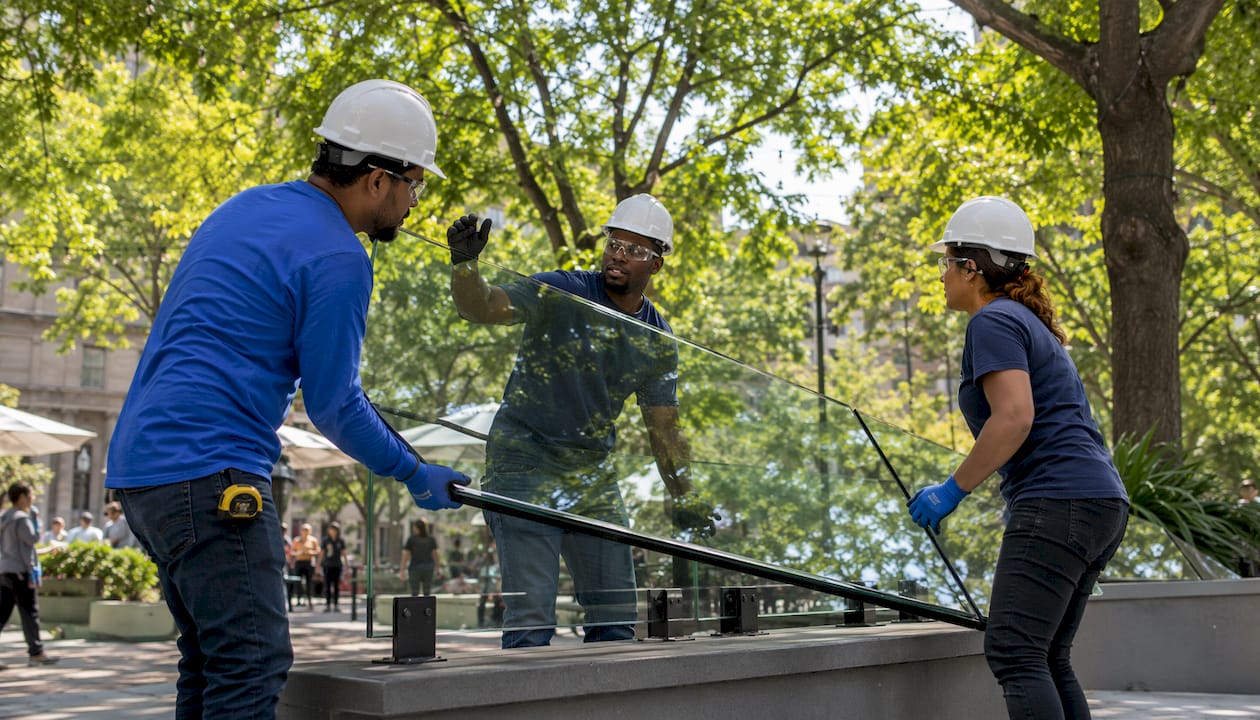
When Should You Bring In Mechanical Lifting Aids?
Use mechanical aids for any panel that is heavy, awkward, overhead, or part of a repetitive install sequence. Mechanical aids reduce both strain injuries and breakage risk.
| Equipment | Typical Capacity | Best Use | Primary Safety Check |
|---|---|---|---|
| Handheld suction cups | Up to ~44 lb (20 kg) per person | Short carries, light panes | Clean/dry surface; test vacuum before moving |
| Portable powered vacuum lifter | — | Heavy or frequent lifts | Verify rated capacity, battery charge, and alarm function |
| Panel cart / A-frame dolly | Varies by cart rating | Horizontal transport and staging | Secure panels with straps and edge protectors |
| Crane or forklift lifter | — | Very large or overhead installs | Certified rigging operator; written lift plan required |
For powered vacuum lifters, always perform a 30-second test lift a few centimeters off the ground. If the vacuum gauge drops during that wait, lower the panel immediately and do not proceed.
How Many People Do You Need, and When Does Manual Lifting Stop Being Safe?
The conservative industry guideline is to limit manual lifting to a safe weight per person. Use area × thickness × 2.5 to estimate weight in kg.
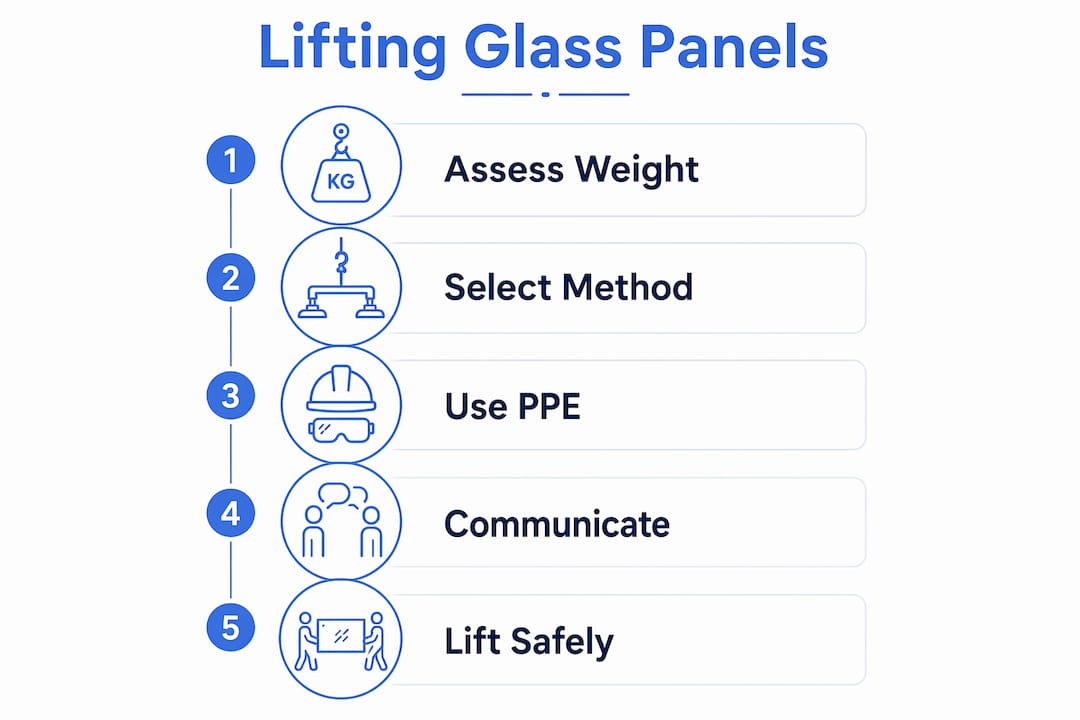
Example: A 46" × 36" panel at 10 mm thickness weighs at a level that may require two people — add additional support or use suction cups when needed.
| Panel weight | Recommended method |
|---|---|
| Small panels within safe manual limits | One person with suction cups |
| Moderate weight panels requiring team lift | Two-person team lift |
| Larger panels requiring suction assistance | Two people with handheld vacuum cups |
| Heavier panels requiring powered lifters | Portable powered vacuum lifter |
| Very heavy panels | Crane or forklift-mounted lifter with certified operator |
How Should You Store and Transport Panels On-Site?
Store panels upright on padded A-frames with edge protection. Flat storage for large panels concentrates stress and makes them far harder to pick up safely.
- Remove the front panel before accessing a rear panel in a vertical rack; never tilt a rear panel out to inspect the one behind it
- Always support the full bottom edge before raising the top
- Secure panels to dollies with straps and corner guards before any horizontal move
- Protect panels from wind exposure during outdoor transport
- Avoid carrying panels across uneven or wet surfaces
Pro Tip: Label each panel with its orientation and final install location before it leaves the staging area. Unnecessary re-handling is one of the most common causes of edge chips on a job site. See Glassrailingstore’s modular construction guide for staging layouts that cut handling time.
What Hazards Should You Watch for During a Glass Lift?
- Wind loading: Postpone outdoor lifts when gusts exceed 20 mph. A large panel acts like a sail.
- Vacuum cup failure: Contaminated or wet glass surfaces, overloading, and battery failure are the leading causes of sudden vacuum loss. Check all three before every lift.
- Edge damage: Keep panels low during transport. Bumping a corner against a wall or post is the most common source of chips.
- Unstable footing: Clear debris and level the path before moving. One trip with a glass panel in hand is a serious incident.
- Pinch points during rotation: Call “rotating” before any turn. Spotters keep hands clear of the panel face.
If any hazard appears mid-lift, lower the panel immediately to the nearest stable surface. Do not attempt to reposition while the panel is at height.
What Do You Do if Glass Breaks or a Lifter Fails?
- Call “stop” immediately. Everyone freezes. Do not attempt to catch falling glass.
- Secure the area. Move all personnel back at least 10 feet. Post a spotter to keep bystanders out.
- Treat injuries first. Apply direct pressure to cuts with a clean cloth. Call 911 for deep lacerations or any injury beyond a minor cut.
- Contain shards. Once the area is safe, use heavy-duty gloves, a stiff broom, and a shovel to collect fragments. Tempered glass breaks into small, relatively blunt pieces; laminated glass holds together but can have sharp edges at the break line.
- Document the incident. Photograph the scene, note the panel spec and serial number, record the installation step, and log equipment checks with timestamps. This protects you for insurance and replacement ordering.
For tempered panels, replacement is the only option after a break — tempered glass cannot be re-cut or repaired. Laminated panels with a contained crack may be salvageable for non-structural applications, but confirm with the manufacturer before reuse.
What Does Lifting Equipment Typically Cost, and How Long Does It Take?
Small panels moved by a two-person crew have the lowest equipment cost, but labor time adds up on large projects. Powered lifters add a rental line item while cutting per-panel handling time and breakage risk.
| Method | Typical crew time per panel | Typical cost driver |
|---|---|---|
| Manual two-person lift | 10–20 minutes (prep + lift + seat) | Labor only |
| Portable powered vacuum lifter | 5–10 minutes | — |
| Crane or forklift attachment | — | Rental + certified operator; get project-specific quotes |
These are typical industry ranges. Always source local quotes for rental equipment, since rates vary significantly by region and equipment model.
Which Products Make Lifting and Installation Safer?
Pick tempered or laminated safety glass and hardware rated for the panel thickness and site loads. The products below from Glassrailingstore each affect how a panel is lifted, seated, or secured.
- 46" Height Tempered Glass Panel: The standard panel height for most deck and balcony applications. Tempered glass breaks into small fragments rather than large shards, which is the critical safety advantage during a handling incident.
- 90 Connector for Glass Railing: Joins panels at a 90° corner. Install this hardware before seating the adjacent panel so the connector is accessible without repositioning glass.
- Wall Connector for Glass Railing: Anchors the panel run to a structural wall. Verify anchor bolt pull-out strength before loading any glass weight against the wall mount.
- Square Caprail Straight Connectors: Join caprail sections for continuous handrail runs. Tighten to manufacturer torque specs — over-tightening can induce stress fractures in the glass below.
- 180 Connector for Glass Railing: Used for straight-through runs. Seat this connector after the panel is plumb and the bottom edge is fully supported.
Place neoprene rubber setting blocks at the base of each bracket before lowering any panel. They protect the glass edge and distribute load evenly. Check Glassrailingstore’s inspection checklist for the full hardware torque and seating sequence.
Key Takeaways
Lifting glass railing panels safely requires a weight-based decision rule, correct PPE, and a planned team or mechanical aid before any panel leaves the ground.
| Point | Details |
|---|---|
| Weight drives the method | Use the 20-kg (44-lb) per-person guideline to choose manual, vacuum, or crane lift. |
| PPE is non-negotiable | Cut-resistant gloves, safety glasses, steel-toe shoes, and long sleeves before every lift. |
| Seat the bottom edge first | Always lay the full bottom edge onto setting blocks before releasing the top of the panel. |
| Test vacuum lifters for 30 seconds | If the gauge drops during the test lift, lower the panel and do not proceed. |
| Glassrailingstore products simplify the sequence | Tempered panels and compatible connectors from Glassrailingstore reduce rework and handling risk. |
What Pro Installers Actually Correct on the Job
The mistake that shows up most often on real job sites is not a wrong tool or a missing piece of PPE. It is the staging sequence. A crew will tilt a rear panel out of a vertical rack to inspect the one behind it, and that single motion puts a 60-pound pane of glass at an angle with one person holding it and no clear place to set it down. The fix is simple: remove the front panel first, store it safely, then look at what is behind it. That rule from Haworth’s site safety guidelines sounds obvious until you are on hour six of an install and trying to save two minutes.
The second pattern worth naming is over-tightening clamps. Installers who come from framing or metalwork tend to torque hardware until it feels “locked.” With glass railing clamps, that instinct causes stress fractures, sometimes immediately, sometimes days later when temperature changes load the panel. Torque to spec, not to feel.
Pre-lift briefings get skipped on small crews because everyone assumes the other person knows the plan. They usually do not. A 30-second verbal run-through of positions, commands, and the path of travel costs nothing and prevents the kind of miscommunication that drops a panel on a deck edge.
Glassrailingstore Makes Safe Installs Easier from the First Order
Glassrailingstore supplies tempered glass panels and the full hardware sequence — connectors, caprail fittings, wall mounts, and setting hardware — so you are not sourcing components from three different vendors and hoping they fit. Every panel ships as certified tempered safety glass, which means if something goes wrong during a lift, you get small fragments instead of large shards. That matters.

The 46" tempered glass panel is the go-to for deck and balcony installs, and it pairs directly with the 90 Connector, Wall Connector, Square Caprail Straight Connectors, and 180 Connector available in the same store. Free shipping applies on orders over $3,000, and the team offers quotes and planning support for both DIY homeowners and professional crews. Check the essential glass railing tools guide for a full equipment list, then request a quote at glassrailingstore.com to get your project started.
This article is general installation guidance, not professional safety or engineering advice. Confirm current OSHA requirements, local building codes, and manufacturer specifications with a qualified professional before beginning any installation.
Authoritative Resources for Training and Compliance
- OSHA Glass Handling Standards — The primary U.S. authority on construction site safety, manual handling limits, and PPE requirements. Cross-check any lift plan against current OSHA 29 CFR 1926 construction standards.
- Haworth Site Safety Guideline: Glass Handling and Storage — Detailed field-level guidance on staging, rack use, and panel movement.
- Quattrolifts: How to Lift Glass Safely — Weight calculation method and manual vs. vacuum lifter decision rules, including the 20 kg per-person guideline.
- Cimec: Safe Glass Lifter Operation — Pre-use inspection checklist and the 30-second vacuum test protocol.
- Glassrailingstore Building Codes Resource — State-by-state code summaries for glass railing installations in the U.S.
- AI applications in construction safety — Industry perspective on technology-assisted hazard monitoring for construction crews.
Always cross-check your local jurisdiction’s building code before lifting or installing. Requirements for panel height, load rating, and fastener specs vary by state and municipality.
Recommended
- How to Replace Railing Panels: A 2026 DIY Guide – The Glass Railing Store
- Glass Railing Slope Adaptation: A Practical Guide – The Glass Railing Store
- Retrofitting Existing Railings with Glass Panels: What You Need to Kno – The Glass Railing Store
- How to Secure Glass Railing Posts the Right Way – The Glass Railing Store