

Estimate Glass Railing Materials: A Contractor's Cost Guide
Budget a range for glass railing materials alone, depending on system type, glass spec, and hardware finish. That figure covers glass panels, posts or base channel, clamps, and basic anchors. It excludes labor, permits, and engineering review, which get their own line items later in this guide. Your next move: run a two-scenario estimate, standard tempered glass against premium laminated, using the worksheet below.
Cost snapshot: Framed and post-to-post systems run lower, frameless base-channel systems run higher, and three variables swing the total more than anything else.
- Glass thickness and whether laminated glass is required
- System type (framed vs. frameless vs. standoff)
- Hardware finish (aluminum vs. 316 stainless steel)
Key Takeaways
Material-only glass railing costs vary widely, with system type, glass thickness, and hardware finish being the main factors affecting the overall price.
| Point | Details |
|---|---|
| Know your baseline range | Budget $80–$130/lf for framed systems and $180–$280/lf for frameless base-channel systems. |
| Glass spec drives cost swings | Laminated glass and premium finishes add 15–40% over standard tempered pricing. |
| Build in waste and contingency | Add a 5–10% waste factor on glass and hardware before finalizing any estimate. |
| Budget for hidden costs | Permits can add $0–$800; substrate loads above 40 lb/lf may require reinforcement. |
| Get itemized SKU quotes | Glassrailingstore’s tempered panels and frameless quote tool turn a worksheet range into a real, itemized bill of materials. |
Table of Contents
- How to Estimate Glass Railing Materials by System Type
- What Drives the Material Cost of Glass Railing?
- Which Glass Railing System Type Fits Your Project?
- Tempered vs. Laminated Glass: Which Do You Need?
- How Do You Turn Linear Footage Into a Material Count?
- Sample Glass Railing Projects and Material Totals
- What Hidden Costs Should You Budget For?
- How Do You Get an Accurate Material Quote From a Supplier?
- Are There Online Calculators for Glass Railing Materials?
- Get Real SKU Pricing Once Your Estimate Is Set
- Sources
How to Estimate Glass Railing Materials by System Type
Material-only pricing splits sharply by system architecture, and the gap between the cheapest and most expensive option is wider than most first-time buyers expect. Framed and semi-framed systems, where a top and bottom rail sandwich the glass, typically run $80 to $130 per linear foot installed, according to DeckMath’s cost breakdown. Frameless base-channel systems, where the glass sits in a continuous aluminum or stainless track with no visible posts, run $180 to $280 per linear foot. Post-to-post and standoff-mounted systems generally land between those two ranges, closer to framed pricing when posts are aluminum and closer to frameless pricing when hardware is stainless with a full-height glass look.
These ranges assume a 36 to 42 inch guard height, standard clear tempered or 1/2 inch laminated glass where code requires it, straight runs, and normal ground-level access. Curves, corners, and elevated or coastal sites push every number up.
What Drives the Material Cost of Glass Railing?
Glass itself is usually the single biggest line item, but hardware adds up fast once you count every post, clamp, and connector. Materials commonly run $100 to $400 per linear foot once you factor in thicker glass and premium hardware, with labor quoted separately at $50 to $200 per linear foot.
Here’s roughly how the components break down on a typical residential job:
- Tempered glass panels: $25 to $50 per square foot, more for laminated or low-iron.
- Posts (aluminum): $40 to $80 each; stainless steel posts run $90 to $180 each.
- Base channel (frameless systems): $30 to $60 per linear foot, material only.
- Panel clamps: $15 to $40 per clamp, two to four per panel depending on spacing.
- Corner and wall connectors: $20 to $70 per unit depending on angle and finish.
Switching from powder-coated aluminum to 316 marine-grade stainless steel hardware typically adds 30 to 50 percent to the hardware subtotal, though it earns its keep on oceanfront or high-humidity jobs where aluminum corrodes faster. A quick way to sanity-check a supplier quote: multiply your total linear footage by the low and high per-unit costs above, then compare that range to the vendor’s line-item total.
Which Glass Railing System Type Fits Your Project?
The system you choose sets the ceiling on your budget before you even get to glass spec. Frameless systems give you the cleanest sightline and command the highest material cost because the glass itself has to do structural work that a rail or post would otherwise handle. Post-to-post systems split the difference: you keep visible posts (lower engineering demand) but still get a modern look. Standoff-mounted systems bolt panels directly to a wall or fascia with no base channel, which suits balconies where you want the glass to appear to float.
| System | Best use case | Cost impact |
|---|---|---|
| Frameless / base channel | Oceanfront decks, high-end balconies | Highest: thicker laminated glass, engineered anchors |
| Post-to-post | Standard decks, budget-conscious remodels | Moderate |
| Standoff-mounted | Balconies, wall-adjacent runs | Moderate to high |
| Semi-framed | Interior stairs, transitional style | Lowest |
- Elevated or coastal frameless installs almost always require laminated glass and an engineer stamp on the anchor plan.
- Interior stair railings rarely need laminated glass unless local code specifies it for that application.
Tempered vs. Laminated Glass: Which Do You Need?
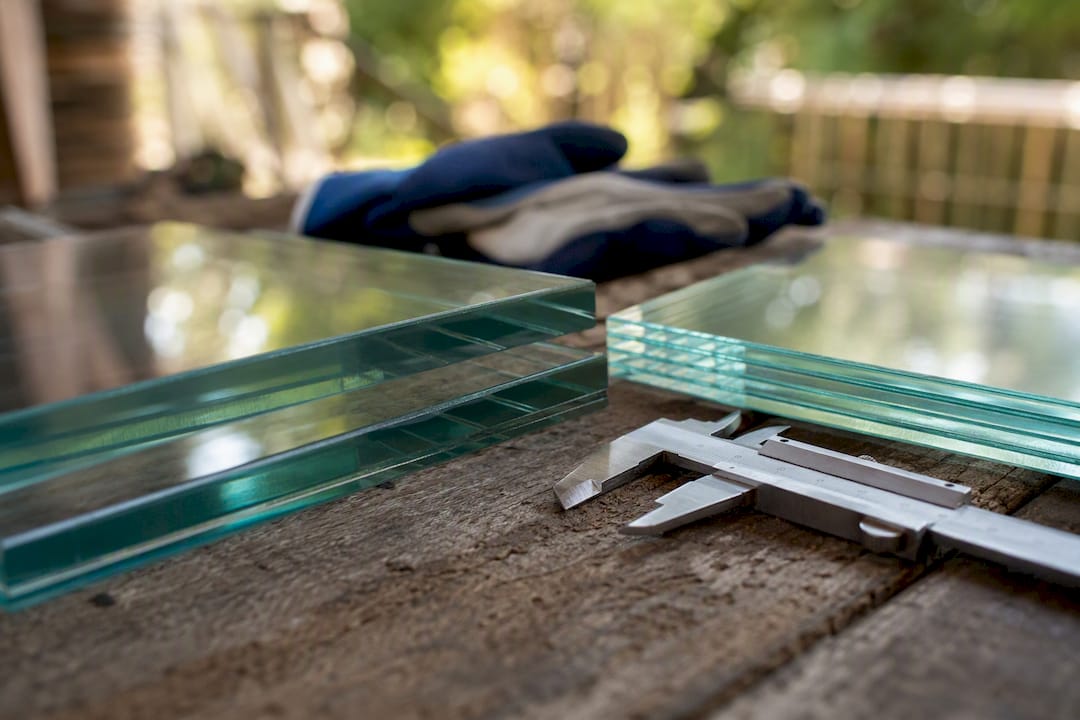
Most framed residential jobs use standard 10mm (3/8 inch) tempered glass. Frameless and base-channel systems need more: a 12mm tempered laminated minimum is standard practice, and DeckMath notes that many jurisdictions require an engineer’s stamp for frameless installs on elevated or coastal sites. High-wind zones and commercial applications often call for 13.5mm laminated glass.
Premium finishes change the number fast. Low-iron, tinted, and frosted glass options add roughly 15 to 40 percent over standard clear tempered glass, depending on the treatment and thickness you choose. Glass Railing Store’s own comparison of laminated versus tempered glass walks through exactly when code forces the laminated upgrade and when tempered alone is sufficient.
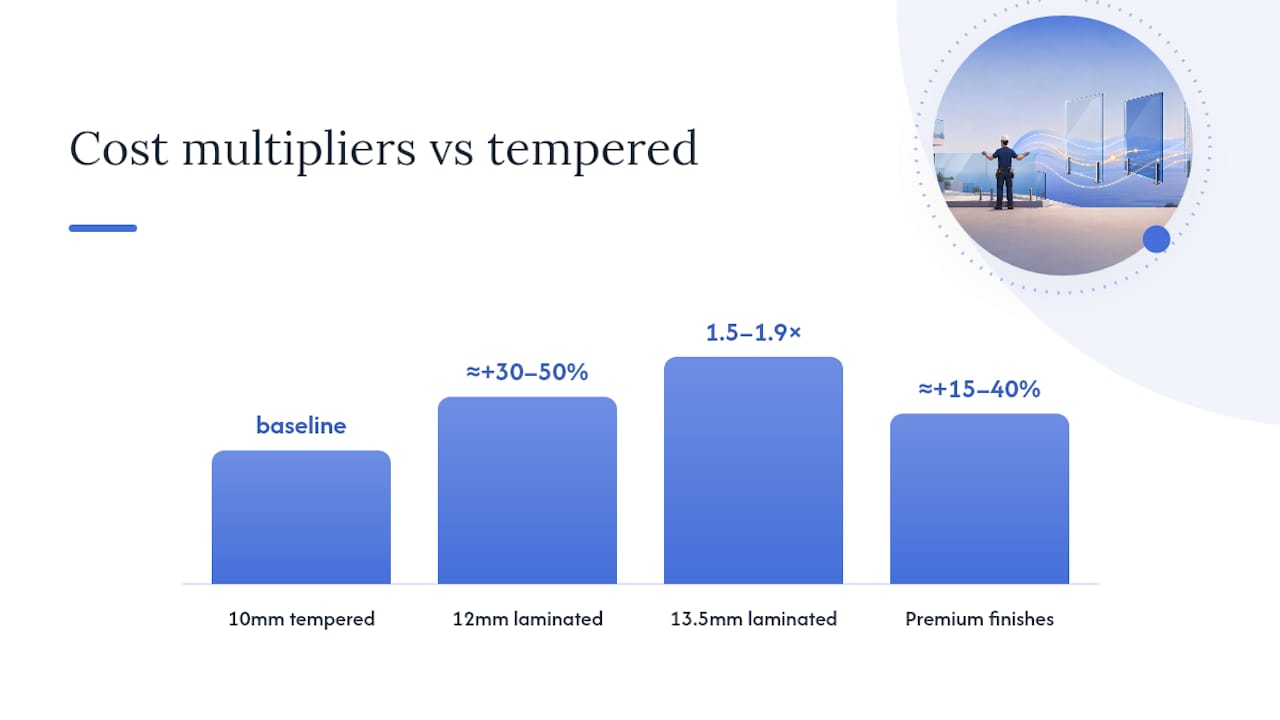
| Spec | Typical use | Cost multiplier vs. standard tempered |
|---|---|---|
| 10mm tempered | Framed residential | baseline |
| 12mm tempered laminated | Frameless, base-channel | roughly 30 to 50 percent |
| 13.5mm laminated | High-wind, commercial | 1.5x to 1.9x |
| Low-iron / frosted / tinted | Any system (upgrade) | roughly 15 to 40 percent |
Pro Tip: Run your estimate twice, once with standard clear tempered glass and standard hardware, once with laminated premium glass and hidden-fastener hardware. The gap between those two numbers is your real budget window, not a single guess.
For a deeper dive into thickness selection by application, Glass Railing Store’s thickness guide breaks down recommendations by system and code zone.
How Do You Turn Linear Footage Into a Material Count?
A materials takeoff is just arithmetic once you know the inputs. Here’s the process:
- Measure total linear footage and required guard height (typically 36 or 42 inches by code).
- Divide footage by target panel width. Most frameless panels run 36 to 48 inches wide; framed panels can go slightly wider. Round down to the manufacturer’s standard size.
- Calculate glass area in square feet per panel, multiply by per-square-foot glass cost, then multiply by panel count.
- Count hardware: one base-channel run per linear foot, or two to four clamps per panel, plus one post per panel gap for post-to-post systems.
- Add connectors for every corner or wall termination.
- Apply a waste and breakage factor of 5 to 10 percent on glass panels and small hardware, per installation calculator guidance; go higher for curved runs or tight access.
Worked example: a 30 foot deck at 36 inches high, frameless spec, comes to roughly 8 panels at 42 inches wide plus base channel and anchors, versus 8 to 10 panels with posts and clamps for a post-to-post version. The frameless version costs more in glass and channel; the post-to-post version spreads cost across more individual hardware pieces.
Pro Tip: Keep a running checklist: linear footage, panel count, glass square footage, post or clamp count, connector count, and waste percentage. That six-line worksheet catches most quoting errors before they reach the supplier.
Sample Glass Railing Projects and Material Totals
Real numbers help more than formulas. Here are three common jobs, with the assumptions that drive their totals.
Small balcony, 12 linear feet, standoff-mounted: Standard tempered glass, four panels, stainless standoff hardware, wall-adjacent mounting. Materials subtotal: roughly $1,900 to $2,900.
30 foot deck, post-to-post: 3/8 inch tempered glass, aluminum posts, straight run, standard clamps. Materials subtotal: roughly $3,000 to $5,400.
Interior stair, 18 linear feet, semi-framed: Tempered glass, no laminated requirement, standard finish. Materials subtotal: roughly $1,600 to $2,600.
These totals assume normal access and no engineering review. Elevated exterior runs, curved layouts, or coastal exposure push every one of these numbers up, and any job requiring laminated glass or an engineer’s stamp adds cost outside the base material figure. CurrentCost’s project scenarios show similar spreads for 40 to 60 foot runs when you scale these examples up.
What Hidden Costs Should You Budget For?
Permit and inspection fees add $0 to $800 depending on your jurisdiction and railing height, according to HomeGuide’s cost data. Substrate loads above roughly 40 pounds per linear foot often trigger structural reinforcement, an added cost most first-time estimates miss entirely.
- Anchor bolts and shims beyond the base hardware kit
- Sealants and weatherproofing at glass-to-substrate joints
- Site protection and post-installation cleanup
- Travel or special-access fees for difficult sites
How Do You Get an Accurate Material Quote From a Supplier?
The single biggest mistake buyers make is comparing quotes that aren’t measuring the same thing. Give every supplier the same information, and you’ll get numbers you can actually stack against each other.
What to send suppliers:
- Total linear footage and required guard height
- Panel layout (straight run, corners, curves)
- Glass spec: tempered or laminated, thickness, tint or frosting
- Hardware finish preference (aluminum or stainless)
- Mounting substrate (wood deck, concrete, masonry)
- Site access notes (stairs, elevation, delivery constraints)
What to ask:
- Is glass factory pre-drilled for standoff or clamp hardware?
- What’s current lead time on tempered vs. laminated orders?
- What’s the return or replacement policy on broken panels?
- Is the quote itemized, with materials separated from labor?
Request an itemized bill of materials from every vendor. Glass Railing Store’s own glass pricing guide shows what SKU-level pricing looks like, which gives you a real benchmark for comparing what a supplier hands you.
Are There Online Calculators for Glass Railing Materials?
Yes, and using one before you call a supplier saves real time. Tools like ProGlass GV’s cost calculator ask for total linear footage, guard height, system type, glass type and thickness, and substrate material, then return a panel count, estimated glass weight, and a rough bill of materials.
The output is only as good as the inputs, so measure twice before you touch the calculator. Total linear footage needs to reflect the actual guard run, not the deck perimeter. Height should match your local code minimum, usually 36 inches for residential decks and 42 inches for commercial applications, since a taller guard means larger, heavier, and more expensive panels. System type matters because a frameless calculator defaults to thicker laminated glass and closer anchor spacing, while a post-to-post calculator assumes standard tempered glass and wider post spacing.
Most calculators also ask whether you’re mounting to wood, concrete, or masonry, because that substrate choice changes which anchor hardware the tool recommends and, by extension, the hardware subtotal. Some tools, like CR Laurence’s estimating software, go further and generate a full parts list with pricing that you can hand directly to a supplier or use to place an order.
Run the numbers through two or three calculators if you can. They rarely agree exactly, since each one uses slightly different default assumptions on waste factor and hardware spacing, but the spread between them tells you how much cushion to build into your budget before you request a formal quote.
What Real Installs Teach You That Quotes Don’t
Every quote I’ve reviewed under-counts something small: an extra wall connector, a reinforcement bracket, a longer anchor bolt for a thicker deck board. Always run two scenarios and keep a contingency line for waste and surprise hardware. When you’re ready to move past estimating, Glass Railing Store’s frameless quote page turns your numbers into a real supplier bill of materials.
Get Real SKU Pricing Once Your Estimate Is Set
Once your worksheet gives you a realistic range, the fastest way to close the gap between estimate and actual cost is pricing against real SKUs instead of averages. Glassrailingstore stocks tempered glass panels in standard sizes, complete frameless kits, and stainless steel hardware including connectors and wall mounts, so the numbers in your takeoff match what actually ships.

If your project needs a frameless base-channel system, request a frameless glass railing quote and get an itemized bill of materials built from your exact linear footage and glass spec, not a generic per-foot average. Compare that itemized BoM line by line against the worksheet you built here. If the numbers are close, you’ve done your homework right. If they’re not, you’ll know exactly which line item to question before you order.
Sources
Cross-check your worksheet against a real calculator before you commit to a budget.
- Glass Railing Calculator — Framed vs Frameless + Cost | DeckMath
- Glass Railing Systems Prices: How Much for Frameless Balustrades in the U.S. 2026 – Current Cost
- How Much Do Glass Railings Cost in 2026? (Stair & Deck)
- Glass Railings Installation Cost Calculator | California
Recommended
- Glass Railing Installation Costs: Factors Affecting the Cost – The Glass Railing Store
- Glass Deck Railing Cost: What to Budget per Linear Foot – The Glass Railing Store
- Glass Pricing Guide: What Custom Panels Really Cost – The Glass Railing Store
- Deck Framing for Glass Railing: A Builder’s Guide – The Glass Railing Store