
Essential Glass Railing Tools for Builders and Homeowners
Essential glass railing tools are specialized instruments used to measure accurately, handle tempered glass panels safely, and fasten hardware securely during installation. The right glass railing tool kit determines whether your finished system looks polished and holds up structurally, or ends up with misaligned panels and loose fittings. This guide covers every category of must-have glass railing equipment, from laser levels to torque wrenches, with material-specific recommendations and pro tips that most installation guides skip entirely.
1. Essential glass railing tools: measuring and leveling
Accurate layout is the foundation of every successful glass railing installation. Core tools for spigot installation include a quality tape measure, spirit level or laser level, power drill with bits, anchor bolts, and a wrench or socket set. Each of these serves a specific function, and substituting a lesser version creates compounding errors down the line.
For measuring, a steel tape measure with a locking blade gives you reliable readings on deck spans and post spacing. A laser distance measurer adds speed and accuracy when you are working alone across a wide deck or staircase. For layout lines, a chalk line snapped between anchor points keeps your post spacing consistent before you drill a single hole.
Leveling is where most DIY installations go wrong. A 4-foot spirit level works for individual posts, but a laser level with a receiver is the tool that separates a professional result from an amateur one. Laser levels with receivers improve layout accuracy in outdoor deck installations where bright sunlight makes the laser beam invisible to the naked eye.
- Steel tape measure (25-foot minimum)
- Laser distance measurer
- 4-foot spirit level
- Rotary or line laser level with receiver
- Chalk line and marking pencil
Pro Tip: On outdoor decks, always use a laser level with a receiver rather than relying on the visible beam alone. Sunlight washes out the line, and even a 2-degree error in post alignment becomes obvious once the glass panels are in.
2. Drilling and fastening tools for secure mounting
The substrate under your deck determines which drilling and fastening tools you need. Power drills with concrete or masonry bits sized 10 to 12mm, allen keys, rubber mallets, and silicone sealant guns are standard for aluminum glass railing installation on concrete or masonry surfaces. For wood decks, you swap masonry bits for sharp twist bits and replace expansion anchors with lag screws.
Here is the standard tool sequence for drilling and fastening:
- Mark all post locations using your chalk line and tape measure.
- Use a hammer drill with a carbide-tipped masonry bit for concrete substrates.
- Switch to a standard power drill with a twist bit for wood or composite decking.
- Insert expansion anchors for concrete or drive lag screws for wood framing.
- Hand-thread all hardware before applying final torque.
- Use a calibrated torque wrench to tighten to manufacturer specifications.
Anchor bolts for concrete and lag screws for wood are the standard fasteners, and torque wrenches are critical because over-tightening can crack glass or strip hardware threads. This is the step most homeowners skip, reaching for a standard wrench and guessing at tension. That guess costs you glass panels.
A socket set with metric and standard sizes covers most glass railing hardware. Hex keys, also called allen keys, handle set screws on spigots and clamps. Keep both short and long-arm versions on hand since recessed hardware often requires the extra reach.
Pro Tip: Always check the torque specification in your hardware manufacturer’s documentation before you start. A torque wrench calibrated to that spec takes the guesswork out entirely and protects both the glass and the mounting hardware.
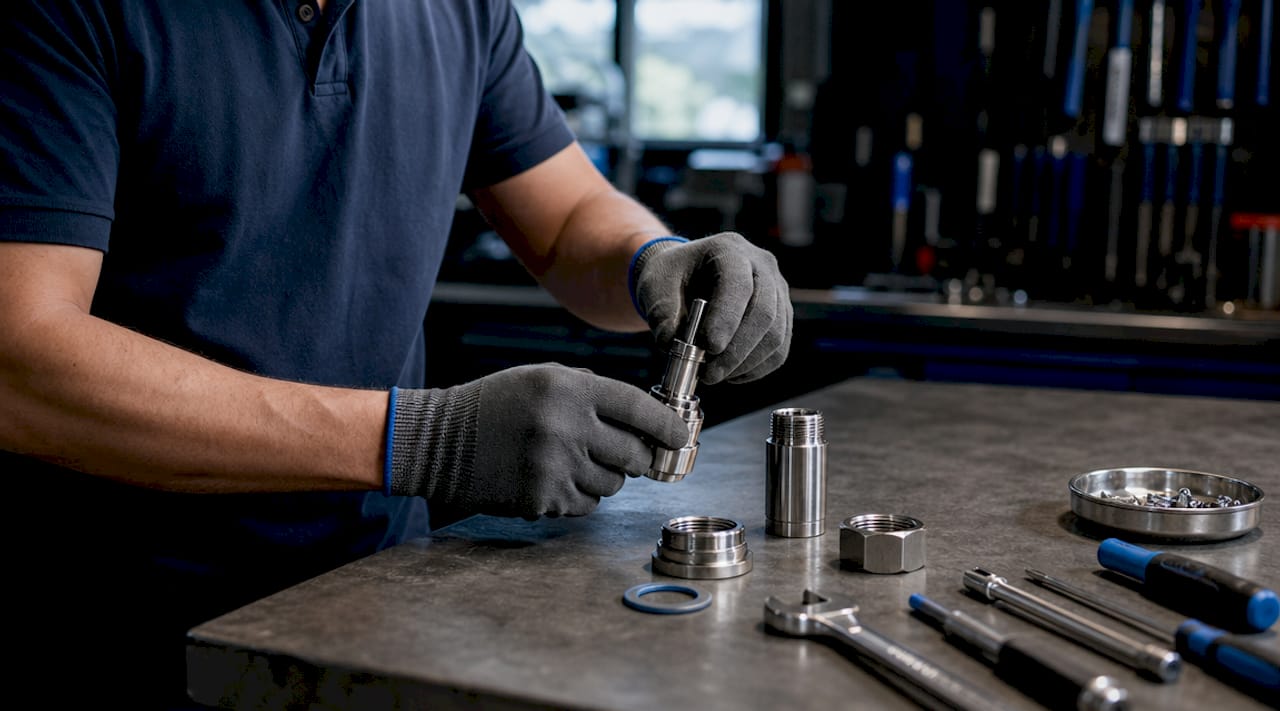
3. Specialized glass handling tools and protective gear
Glass panels for railings are heavy, slick, and unforgiving of poor grip. Professional glass handling relies on suction cups, protective gloves, rubber gaskets, clamps, and spigots to protect both the installer and the glass surface during lifting and positioning. A single dropped panel does not just break glass. It creates a safety hazard and a significant replacement cost.
Suction cup lifters are the single most important glass handling tool in your kit. Two-point lifters work for panels under 100 pounds. For larger frameless panels, a four-point vacuum lifter distributes the load and gives you better control during placement into spigots or base shoe channels.
- Dual-handle suction cup lifters (rated for your panel weight)
- Rubber setting blocks to protect glass edges in base shoe channels
- Rubber gaskets and neoprene pads for spigot fittings
- Glass clamps for temporary positioning during alignment
- Felt-lined panel storage stands to prevent scratches during staging
Safety glasses, gloves, and proper footwear are mandated for installer safety during glass railing work. Tempered glass shatters into small fragments rather than large shards, but those fragments are still sharp and travel fast. Closed-toe boots with puncture-resistant soles are non-negotiable on any glass installation site.
Pro Tip: Never set a glass panel directly on a concrete or wood surface. Always use rubber setting blocks or a felt-lined stand. Even a small piece of grit trapped under the panel edge can cause a stress fracture that shows up days after installation.
4. Tool requirements by installation type and substrate
Not every glass railing system uses the same hardware, and your tool kit needs to match the system you are installing. The table below compares the core glass railing installation tools by system type and substrate.
| Installation type | Substrate | Key tools required | Notes |
|---|---|---|---|
| Spigot-mounted frameless | Concrete | Hammer drill, masonry bits, expansion anchors, torque wrench | Precise spigot spacing is critical |
| Spigot-mounted frameless | Wood deck | Power drill, twist bits, lag screws, torque wrench | Pre-drill to prevent splitting |
| Base shoe channel | Concrete or wood | Circular saw or grinder, drill, anchor bolts, rubber mallet | Channel must be perfectly level |
| Clamp system | Wood or metal | Drill, hex keys, socket set, suction cups | Clamp torque spec varies by brand |
| Framed aluminum system | Concrete | Hammer drill, masonry bits, silicone gun, allen keys | Sealant gun needed for weatherproofing |
Frameless glass railing systems require specialized setting tools and highly precise drilling because the glass cannot be cut or adjusted after tempering. This is the defining constraint of frameless work. Every measurement and every drilled hole must be correct before the glass arrives on site. A framed aluminum system gives you slightly more tolerance since the frame absorbs minor alignment errors, but frameless systems expose every mistake.
Indoor installations typically involve wood or tile substrates and lighter panels, which reduces the need for heavy-duty hammer drills. Outdoor installations on concrete pool decks or elevated balconies demand the full range of masonry tools and corrosion-resistant hardware. For a detailed breakdown of support system requirements, the substrate and load conditions drive every tool and hardware decision.
5. Additional tools that prevent costly mistakes
The tools in this section do not get mentioned in basic installation guides, but they are the ones that separate a clean finished job from one that needs rework. Shimming at base posts before setting glass is the workflow step that achieves a perfectly plumb and aligned railing, reducing post-installation corrections significantly.
Plastic shims and a rubber mallet let you make micro-adjustments to post plumb before final tightening. Once the glass is in, you cannot correct a leaning post without removing the panel. A digital level app on a smartphone works as a quick check, but a dedicated digital angle gauge gives you a more reliable reading on post plumb.
- Plastic shims for post base adjustment
- Rubber mallet for seating hardware without damage
- Silicone sealant gun with marine-grade silicone for outdoor weatherproofing
- Hex key set (metric and standard) for set screws
- Cleaning cloths and isopropyl alcohol for glass surface prep before final inspection
Even minimal twisting or misalignment during installation creates visible panel angle errors that cannot be corrected after the fact. This means your shimming and leveling work before final tightening is the last chance to fix anything. Take the time to check every post with a level before you torque down a single bolt.
Silicone sealant guns loaded with marine-grade silicone are the finishing tool for outdoor base shoe installations. The sealant seals the channel against water intrusion and prevents the glass from rattling in wind. Use a caulk smoothing tool or a wet finger to create a clean bead, and wipe excess immediately with isopropyl alcohol before it cures.
Pro Tip: Work in this sequence: measure and mark, drill and anchor, shim and level posts, set glass with suction cups, check alignment, then torque to spec. Skipping the shim and level step before torquing is the single most common cause of misaligned panels.
Key takeaways
A complete glass railing tool kit covering measuring, drilling, glass handling, and fastening is the difference between a professional result and a costly rework.
| Point | Details |
|---|---|
| Laser levels beat spirit levels outdoors | Use a laser level with a receiver on outdoor decks where sunlight obscures the beam. |
| Torque wrenches are non-negotiable | Calibrate to manufacturer specs to avoid cracking glass or stripping hardware threads. |
| Suction cup lifters protect panels and installers | Use four-point lifters for large frameless panels to distribute weight safely. |
| Substrate drives tool selection | Concrete requires hammer drills and expansion anchors; wood needs twist bits and lag screws. |
| Shim before you torque | Adjust post plumb with plastic shims before final tightening to prevent permanent misalignment. |
Why I trust the tools more than the technique
After years of reviewing glass railing installations across residential decks, commercial balconies, and pool enclosures, the pattern is consistent. The jobs that go wrong almost never fail because of a bad installer. They fail because someone used the wrong tool for the substrate, skipped the torque wrench, or tried to eyeball level instead of using a laser.
The most underrated item in any glass railing tool kit is the calibrated torque wrench. Most builders own one. Few use it consistently on glass railing hardware because the fittings feel tight by hand and the temptation is to move on. Torque wrenches calibrated to manufacturer specifications prevent hardware overtightening that can damage glass or mounting fabrications. That sentence sounds obvious until you are looking at a stress fracture in a $400 tempered panel.
I also think the glass handling tools get underbudgeted. Homeowners will spend $3,000 on panels and hardware, then try to carry them by hand to save $80 on suction cup lifters. The glass panel measurement guide at Glassrailingstore makes clear how precise the sizing tolerances are. A panel that arrives perfectly sized can be ruined in 10 seconds by a dropped edge on concrete.
Respect the tools. Buy the torque wrench. Rent the four-point lifter if you only need it once. The glass does not forgive improvisation.
— Fuanne
Get the right hardware from Glassrailingstore
Glassrailingstore carries the hardware and glass panels that work with the tools in this guide. Whether you are installing a frameless spigot system on a concrete deck or a clamp-based railing on a wood balcony, the product selection is built around real installation requirements. Browse tempered glass panels sized for standard railing heights, and check the engineering testing page to confirm load ratings and compliance standards before you order. All hardware is marine-grade stainless steel rated for outdoor exposure, and orders over $3,000 ship free. If you need help sizing your project, the Glassrailingstore team provides quotes and planning support directly.
FAQs
1. What are the most important tools for glass railing installation?
A tape measure, laser level, power drill with substrate-appropriate bits, torque wrench, and suction cup lifters form the core glass railing tool kit. These cover measuring, fastening, and safe panel handling for most residential and commercial systems.
2. Do I need different drill bits for concrete vs. wood decks?
Yes. Concrete and masonry substrates require a hammer drill with carbide-tipped masonry bits sized 10 to 12mm, while wood decks use a standard power drill with sharp twist bits and lag screws instead of expansion anchors.
3. Why is a torque wrench necessary for glass railing hardware?
Over-tightening glass railing fittings by hand can crack tempered glass or strip hardware threads. A torque wrench calibrated to the manufacturer’s specification applies the correct tension without guesswork or damage.
4. Can I install frameless glass railings without specialized tools?
Frameless systems require precise drilling and setting tools because the glass cannot be cut or adjusted after tempering. Attempting installation without a laser level, calibrated torque wrench, and suction cup lifters significantly increases the risk of panel misalignment or breakage.
5. What protective gear is required during glass railing installation?
Safety glasses, cut-resistant gloves, and closed-toe boots with puncture-resistant soles are the minimum personal protective equipment for any glass railing installation, protecting against glass fragments and tool hazards.
Recommended
- DIY glass stair railing: A complete homeowner’s guide – The Glass Railing Store
- Glass railing durability: Build it right, build it to last – The Glass Railing Store
- Defining premium glass railing systems: a homeowner’s guide – The Glass Railing Store
- Glass Railing Installation Guide – The Glass Railing Store