
How to Align Glass Railing Panels: A DIY Guide
Proper glass railing panel alignment is the process of positioning each tempered glass panel so it sits level, plumb, and evenly spaced within its mounting system. Get it wrong and you risk both structural failure and an installation that looks visibly off. Get it right and you have a railing that passes inspection, holds up in wind, and gives you unobstructed views from every angle. This guide walks you through the tools, site preparation, step-by-step installation, and final checks you need to align glass railing panels correctly the first time.
How to Align Glass Railing Panels: Tools and Materials You Need First
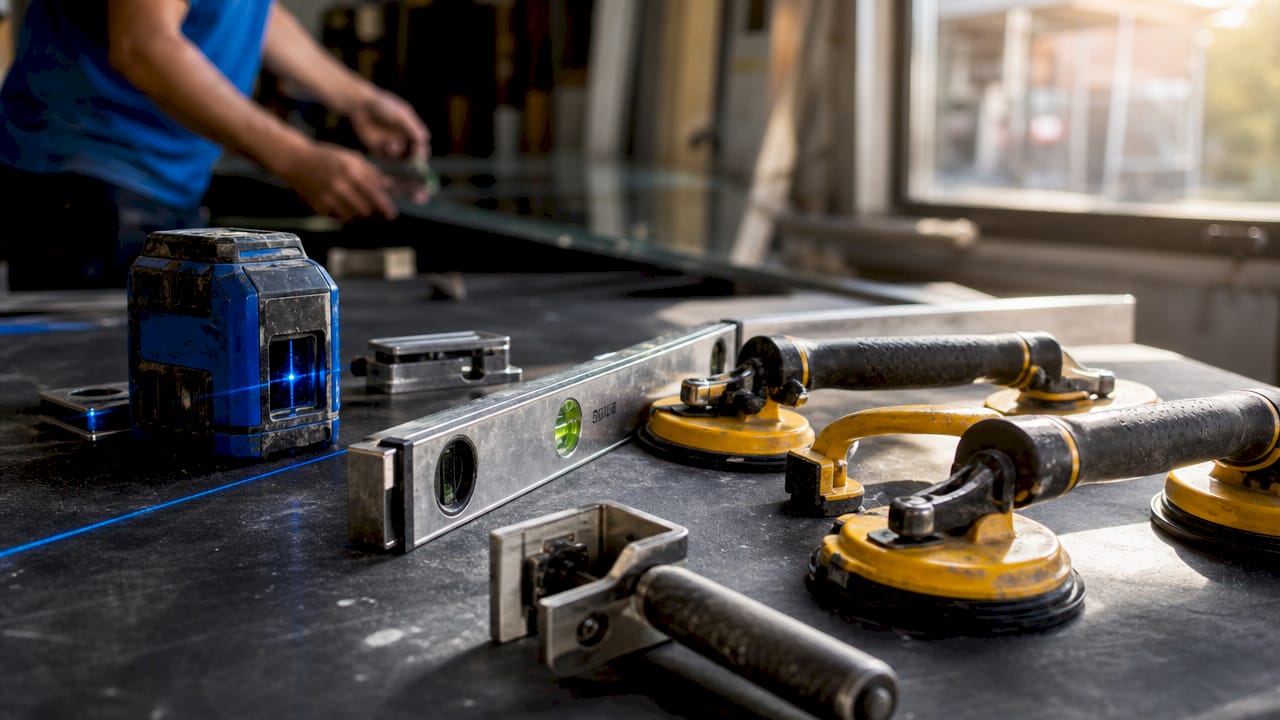
The right tools make the difference between a panel that sits perfectly and one you have to pull out and redo. Gather everything before you start.
Critical tools:
- Laser level — projects a perfectly horizontal or vertical reference line across your entire run
- Spirit level — confirms plumb and level at each individual post or bracket
- Suction cups — the only safe way to lift and position tempered glass panels without touching edges directly
- Neoprene or rubber setting blocks — cushion the glass inside the channel and allow for thermal expansion
- Clamps and wedges — hold panels in position while you check alignment before final tightening
- Measuring tape and string line — establish consistent reference points across the full run
- Drill and appropriate fasteners — secure base profiles and brackets to the substrate
- Silicone sealant — seals gaps after final positioning
| Tool | Function |
|---|---|
| Laser level | Projects reference lines for horizontal and vertical alignment |
| Spirit level | Checks plumb at individual posts and brackets |
| Suction cups | Lifts glass safely without edge contact |
| Neoprene setting blocks | Cushions glass and allows thermal movement |
| Clamps and wedges | Holds panels during alignment checks |
| String line | Establishes a consistent reference across the full run |
Tempered safety glass is mandatory for railings, and panels must be handled using suction cups with personal protective equipment at all times. That means safety glasses and gloves before you touch a single panel.
Pro Tip: Buy one extra pair of suction cups. Lifting a glass panel alone is possible but risky. Two people, each with a suction cup handle, gives you control over both ends of the panel simultaneously.
How to Prepare the Installation Site for Accurate Panel Alignment
Frameless glass systems require extremely precise site preparation. The floor must be perfectly level and walls plumb before a single panel goes in. Skipping this step is the single most common reason DIY glass railing installations end up misaligned.
Follow these steps in order:
-
Check the floor for level. Run your laser level across the full length of the installation. Mark any high or low spots with a pencil. A floor that varies by more than a few millimeters will throw off every panel above it.
-
Check walls and posts for plumb. Hold your spirit level against each post or wall-mounting surface. Any surface that leans forward or back will tilt the glass panel and create visible gaps at the top rail.
-
Mark your fixing points. Use a string line or laser guide to mark where each bracket or base profile will land. For continuous base profile systems, fixing holes should be spaced every 300–400mm. For bracket systems, space them every 600–800mm depending on wind load requirements.
-
Install posts and brackets. Drive fasteners into your marked points. Check each post with a spirit level immediately after installation. Do not move to the next post until the current one reads perfectly plumb.
-
Verify the full run. After all posts are in, run your laser level across the tops. Every post should intersect the same laser line. If one sits high or low, adjust before you bring any glass near the site.
Pro Tip: Double-check alignment after drilling each hole, not just after the full run is complete. A single off-center hole forces you to re-drill or use an oversized fastener, which weakens the connection.
Spacing fixing holes correctly according to system type and structural requirements is critical for stability. Wind load is a real factor on decks and balconies, and under-spaced brackets can allow panels to flex under pressure, which shifts alignment over time.
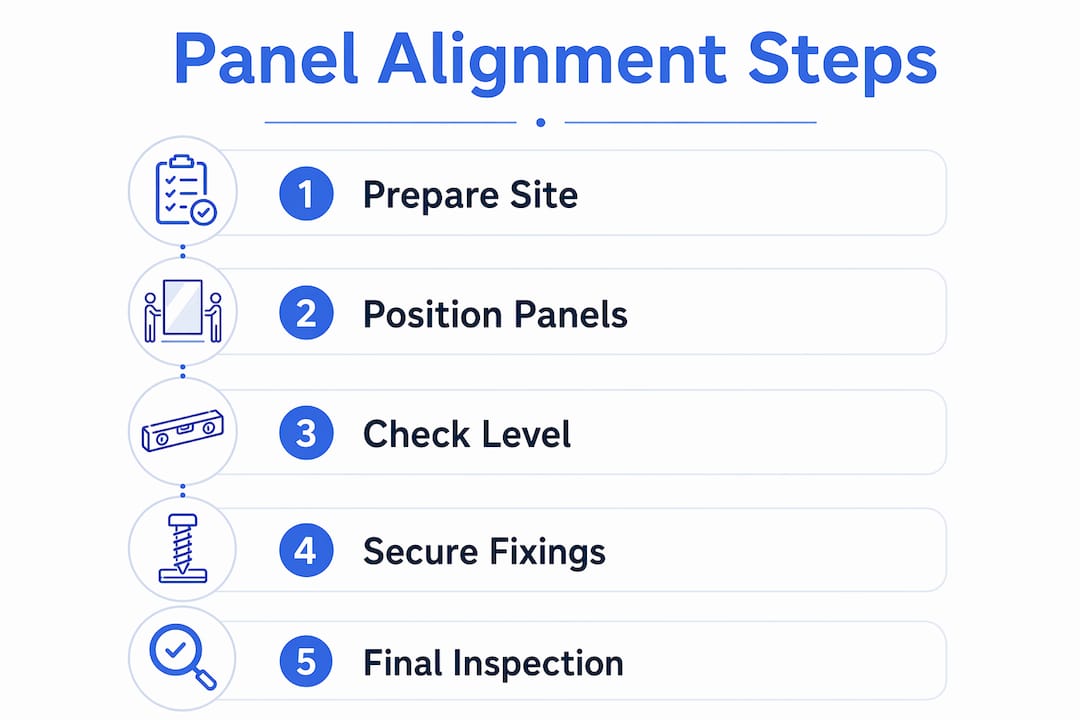
Step-by-Step Process for Installing and Aligning Glass Panels
With the site prepared and posts confirmed plumb, you are ready to place glass. Work methodically. Each panel affects the next.
-
Place setting blocks inside the channel. Drop neoprene or rubber setting blocks into the base channel or bracket before lifting any glass. Glass panels must not sit directly on metal or masonry but on these blocks to avoid edge damage and allow for thermal movement. Position one block roughly one quarter of the way in from each end of the panel.
-
Lift the panel using suction cups. Attach suction cups to the flat face of the panel, not the edge. Two people should lift together, keeping the panel vertical at all times. Carry it straight to the channel without tilting.
-
Lower the panel onto the setting blocks. The Gravity-First method distributes panel weight evenly on the rubber blocks inside the base channel. This prevents lateral force on the anchors, which can cause stress fractures or anchor failure over time. Lower slowly and let the weight settle before releasing the suction cups.
-
Apply clamps and wedges. Fit your clamps loosely around the panel. Use wedges to nudge the panel left or right until it sits centered in the channel. Maintain a consistent gap of 3–5mm between adjacent panels to allow for thermal expansion.
-
Check level and plumb. Place your spirit level against the face of the panel. Check both vertical edges. Then run your laser level across the top edge. The panel top must intersect the same reference line as every other panel in the run.
-
Tighten clamps gradually. Tighten each clamp in small increments, alternating sides. Never tighten one side fully before the other. Uneven clamping creates stress points in the glass.
-
Repeat for each panel. Check that each new panel aligns on the same horizontal plane as the previous one before moving forward.
Pro Tip: Use a thin plastic shim between the glass edge and the channel wall if a panel keeps drifting to one side. Shims give you fine control without forcing the glass.
Safety reminders:
- Never force a panel into position. If it does not fit smoothly, stop and re-check alignment to avoid damage and safety risks.
- Always wear cut-resistant gloves when handling glass edges.
- Keep bystanders away from the work area during panel lifting.
How to Troubleshoot Common Glass Railing Alignment Issues
Even careful installers run into problems. Knowing what to look for saves you from pulling panels out unnecessarily.
Common alignment problems include placing panels off-center in channels, overtightening clamps which creates stress points, and neglecting consistent panel spacing. Each of these mistakes is fixable if caught early.
Common issues and fixes:
- Panel sits off-center in the channel. Loosen the clamps, reposition the setting blocks, and re-center using wedges before re-tightening.
- Glass edge resting on metal. Remove the panel, add a setting block at the contact point, and re-seat the glass. Metal-to-glass contact causes edge chips and, over time, cracking.
- Uneven post heights. If one post sits higher than the others, the top rail will slope visibly. Shim the base of the low post or re-drill the high one before proceeding.
- Panel leans forward or back. The mounting surface is not plumb. Loosen the bracket, insert a shim behind it, and re-check with a spirit level.
Safety warning: Never use force to push a glass panel into a tight channel. Tempered glass does not bend. Forcing it creates internal stress that can cause spontaneous shattering hours or days after installation.
Always perform an eye test from multiple angles after mechanical checks. Stand at one end of the run and sight down the top edge of all panels. They should form a single, unbroken line. Step back and look at the face of the installation. Gaps should be consistent. Panels should appear flush with each other.
Pro Tip: If you cannot identify why a panel looks wrong after checking level and plumb, photograph the installation from 10 feet away. The camera catches alignment issues your eyes sometimes miss up close.
When to call a professional: if your substrate is out of level by more than 10mm over the run, or if any panel shows a chip or crack after installation, stop and consult a licensed glazier. Structural glass failures are not a DIY repair.
How to Verify the Final Installation for Alignment, Safety, and Aesthetics
Final verification is not optional. It is the step that separates a safe installation from a liability.
Final checklist:
- Run your laser level across the top edge of all panels one last time. Every panel top should touch the same reference line.
- Check each panel face with a spirit level. Both vertical edges must read plumb.
- Inspect all clamps and fasteners. They should be firm but not over-tightened. You should not be able to rotate a clamp by hand, but you should not need a breaker bar to tighten it either.
- Check panel spacing at every joint. Gaps should be consistent throughout the run.
- Use laser and spirit levels to confirm verticals and horizontals match your original reference lines.
- Clean all glass surfaces with a non-abrasive glass cleaner. Proper cleaning after installation removes installation residue and preserves the aesthetic finish.
- Inspect each panel face for chips, scratches, or stress marks. Any damage to tempered glass requires panel replacement, not repair.
For long-term alignment, check your railing twice a year. Thermal expansion and contraction, especially on south-facing decks, can gradually shift panels. Re-tighten loose clamps and re-check plumb each spring and fall.
Key Takeaways
Aligning glass railing panels correctly requires level surfaces, proper setting blocks, and consistent checks at every stage of installation.
| Point | Details |
|---|---|
| Site preparation is non-negotiable | Check floor level and post plumb before placing any glass panel. |
| Setting blocks protect the glass | Neoprene blocks prevent edge damage and allow thermal movement inside the channel. |
| Check alignment at every panel | Use a laser level and spirit level after each panel, not just at the end. |
| Never force glass into position | Forcing a panel creates internal stress that can cause shattering after installation. |
| Final eye test confirms the result | Sight down the full run from one end to catch alignment issues no tool will show. |
What I Have Learned from Watching DIY Glass Railing Projects Go Wrong
Most alignment failures I have seen do not happen during panel placement. They happen in the 30 minutes before the first panel goes in. A homeowner rushes the site prep, skips the laser level, and assumes the deck frame is close enough to level. It never is. By the time the third panel is in, the misalignment is obvious and the only fix is to pull everything out and start over.
The other mistake I see constantly is over-reliance on the clamps. Clamps are for holding, not correcting. If a panel is sitting wrong, no amount of clamping pressure will fix it. You have to go back to the setting blocks and the substrate. Patience at the start saves hours of rework at the end.
One thing that surprises most homeowners: frameless systems are significantly less forgiving than framed ones. A framed system hides small errors behind aluminum extrusions. A frameless system puts every millimeter of misalignment on display. If you are installing frameless glass, budget extra time for site prep and do not skip a single level check.
My honest advice: if your deck or balcony substrate has any significant irregularity, get a professional assessment before you order glass. Custom-cut panels are not returnable, and a substrate that is 15mm out of level will cost you far more in wasted glass than a one-hour consultation would have.
— Fuanne
Glassrailingstore Has the Panels and Hardware for Your Project
Getting the alignment right starts with having the right components. Glassrailingstore carries tempered glass panels, connectors, and all the hardware you need for a clean, code-compliant installation.
For homeowners who want confidence before they build, Glassrailingstore offers glass railing engineering testing to verify that your system meets safety and load requirements. You can also request a frameless glass railing quote to get product recommendations matched to your specific deck or balcony dimensions. Every order over $3,000 ships free, and the team is available to help you plan your project from measurement to final panel placement.
FAQs
1. What is the correct gap between glass railing panels?
Maintain a consistent gap of 3–5mm between adjacent panels. This spacing allows for thermal expansion and prevents panels from pressing against each other under temperature changes.
2. Can glass railing panels sit directly on metal channels?
No. Glass panels must rest on neoprene or rubber setting blocks inside the channel. Direct metal-to-glass contact causes edge chips and can lead to cracking over time.
3. How do I know if my glass railing panels are truly plumb?
Check both vertical edges of each panel with a spirit level immediately after placement. Follow up with a laser level across the full run to confirm all panels align on the same horizontal plane.
4. What should I do if a glass panel will not fit into the channel?
Stop immediately and re-check your alignment measurements. Forcing a panel into a tight channel creates internal stress in the tempered glass and can cause it to shatter hours or days later.
5. How often should I check glass railing alignment after installation?
Inspect your railing twice a year, ideally each spring and fall. Thermal expansion on outdoor decks can gradually shift panels, and re-tightening loose clamps early prevents larger alignment problems from developing.