

DIYers: Avoid a $400 Mistake Installing Side Mount Glass Railings
Yes, you can install a side mount glass railing yourself if your deck framing or stair stringers can take the load and you follow the manufacturer’s shop drawings exactly. The entire job hinges on one thing: what’s underneath the decking. Before you order a single panel, measure your run, check for solid blocking, and request shop drawings or a measuring kit from your supplier.
TL;DR:
- Accurate measurement of the run and stair angles is crucial, as a half-inch error can lead to a costly mismatched glass panel.
- Confirming the substrate’s integrity and ensuring proper blocking is essential to prevent future wobbling or cracking after installation.
- Using the exact hardware and following the manufacturer’s torque specifications guarantees safety, warranty validity, and a stable installation.
- Proper setup of the channel or base shoe on a level, solid surface with mark alignment prevents misplacement and structural issues.
- Heavy panels require careful lifting with suction cups, and aligning them from corners ensures proper plumb and thermal expansion gaps.
Table of Contents
- How Do You Plan and Measure a Side Mount Glass Railing Installation?
- What Tools and Safety Gear Do You Need for a Side Mount Install?
- How Do You Anchor the Channel or Base Shoe to the Substrate?
- How Do You Set and Align the Glass Panels?
- How Do You Verify and Maintain a Finished Installation?
- How Does Glassrailingstore Support a Side Mount Installation?
- What Does a Side Mount Glass Railing Installation Cost?
- What Do Installers Get Wrong Most Often?
- Get the Right Parts and Support for Your Install
- Where to Find Torque Specs and Code Details
- Sources
How Do You Plan and Measure a Side Mount Glass Railing Installation?
Every side mount glass railing installation lives or dies on the numbers you collect before you place an order. Glass is cut to exact dimensions once, and a half-inch error at the measuring stage becomes a $400 mistake when the panel arrives and doesn’t fit.
Start by recording the total run length, any stair rake angle, and individual panel widths using a string line pulled taut between end points. Stairs complicate things because rise and run change the geometry of every panel, so template each stair section separately rather than assuming uniform spacing.
Request shop drawings from your supplier before finalizing an order. A proper drawing shows centerlines for anchors, offset distances from the deck edge, and exact panel cutout dimensions, and it catches design conflicts on paper instead of on your deck.
Before you order glass, work through this checklist:
- Confirm guardrail height and opening limits against your local building codes, since requirements vary by jurisdiction.
- Inspect the substrate now for soft spots, rot, or missing blocking, and budget time and money for repairs if needed.
- Decide on glass thickness and edge treatment based on span length and whether the railing is framed or frameless, as explained in the luxury of glass interior doors.
- Order a few extra fasteners in the exact size the shop drawing specifies, since side mount systems rarely use standard hardware.
Skipping the drawing step is the single most common reason DIY installers end up reordering glass.
What Tools and Safety Gear Do You Need for a Side Mount Install?
A side mount glass railing installation calls for tools most homeowners don’t already own, and glass adds a level of injury risk that typical deck projects don’t carry. Renting a couple of specialty items beats improvising with what’s in the garage.
- A torque wrench sized for your fastener range, since manufacturer torque specs are not suggestions.
- Suction cups rated for the panel weight, ideally two per panel for a two-person lift.
- A hammer drill for concrete substrate or a standard drill/driver for wood and composite.
- A magnetic level and string line for keeping the channel and glass faces plumb.
- Substrate-appropriate anchors: lag bolts for wood joists, sleeve or wedge anchors for concrete.
- EPDM or neoprene gaskets, shims, and the wedge or clamp hardware specified for your system.
Recommended tools for a DIY install consistently include suction cups, torque wrenches, and substrate-matched anchors, and skipping any one of them tends to show up later as a wobble or a crack.
Wear cut-resistant gloves and safety glasses when handling panels, and never lift a full-size panel alone. Edge-protect glass with foam corner guards during transport and staging.
Pro Tip: Use only the fasteners your manufacturer ships with the kit. Substituting a hardware-store bolt that “looks the same” is the fastest way to void your warranty and, worse, undertighten a load-bearing anchor.
How Do You Anchor the Channel or Base Shoe to the Substrate?
The channel or base shoe is what actually holds your railing in place, and getting the anchoring wrong is invisible until someone leans on the glass. Lay out the channel’s centerline first, marking anchor points at the spacing your manufacturer’s drawing specifies, and add blocking underneath any decking that lacks solid backing.
- Drill pilot holes matched to your substrate: undersized for wood, properly rated sleeve anchors for concrete, and never a generic anchor swapped in for the specified one.
- Align the channel against your string line before drilling a single hole, then confirm level along the entire run.
- Tighten fasteners in the sequence the manufacturer lists, usually working from the center outward, to avoid twisting the channel out of alignment.
- Where aluminum hardware meets a different metal fastener, apply an anti-corrosion barrier or sealant to prevent galvanic reaction over time.
Vendor installation guides walk through this exact sequence: fit the channel, clamp the glass, torque to spec, then finish with gaskets and end caps. Notice that torquing comes after clamping, not before.
Re-check your string line one more time before final torque. Leave the last quarter turn on each bolt until every anchor is snug, so you still have room to nudge the channel into perfect alignment before locking it down for good. Composite decking often needs different blocking than solid wood joists, and installing on composite substrate deserves its own look before you drill.
How Do You Set and Align the Glass Panels?
Setting glass is where a side mount system earns its reputation as the trickiest part of the job, mostly because you’re aligning heavy, unforgiving panels while trying not to over-tighten anything.
- Install corner spigots or clamps first, then run a string or laser line between them to establish a reference plane for every panel face.
- Lift each panel with suction cups and at least one helper, lowering it into the channel slowly rather than dropping it in.
- Maintain the manufacturer’s minimum panel gap, typically 5 millimeters, which allows for thermal expansion between panels.
- Adjust the clamp bars or wedge hardware until the panel sits plumb, checking with your level on both faces before moving to the next one.
- Tighten set screws in the sequence your drawing specifies, typically working corner to corner rather than straight across.
- Install cover plates, add thread locker to any fastener the manufacturer flags for it, and write down every torque value you used.
That last step matters more than it sounds. Installers who track torque values have documentation ready if a warranty question ever comes up. And starting alignment from corner spigots rather than the middle of a run is standard practice among experienced installers, since it locks your reference plane in first.
How Do You Verify and Maintain a Finished Installation?
A finished installation still needs a real check, not a glance. Walk the length of the railing and confirm every panel sits plumb, gaps are uniform, and the handrail (if fitted) doesn’t flex when you push on it.
- Perform a simple functional load check by applying firm, steady pressure at hand height across a few points on the rail.
- Call a structural engineer if you notice any deflection, if the substrate felt questionable during install, or if the run spans an unusually long distance without intermediate support.
- Seal channel ends and install end caps to keep water from pooling against fasteners and causing corrosion.
- Clean tempered glass with a standard glass cleaner and a soft cloth, and wipe stainless hardware with a non-abrasive cleaner to avoid dulling the finish.
- Watch for binding at set screws, hairline chips at panel edges, or fasteners that loosen after the first season of temperature swings, and address any of these immediately rather than waiting.
Neoprene gaskets between glass and metal hardware prevent the point loads that cause stress cracking, and they’re cheap insurance against the most common complaint installers hear about.
How Does Glassrailingstore Support a Side Mount Installation?
Some suppliers build their catalog and guides around exactly this kind of project, which can be helpful for anyone planning a side mount installation.
- The platform stocks a wide range of tempered glass panels, stainless hardware, and connectors sized for residential and commercial jobs alike.
- Its step-by-step installation guide walks through measurement, design, and assembly in the same order a real installer would follow.
- Many frameless systems use tempered safety glass paired with stainless steel hardware designed for exterior exposure.
- The site’s installation guidance and planning pages cover both DIY projects and jobs handed to a contractor, with quotes available either way.
What Does a Side Mount Glass Railing Installation Cost?
Material costs for a side mount system typically run higher than a post-and-picket railing because you’re paying for tempered or laminated glass panels plus precision-machined hardware, not just lumber and balusters. Panel thickness drives a good chunk of that cost: thicker glass for longer spans or taller guardrail heights costs more per panel, and custom cuts for stair rake angles cost more than straight runs.
Budget for hardware separately from glass. Spigots, channel, clamps, and connectors add up fast, especially on a run with multiple corners, since each connector type is priced individually and stair transitions often need more of them than a straight deck rail.
Labor is where DIY saves the most money, assuming your substrate doesn’t need repair. Hiring a contractor for the same side mount project typically adds a significant markup on top of materials, largely because glass railing work requires precision most general contractors subcontract out.
Set aside a contingency for the surprises that show up once you open the decking: rot, undersized joists, or missing blocking. These repairs aren’t optional, and skipping them isn’t a way to save money. It’s a way to install a railing on a substrate that can’t hold it.
What Do Installers Get Wrong Most Often?
The biggest mistake is assuming decking is structurally adequate without checking for blocking underneath. A close second: skipping pre-assembly. Pre-mark anchor centers and pre-fit clamp hardware off-site before you’re balancing on a ladder. Hire a pro for complex stair geometry, high-wind sites, or substrate you can’t confidently verify.
— Fuanne
Get the Right Parts and Support for Your Install
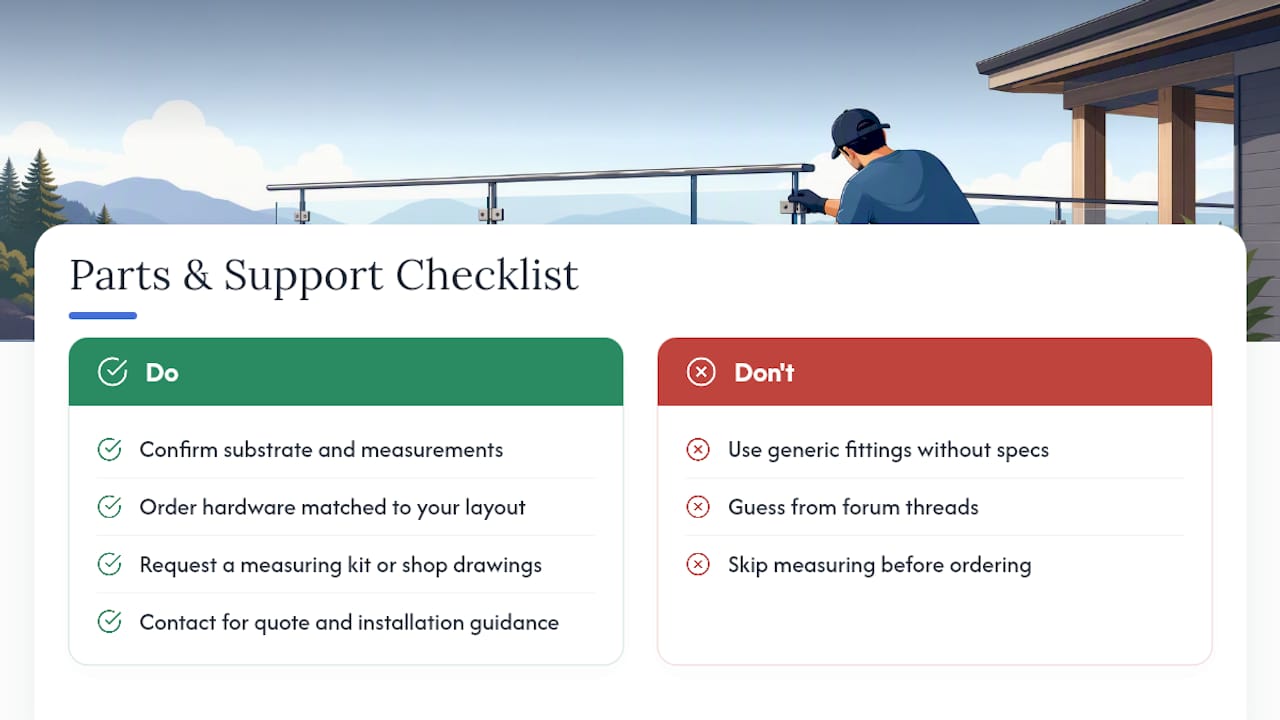
Glassrailingstore is the direct route to correct parts and real documentation, not guesswork pieced together from forum threads. Once you’ve confirmed your substrate and measurements, the fastest path forward is ordering hardware matched to your exact layout instead of hunting for generic fittings that may not carry the same torque specs or warranty coverage.

Browse 46-inch tempered glass panels sized for standard guardrail heights, or check 90-degree connectors and wall connectors for corner and transition points on your run. If your layout includes a caprail, the square caprail straight connector keeps that line clean without extra fabrication.
Not sure your measurements are ready for an order? Request a measuring kit or shop drawings, or reach out for a quote and installation guidance before you buy a single panel. Visit Glassrailingstore to get started.
Where to Find Torque Specs and Code Details
For torque and fastener specs, see the POSI-Lite installation guide. For local guardrail rules, check building code pages.
Sources
- POSI-Lite Side Mount installation guide (PDF)
- How to Install Frameless Glass Railings | Step-by-step guide
- Side Mount Glass Rail for Deck: Expert Q&A & Installation