

10 Ways to Customize Railings for Style and Safety
Custom railing design is the practice of modifying materials, finishes, and structural patterns to transform a standard safety barrier into a defining architectural feature. The best ways to customize railings combine code compliance with personal style, and the payoff is real. Well-executed custom railings can increase resale appeal by 5–10%, adding roughly $5,000 in perceived value per project. Building codes under the IRC and IBC set the baseline: railing height must fall between 34 and 42 inches, and baluster spacing cannot exceed 4 inches. Work within those rules, and the design possibilities are wide open.
1. Ways to Customize Railings with Material Selection
Material choice is the single biggest decision in any railing project. It determines durability, maintenance load, cost, and the overall visual tone of the space.
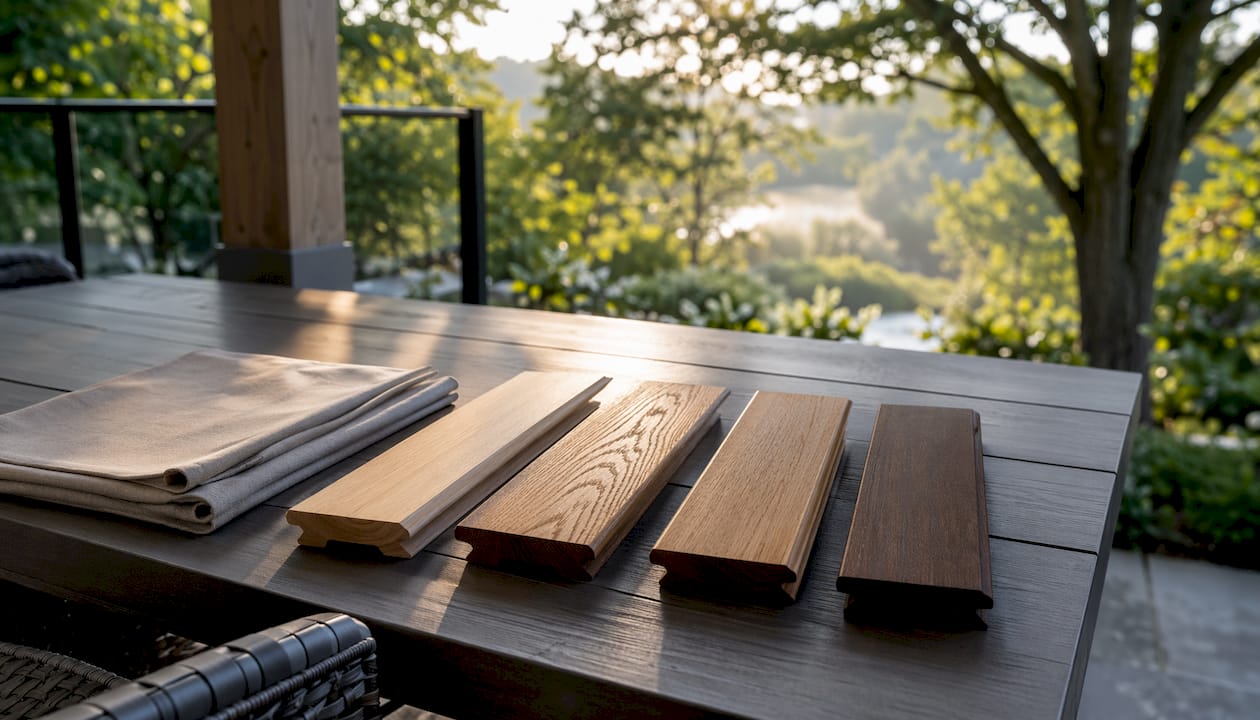
Wood remains the most popular starting point for residential projects. High-Janka hardwoods like maple and oak resist denting and structural failure under load far better than lower-grade woods with knots. Pine and cedar work well for rustic or budget-conscious builds, but they require more frequent sealing to hold up outdoors.
Metal options give you a cleaner, more modern result. Powder-coated steel, aluminum, and marine-grade stainless steel all resist corrosion and hold their finish for years without refinishing. Aluminum is lighter and easier to work with on DIY projects. Stainless steel costs more upfront but requires almost no maintenance over its lifespan.
Glass is the third major category, and it delivers something wood and metal cannot: unobstructed views. Tempered safety glass panels used in frameless systems meet load requirements while keeping sightlines completely clear. For decks, balconies, and pool fences, glass is the strongest argument for a modern, open feel.
Pro Tip: Mix materials intentionally. A wood top rail over a glass or cable infill gives you warmth at hand level and openness below. That combination reads as high-end design without requiring custom fabrication on every component.
2. Choose Finishes and Colors Early
Finish selection is not a final step. Integrating finish and color choices at the design start prevents the most common aesthetic mistake in railing projects: a railing that looks like an afterthought.
Custom powder coating lets you match metal railings to trim colors, window frames, or architectural details without adding bulk. The finish bonds directly to the metal surface, creating a hard shell that resists chipping, fading, and rust. You can order powder-coated components in virtually any RAL color, which means your railing can coordinate with the rest of the exterior or interior palette precisely.
For wood railings, the choice between stain, oil, and epoxy coating affects both appearance and longevity. Penetrating oils feed the wood and maintain a natural look. Epoxy coatings create a harder surface that resists moisture better, which matters on outdoor stairs and decks. Stains add color while still showing grain, giving you the warmth of wood with a controlled tone.
The railing finishing options available to homeowners today go well beyond paint. Brushed, satin, and mirror finishes on stainless steel each read differently in natural light, and the right choice depends on whether you want the railing to stand out or recede visually.
3. Select a Design Style That Fits the Architecture
Design style sets the visual language of the railing before a single piece is cut. The four most common styles each serve a different architectural context.
Traditional spindle railings use vertical balusters spaced evenly between posts. They suit craftsman, colonial, and farmhouse homes. Cable rail systems run horizontal stainless steel cables between posts, creating a clean, industrial look that works well on modern and coastal builds. Ornamental panel railings use decorative metal inserts, often with scrollwork or geometric patterns, for a more formal or historic aesthetic. Hybrid wood-metal designs combine the warmth of a wood top rail with the visual lightness of metal or cable infill.
The right style is not just about preference. It also affects how much light passes through the railing, how easy it is to clean, and how the railing reads from a distance. Cable and glass systems maximize views. Spindle and panel systems create more visual weight and privacy.
Pro Tip: Before committing to a style, photograph your home’s exterior and overlay railing options digitally. Many suppliers offer free visualization tools, and this step prevents expensive regrets.
4. Use Joinery Methods That Match the Load
Joinery determines how long a wood railing holds up under daily use. Mortise and tenon joinery is the strongest option for railings that take heavy daily contact. The tenon fits into a mortised pocket in the post or rail, creating a mechanical lock that glue alone cannot match.
Pocket screws offer a faster alternative for lower-traffic applications or interior railings. They work well when the railing will not face heavy lateral loads, and they speed up installation significantly on weekend projects. The tradeoff is that pocket-screw joints can loosen over time if the wood moves.
For curved sections, steam-bending and laminated molding are the two main techniques. Steam-bending shapes solid wood by softening it with heat and moisture, then holding it in a form until it cools. Laminated molding builds up thin strips of wood glued together over a curved form, which gives you more control over the final radius and works with more wood species.
5. Apply the 4-Inch Sphere Rule for Baluster Spacing
Baluster spacing is not a design preference. It is a safety requirement. The 4-inch sphere rule mandates that no gap in the railing infill can allow a 4-inch sphere to pass through. This standard exists to prevent children from getting their heads trapped between balusters.
The practical way to meet this standard consistently is to use a spacing jig. Cut a block of wood to exactly 4 inches and use it as a spacer between each baluster as you install them. This eliminates measuring errors and speeds up the process considerably. A story stick, which is a long piece of wood marked with all post and baluster locations, takes this one step further by letting you reduce installation rework by up to 40%.
Building codes also require railings to withstand a 200-lb concentrated load at any point. This affects post spacing and anchoring method more than baluster design, but both requirements must be met simultaneously for the railing to pass inspection.
6. Add Integrated LED Lighting
Integrated lighting turns a railing into a functional design element after dark. LED strip lights mounted under the top rail or along the base of posts create ambient lighting on stairs and decks without requiring separate fixtures.
Post cap lights are the simplest option. They replace standard post caps with fixtures that cast downward light onto the deck surface. Recessed LED strips inside hollow aluminum or stainless steel posts give a cleaner look and work well on modern builds. Both options run on low-voltage systems that are safe and inexpensive to operate.
Lighting also improves safety on outdoor stairs, which is the most common location for nighttime falls. A well-lit stair railing does double duty: it guides foot traffic and signals the edge of each step clearly. For pool fences and deck railings, lighting extends usable hours and adds visual appeal that photographs well for listings.
7. Incorporate Mixed Materials and Inlays
Mixed-material railings are one of the strongest signals of custom design. A live-edge wood cap on a steel post base, or a glass panel framed in a wood border, reads as intentional and high-end without requiring specialized fabrication skills.
Inlays add detail at a smaller scale. Metal inlays in wood top rails, rope wrapped around posts, or decorative tile set into concrete bases all create texture and visual interest that standard railings lack. These details work best when they echo materials used elsewhere in the home, such as matching the metal inlay color to door hardware or window frames.
For homeowners who want a personalized railing design without full custom fabrication, pre-made decorative inserts are available in wrought iron, aluminum, and stainless steel. These drop into standard baluster openings and transform the look of an existing railing without replacing the structure.
8. Consider Cable Rail for Unobstructed Views
Cable rail systems are the most view-preserving infill option available. Horizontal stainless steel cables run between posts at regulated spacing, meeting the 4-inch sphere rule while leaving the view almost entirely open. This makes cable rail the preferred choice for decks overlooking water, mountains, or open landscapes.
The posts in a cable system carry significant tension load, especially at corners and end runs. This means post sizing and anchoring must be engineered for the cable tension, not just the standard 200-lb point load. Many homeowners underestimate this requirement and end up with posts that flex under tension.
Cable systems also require periodic retensioning as the cables stretch slightly over time. This is a minor maintenance task, but it is one that wood and glass systems do not require. For a modern home design, the visual payoff of cable rail typically outweighs the added maintenance.
9. Plan for Wood Movement Before Installation
Wood movement is the most overlooked factor in railing longevity. Lumber must acclimate for at least 7 days at the installation site before cutting or assembly. Skipping this step causes joints to open, finishes to crack, and balusters to loosen as the wood adjusts to local humidity.
The acclimation period is especially critical for outdoor railings, where temperature and moisture swings are more extreme. Stack the lumber with spacers between boards so air circulates on all sides. Check moisture content with a wood moisture meter before cutting. Target a moisture content that matches the expected average for the installation environment.
Finishing also affects wood movement. Sealing all six sides of each piece, including the ends, slows moisture exchange and reduces seasonal movement. Most installers only finish the visible faces, which leaves the ends exposed and accelerates cracking at joints.
Pro Tip: Seal the end grain of every wood component before assembly. End grain absorbs moisture faster than face grain, and sealing it first is the single most effective step for preventing joint failure.
10. Batch Cut and Use a Story Stick for Efficiency
Project efficiency separates a clean installation from a frustrating one. Batch cutting means setting up each saw cut once and running all identical pieces through before changing the setup. This approach reduces measurement errors and cuts total shop time significantly.
A story stick is a long, straight board marked with every post location, baluster position, and rail height for the entire run. You transfer these marks directly to the material rather than measuring each piece individually. Using a story stick and batch cutting together can reduce rework by up to 40% on a standard stairwell project.
Standard wood railing projects for a single stairwell take approximately 12 hours of weekend effort when planned well. Metal fabricators typically provide quotes within one business day, with pricing based on linear footage and design complexity. Knowing your timeline upfront helps you decide whether DIY or professional fabrication makes more sense for your project.
For projects involving hiring custom fabricators, the same principles apply: clear documentation of spacing, heights, and finish specs reduces back-and-forth and keeps the project on schedule.
Key Takeaways
The most effective railing customization combines code-compliant structure, durable materials, and finish choices made at the design start, not as an afterthought.
| Point | Details |
|---|---|
| Material drives durability | Choose high-Janka hardwoods or marine-grade stainless steel for railings under heavy daily use. |
| Finish selection comes first | Lock in powder coating or stain color at the design stage to keep the railing cohesive with the architecture. |
| Safety codes are non-negotiable | Meet the 34–42 inch height rule, 4-inch sphere spacing standard, and 200-lb load requirement on every project. |
| Efficiency tools cut rework | A story stick and batch cutting reduce installation errors by up to 40% on standard projects. |
| Custom railings add real value | Well-executed personalized railing designs can increase property resale appeal by 5–10%. |
What I’ve Learned from Watching Homeowners Get Railing Projects Wrong
Most railing mistakes happen before a single board is cut. Homeowners pick a finish color after the railing is already installed, then realize it clashes with the trim. They skip wood acclimation and watch joints open up six months later. They choose a design style they love in photos but that looks wrong against their home’s actual proportions.
The fix is always the same: treat the railing as part of the architecture from day one, not as a safety feature you add at the end. Balancing aesthetics and safety starts with choosing materials that can handle the structural load and then building the design around that constraint, not the other way around.
I’ve also seen homeowners dramatically underestimate the value of a well-done railing. A custom railing on a deck or stairwell is one of the first things a buyer notices. It signals craftsmanship and attention to detail in a way that new paint or updated fixtures cannot. The 5–10% resale value bump is real, but only when the execution is clean.
The projects that turn out best are the ones where the homeowner spent more time planning than cutting. Measure twice, acclimate the lumber, lock in the finish early, and use a story stick. Those four steps alone separate a railing that lasts 30 years from one that needs replacing in 10.
— Fuanne
Glass Railing Options for Modern Customization
For homeowners who want the clearest possible views with the least visual bulk, glass railing systems are the strongest option on the market today.

Glassrailingstore offers custom glass railing panels built from tempered safety glass with marine-grade stainless steel hardware. The systems meet IRC and IBC load requirements and come with detailed installation guides suited for both DIY projects and professional builds. You can pair glass panels with a range of handrail finishes to match any architectural style, from brushed stainless to powder-coated black. For decks, balconies, stairs, and pool fences, Glassrailingstore also provides free quotes and planning support to help you get the spec right before you order. Explore the building codes for glass railings to confirm your project meets local requirements before purchasing.
FAQs
1. What is the minimum railing height required by code?
Building codes under the IRC and IBC require railing height between 34 and 42 inches, depending on the application. Decks and balconies above 30 inches off the ground typically require the full 42-inch height.
2. How do I keep baluster spacing code compliant?
Use a 4-inch spacing jig between each baluster during installation. No gap in the infill can allow a 4-inch sphere to pass through, per the standard safety requirement.
3. What wood is best for custom railings?
High-Janka hardwoods like maple and oak are the best choices for strength and longevity. Lower-grade woods with knots carry a higher risk of structural failure under load.
4. Can I customize a railing without replacing the whole structure?
Yes. Decorative inserts, new post caps, LED lighting, and finish updates can all change the look of an existing railing without full replacement. These are the most cost-effective DIY railing modifications available.
5. How much value does a custom railing add to a home?
Well-executed custom railings can increase resale appeal by 5–10%, adding roughly $5,000 in perceived value per project based on real estate comparisons.
Recommended
- Glass Railings: Safe and Elegant Customization – The Glass Railing Store
- How to Select Handrail Design for Decks and Stairs – The Glass Railing Store
- Top 10 Reasons Why Glass Railings Are Perfect for Modern Homes in 2025 – The Glass Railing Store
- Railing Finishing Options List for Homeowners – The Glass Railing Store