

Dry Glaze vs Wet Glaze: Which Method Fits Your Project?
For exterior, large-format, or structurally demanding glass work, wet glazing is the right default. For interior partitions, replacement sashes, or jobs where quick serviceability matters more than maximum weatherproofing, dry glazing is the faster, cleaner choice.
- Wet glazing (structural silicone, polyurethane, or polysulfide sealants) bonds glass to its frame with a cured, continuous seal. Use it for exposed exteriors, curtain walls, large frameless panels, and glass railing systems on decks or balconies where water intrusion and structural loading are real concerns.
- Dry glazing (EPDM or neoprene gaskets, glazing tape, mechanical beads) compresses around the glass without any liquid sealant. Use it for interior partitions, standard residential sash windows, storefronts with easy access, or anywhere panel replacement needs to stay simple.
- The primary trade-off: wet glazing costs more upfront in labor and materials and requires cure time; dry glazing installs faster but depends on sustained gasket compression that can degrade with UV exposure and temperature cycling.
If your project checks two or more of these boxes — large panel, exposed location, long service life, structural loading — default to wet glazing. One box or fewer, dry glazing is worth serious consideration.
Key Takeaways
Wet glazing is the right default for exposed, large-format, or structurally demanding glass installations; dry glazing is the faster, more serviceable choice for interior or low-exposure work where panel replacement matters.
| Point | Details |
|---|---|
| Wet glazing for exposure | Use structural silicone or polyurethane for exterior, large-panel, or high-load applications where weatherproofing and service life are priorities. |
| Dry glazing for serviceability | EPDM or neoprene gaskets and glazing tape install faster and allow easier panel replacement, making them right for interior or sheltered locations. |
| Gasket lifespan | Dry-glazed gaskets typically need replacement in the typical service life range; wet-glazed sealant systems generally have a longer service interval before reseal. |
| Railing systems | Exterior deck and balcony railings favor wet-glazed pocket-mounted systems; sheltered or easily serviced railings can use dry-glazed channel systems. |
| Glassrailingstore hardware | Glassrailingstore supplies tempered glass panels, adjustable connectors, and marine-grade stainless steel hardware compatible with both glazing methods. |
Table of Contents
- What is dry glazing and how does it work?
- What is wet glazing and how does it work?
- How do dry glaze and wet glaze compare across key dimensions?
- How does glazing method affect weatherproofing, thermal performance, and structural behavior?
- What do installed cost and service life look like for each method?
- Installation steps and common failure modes to watch for
- How do you choose the right glazing method for your project?
- How does glazing method affect glass railing systems?
- Common myths about dry vs wet glazing, corrected
- A practical perspective on choosing between these two methods
- Glassrailingstore has the hardware for whichever method you choose
- Sources
What is dry glazing and how does it work?
Dry glazing secures glass without any liquid sealant that cures in place. Instead, pre-formed compression gaskets or wedges hold the glass in its channel, relying on sustained mechanical pressure to create a weather-resistant seal. The system is entirely mechanical: no mixing, no priming, no waiting for chemistry to cure.
Common materials in dry glazing systems:
- EPDM and neoprene gaskets: the workhorses of dry glazing; EPDM handles UV and ozone better, neoprene suits oil-exposed environments
- Pre-compressed glazing tape: a foam or rubber tape applied to the glazing rebate before the glass is set; compresses under the bead to form a seal
- Aluminum or PVC glazing beads: the mechanical retaining element that holds the gasket under compression
- Setting blocks and backer blocks: small neoprene or EPDM pads that support the glass weight at the sill and prevent direct glass-to-frame contact
Typical systems and where you encounter them:
Residential replacement windows with snap-in glazing beads are the most common dry-glazed product most homeowners ever touch. Storefront systems with continuous gasket channels, interior glass partition walls, and temporary or easily serviced glazing in commercial fit-outs all rely on the same principle. The glass can be removed and reinstalled without breaking any chemical bond, which makes dry glazing the practical choice wherever panel replacement needs to be fast and clean.
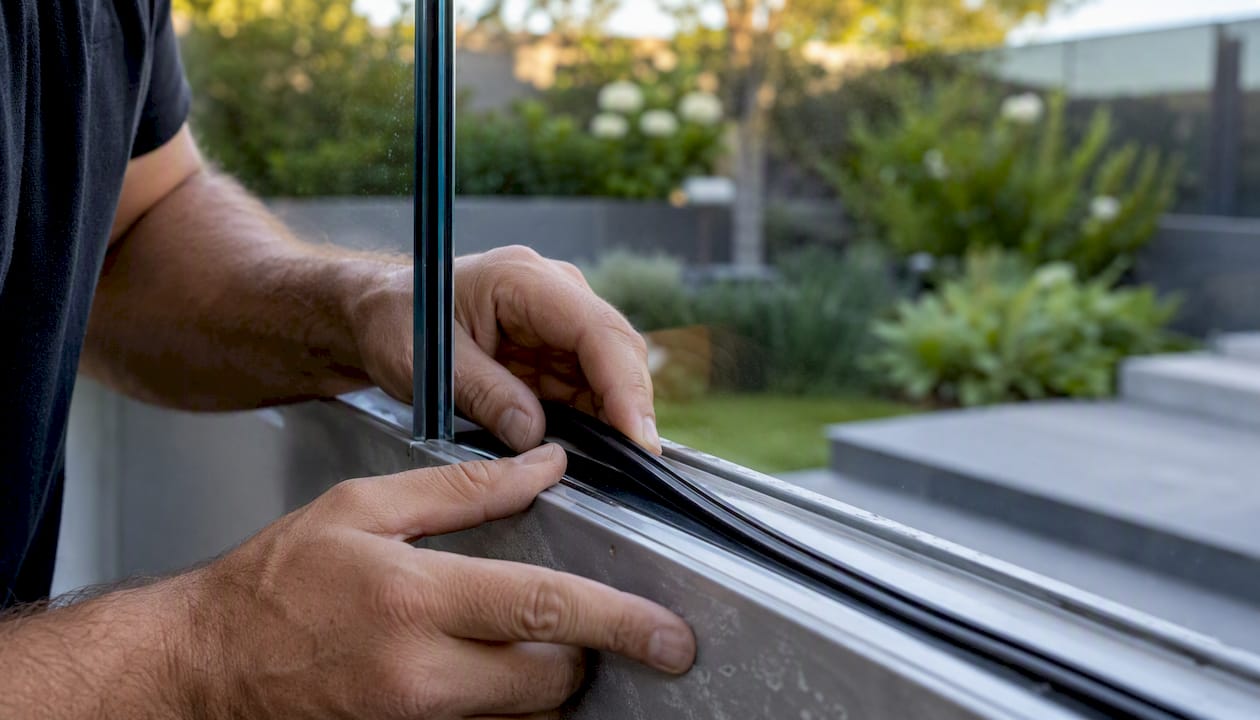
The performance trade-off is mechanical. A compression seal works only as long as the gasket stays resilient and the bead holds consistent pressure. UV exposure and thermal cycling cause EPDM and neoprene to harden and shrink over time, which reduces compression and opens pathways for air and water. That degradation is manageable with scheduled inspection and replacement, but it is a real maintenance commitment in exposed conditions.
Pro Tip: Check gasket compression and setting block alignment at handover, before any cladding or trim covers the glazing pocket. Misaligned setting blocks that allow the glass to bear on the frame rather than the blocks are one of the most common dry-glaze failure modes, and they are nearly invisible once the job is finished.
Glazing tape options for railing systems follow the same mechanical logic, and the selection criteria are similar: match the tape’s compression range to the actual joint width and confirm UV resistance for any exterior application.
What is wet glazing and how does it work?
Wet glazing uses a liquid sealant, gunned or poured into the glazing channel, to bond and seal the glass to its frame. Once cured, that sealant is not just a weather barrier — it becomes a structural element. Structural silicone and polyurethane sealants create a permanent, airtight bond that ties glass and frame into a single load-sharing assembly, which is why wet glazing dominates high-performance exterior applications.
Common sealant chemistries and backer materials:
- Structural silicone: the industry standard for curtain walls, frameless facades, and exposed exterior glazing; excellent UV resistance, high movement accommodation, and long service life when correctly primed and installed
- Polyurethane sealants: strong adhesion and good abrasion resistance; used in window perimeter sealing and some railing applications; slightly less UV-stable than silicone without a protective cap bead
- Polysulfide: older chemistry, still found in some insulating glass unit edge seals and marine applications; good chemical resistance but lower movement accommodation than silicone
- Closed-cell backer rod: foam rod inserted into the joint before sealant application to control sealant depth and prevent three-sided adhesion, which would restrict joint movement and cause premature failure
How the bond changes structural behavior:
A cured silicone joint does not just seal — it transfers load. Architects use this to keep frames square under wind pressure, to allow larger glass panels with reduced frame sections, and to distribute edge loading more evenly across the perimeter. That load-sharing behavior is why wet glazing is specified for curtain walls, structural glass facades, and large-format frameless panels where a gasket system simply cannot provide equivalent stiffness.
Surface preparation is where wet glazing jobs succeed or fail. Glass, aluminum, and steel substrates each require specific cleaning protocols and, in most cases, a compatible primer. Contamination from silicone overspray, oils, or dust on the bonding surface is the leading cause of adhesion failure. Manufacturer technical data sheets specify the primer, the joint geometry, and the minimum cure time — following them is not optional.
| Dimension | Dry Glazing | Wet Glazing |
|---|---|---|
| Weatherproofing | Moderate; depends on gasket compression | High; continuous cured seal |
| Structural strength | Lower; mechanical retention only | Higher; glass and frame act as one assembly |
| Aesthetics / sightlines | Visible bead or gasket line | Cleaner, slimmer sight lines possible |
| Thermal and acoustic performance | Moderate; infiltration risk at gasket joints | Better; fewer infiltration paths |
| Durability / lifespan | Shorter gasket cycle; 10–20 years typical | Longer when correctly installed; 20–30 years typical |
| Maintenance | Gasket inspection and replacement | Periodic sealant inspection; reseal at intervals |
| Cost and installation time | Lower labor cost; faster installation | Higher labor and materials; cure time required |
How do dry glaze and wet glaze compare across key dimensions?
The table above captures the matrix. Here is what it means in practice.
Wet glazing retains a clear edge for complex, high-performance applications where weatherproofing and structural behavior matter. Dry glazing wins on installation speed, serviceability, and first cost. Neither method is universally superior — the right answer depends on what the project actually demands.
Quick selection rules from the matrix:
- If the panel is large or taller in an exposed location, wet glazing is the safer specification.
- If the installation is interior or sheltered and the panel may need replacement within 10 years, dry glazing is the practical choice.
- If the project has a tight schedule and the glazing is not load-bearing, dry glazing’s faster installation is a real advantage.
- If long-term weatherproofing is a warranty requirement, wet glazing provides superior continuous sealing that gasket systems cannot reliably match over the same interval.
- If budget is the primary driver and the location is interior or low-exposure, dry glazing’s lower labor cost is defensible.
How does glazing method affect weatherproofing, thermal performance, and structural behavior?
The performance gap between wet and dry glazing comes down to one word: continuity. A cured sealant joint is a single unbroken material from one side of the glazing pocket to the other. A gasket system is a compression fit — and compression relaxes.

Weatherproofing mechanics:
Water finds the path of least resistance. In a wet-glazed joint, that path is blocked by a chemically bonded, flexible membrane. In a dry-glazed system, water pressure can work against gasket compression, particularly at corners and at the sill where drainage is slowest. Gasketed systems are vulnerable to UV-induced shrinkage and thermal cycling, which progressively reduce the contact pressure that creates the seal.
Thermal and acoustic performance:
Air infiltration is the dominant variable for both U-value and sound transmission class (STC) in a glazed assembly. A continuous cured seal eliminates most infiltration paths at the glass-to-frame interface. Gasket systems, especially aging ones, allow measurable air movement at joints. For passive house or high-performance envelope work, wet glazing at the perimeter is almost always specified.
Structural behavior:
Architects and builders often prefer wet glazing for its ability to keep frames square and to accommodate larger glass panels — the cured silicone bond combines load paths and increases overall envelope strength. A structural silicone joint transfers wind load, thermal expansion, and live load across the glass-to-frame interface, allowing engineers to reduce frame depth or increase panel size without adding structural members. That is not possible with a gasket system, which provides retention but not meaningful load transfer.
Durability factors:
Silicone’s UV resistance is inherently high; polyurethane needs a cap bead or paint protection in direct sun. Cyclic movement accommodation — the ability of the sealant to stretch and compress repeatedly without cracking — is specified in the manufacturer’s movement rating, typically expressed as a percentage of joint width. Matching that rating to the actual thermal movement of the assembly is a basic design step that is frequently skipped, and it is the root cause of most sealant fatigue failures.
Just as ceramic glaze chemistry must match the substrate and firing schedule to perform correctly, sealant chemistry and joint design must match the substrate’s movement and environmental exposure for long-term adhesion. The principle is the same across both industries: the material and the application conditions have to be compatible from the start.
What do installed cost and service life look like for each method?
Neither method is cheap when you account for the full life cycle, but the cost curves look different.
Installed cost:
Dry glazing typically costs less at installation. There is no sealant to mix or gun, no primer to apply, no cure window to manage, and the work can proceed faster. For a straightforward residential window replacement or an interior partition, that speed advantage translates directly into lower labor cost.
Wet glazing carries higher upfront costs: sealant and primer materials, longer installation time, and the need for skilled applicators who understand joint geometry and surface preparation. On a large curtain wall or exterior railing system, those costs are real but they are also the cost of getting the performance the project requires.
Expected service life:
Gaskets in dry-glazed systems typically need inspection every 5–10 years and replacement somewhere in the 10–20 year range, depending on UV exposure, temperature swings, and the original gasket quality. In harsh climates or south-facing exposures, that interval shortens. Gasketed dry glazing systems depend on consistent compression and are vulnerable to UV-induced shrinkage and thermal cycling, making regular inspection and scheduled replacement standard maintenance items.
Wet-glazed systems, when correctly installed and primed, typically reach 20–30 years before reseal is needed. The failure mode is usually cohesive or adhesive fatigue at the sealant-to-substrate interface, which shows up as visible cracking or separation before water intrusion becomes a problem — giving owners time to plan a reseal rather than respond to an emergency.
Maintenance profile:
- Dry glazing: annual visual inspection of gasket compression; replace gaskets when compression loss or hardening is visible; check setting blocks at each inspection
- Wet glazing: inspect sealant joints every 5–7 years; look for cohesive cracking, adhesion loss at edges, or discoloration; reseal when cracking exceeds the manufacturer’s acceptable limit
- Both methods benefit from keeping drainage channels clear of debris, which is the single most common cause of accelerated seal degradation in both systems
For exterior glass railings specifically, seasonal weatherproofing maintenance is worth scheduling regardless of which glazing method was used at installation.
Installation steps and common failure modes to watch for
Most glazing failures trace back to a handful of avoidable mistakes. The checklist below applies to both methods, with method-specific notes where the steps diverge.
Installation checklist:
- Setting blocks: place at quarter points of the glass width, not at corners; use EPDM or neoprene blocks sized to the glass weight
- Shimming and alignment: verify the frame is plumb and square before glazing; a racked frame puts uneven stress on any seal
- Backer rod (wet glazing): insert closed-cell backer rod to achieve a 2:1 width-to-depth ratio for the sealant joint; deeper sealant does not perform better and restricts movement
- Surface preparation (wet glazing): clean all bonding surfaces with the manufacturer’s recommended solvent; apply primer where specified; allow primer to dry fully before sealant application
- Sealant tooling: tool the sealant within the open time specified on the data sheet; a properly tooled joint has full contact with both substrates and a slightly concave face
- Movement joints: include movement joints at frame corners and at structural transitions; a continuous sealant bead that bridges a movement joint will crack
- Cure environment: maintain temperature and humidity within the manufacturer’s specified range during cure; cold or wet conditions extend cure time and can compromise adhesion
Common failure modes:
- Gasket compression loss: the most common dry-glaze failure; visible as a gap between gasket and glass or frame, often accompanied by water staining at the sill
- Adhesion failure in wet glazing: caused by contamination, skipped primer, or application outside the manufacturer’s temperature range; presents as sealant peeling cleanly from one substrate
- Three-sided adhesion: occurs when sealant bonds to the backer rod as well as both substrates, preventing joint movement and causing cohesive tearing; prevented by using a closed-cell (non-bondable) backer rod
- Trapped moisture: water that enters the glazing pocket and cannot drain accelerates gasket degradation and promotes frame corrosion; keep weep holes clear
- Thermal cycling fatigue: sealant specified with insufficient movement accommodation cracks at the substrate interface after repeated expansion and contraction cycles
Pro Tip: Before any cladding or trim covers the glazing pocket, run a simple hose test: apply water at the head of each glazed unit for 15 minutes and check the interior for any sign of water entry. Catching a leak at this stage costs minutes to fix; catching it after the interior is finished costs days.
For post installation, securing glass railing posts correctly is equally critical — a well-glazed panel in a poorly anchored post system still fails under load.
How do you choose the right glazing method for your project?
Work through these questions before specifying either method. Two or more “yes” answers in the wet-glazing column is a strong signal to default to structural silicone.
Project decision checklist:
- Is the glazing exposed to weather (rain, wind, UV) on at least one face? → Wet glazing preferred
- Is the glass panel larger than roughly 48 × 96 inches, or heavier than standard residential weight? → Wet glazing preferred
- Is the installation on a deck, balcony, pool fence, or other exterior railing? → Wet glazing preferred
- Does the project require a warranty of 15 years or more on weathertightness? → Wet glazing preferred
- Is panel replacement likely within 10–15 years (tenant fit-out, temporary partition, budget renovation)? → Dry glazing preferred
- Is the glazing interior and not subject to wind or water pressure? → Dry glazing preferred
- Is the installation schedule tight and skilled sealant applicators unavailable? → Dry glazing preferred
- Does the design require minimal visible frame or gasket lines? → Wet glazing preferred (slimmer sight lines)
Prioritization rule: if questions 1, 2, and 4 all answer “wet glazing preferred,” that is a definitive specification. If only question 5 or 6 applies, dry glazing is defensible and often the smarter choice.
Specifying to minimize liability:
- Name the sealant system by manufacturer and product designation, not just “structural silicone”
- Specify the primer by product name and confirm compatibility with the actual substrate (anodized aluminum, galvanized steel, and painted steel each require different primers)
- State the joint depth and width in the specification, not just “per manufacturer’s recommendation”
- Require installer qualifications: most major sealant manufacturers offer applicator certification programs; specify that the installer holds current certification
- Include a pre-installation mock-up requirement for large or complex projects so adhesion can be verified on the actual substrates before full installation begins
How does glazing method affect glass railing systems?
Glass railings sit at the intersection of structural performance, weather exposure, and aesthetics — which makes the wet-versus-dry choice more consequential here than in most other applications.
Why the choice matters for railings:
A deck or balcony railing panel faces wind load, edge loading from people leaning against it, UV exposure, rain, and in many climates, freeze-thaw cycling. Those conditions favor wet glazing for the same reasons they favor it on curtain walls: continuous sealing, load sharing, and resistance to gasket degradation. At the same time, some railing systems are designed specifically for dry-glazed installation, and they perform well when the hardware is correctly specified.
Common railing approaches:
- Wet-glazed pocket-mounted systems: the glass panel sits in a U-channel or base shoe filled with structural silicone or polyurethane; the sealant bonds the panel to the channel and transfers lateral load to the post; used on exposed decks, pool fences, and commercial balconies
- Dry-glazed channel-mounted systems: the panel sits on setting blocks in a channel with EPDM gaskets or glazing tape providing the seal; faster to install and easier to replace individual panels; appropriate for sheltered locations or where panel replacement is a design requirement
Installation cues specific to railings:
- Allow adequate edge clearance between the glass and the channel walls to accommodate thermal expansion; a panel that bears directly on the channel wall under heat will crack
- Use marine-grade stainless steel hardware (316-grade) for any exterior railing within 10 miles of salt water; standard 304-grade corrodes faster than the sealant in coastal environments
- Confirm sealant compatibility with the metal finish before application; some silicone formulations contain acetic acid cure byproducts that can stain or corrode certain metal finishes
- For weatherproof glass railing systems, drainage at the base of the channel is as important as the sealant choice; a blocked weep hole turns a well-sealed channel into a water trap
Pro Tip: When combining wet-glazed panels with stainless steel hardware, ask the sealant manufacturer for a compatibility statement specific to your metal finish. Neutral-cure silicones are generally safer on metal than acetoxy-cure formulations, and that one specification detail can prevent staining that is nearly impossible to reverse.
Glassrailingstore carries tempered safety glass panels, adjustable connectors, and marine-grade stainless steel hardware compatible with both wet and dry glazing approaches. For glass veranda and outdoor structure applications, year-round glass installation considerations follow similar principles around sealant selection and drainage.
Common myths about dry vs wet glazing, corrected
Myth: Dry glazing is always cheaper over the life cycle.
The initial installation cost is often lower, but gasket replacement cycles and the performance penalty in exposed conditions change the math. A dry-glazed exterior railing that needs gasket replacement every 10–12 years, plus any water damage remediation, can easily exceed the life-cycle cost of a correctly installed wet-glazed system that runs 25 years before reseal.
Myth: Wet glazing is messy and not appropriate for residential work.
Wet glazing is the industry standard for exposed residential exteriors, large windows, and glass railing systems on decks and balconies. A skilled installer with the right tools produces a clean, tooled joint. The “messy” reputation comes from poorly executed jobs, not from the method itself.
Myth: “Dry” and “wet” mean the same thing across industries.
They do not. In ceramics, “wet glazing” refers to applying a liquid glaze slurry to bisqueware before firing, and “dry glazing” refers to powder or electrostatic application methods. The terms have distinct technical meanings in ceramics and can cause real confusion when someone crosses between pottery and architectural contexts. If a specification document uses these terms, confirm which industry convention applies. Similarly, glaze terminology in ceramic science covers firing schedules and material chemistry — a completely different discipline from architectural glazing.
Myth: Structural silicone is overkill for a residential deck railing.
For a ground-level interior application, perhaps. For an elevated deck railing exposed to wind, rain, and UV, structural silicone is not overkill — it is the correct specification. The panel size and exposure conditions, not the residential label, determine the right sealant.
A practical perspective on choosing between these two methods
The debate between wet and dry glazing gets oversimplified in most project conversations. Builders reach for dry glazing because it is familiar and fast; architects specify wet glazing because the spec sheet says “structural silicone” and they move on. Neither instinct is wrong, but neither is a substitute for actually reading the project conditions.
What most decision-makers underestimate is how much the failure mode matters. A dry-glazed gasket that fails gives you a slow leak and a visible gap — annoying, but fixable. A wet-glazed joint that fails because the primer was skipped gives you adhesion loss across the entire bonded perimeter, and that repair is expensive and disruptive. The method with the higher performance ceiling also has the higher consequence of a bad installation. That asymmetry should push anyone specifying wet glazing to be explicit about surface preparation and installer qualifications, not just sealant product selection.
For glass railing systems specifically, the exposure conditions almost always favor wet glazing. A deck railing on an elevated balcony faces wind loads, thermal cycling, UV, and rain simultaneously. Gasket compression under those conditions is a maintenance commitment, not a set-and-forget solution. The 20–30 year service interval of a correctly installed structural silicone joint is not marketing language — it reflects what the chemistry actually delivers when the joint is designed and installed correctly.
The practical rule worth keeping: if you would not trust a gasket to seal a shower enclosure in that location, do not trust one to seal an exterior railing panel either.
Glassrailingstore has the hardware for whichever method you choose
Choosing the right glazing method is half the equation. The other half is hardware that holds up to the same standard as the sealant or gasket you specify.

Glassrailingstore supplies tempered safety glass panels, marine-grade 316 stainless steel connectors, and adjustable hardware designed for both wet-glazed pocket-mounted systems and dry-glazed channel installations. The adjustable connector for glass railing accommodates the tolerance variation that comes with field installation, which matters whether you are tooling a silicone joint or seating a compression gasket. Free shipping on orders over $3,000, free quotes, and planning support for contractors and homeowners are available directly through the store. Get your quote and confirm hardware compatibility before your next installation.
Sources
- An Architect’s Guide to Glazing
- Comparison of dry glazing and wet glazing
- What does wet glazed mean? – Sage-Tips
- Wet Glazing vs. Dry Glazing
- Ceramic Glaze Complete Guide: Types Application and Science
Recommended
- Glass Deck Projects: Why Glass Thickness Matters Most – The Glass Railing Store
- Combining Glass Railings with Other Materials: Wood, Metal, or Stone? – The Glass Railing Store
- Laminated vs. Tempered Glass: Which Is Better for Your Railing Project – The Glass Railing Store
- Choosing Outdoor Glass Panels: A 2026 Homeowner’s Guide – The Glass Railing Store