

How to Clean Glass Railings: A Homeowner's Guide
Cleaning glass railing comes down to one simple habit: a gentle wash with mild dish soap or diluted white vinegar, followed by a top-to-bottom squeegee pass before the water dries. Do that consistently and your panels stay clear, your hardware stays sound, and you avoid the mineral etching that turns a beautiful railing cloudy. Two tools do most of the work: a rubber-blade squeegee and a lint-free microfiber cloth.
Quick-start checklist for your next clean:
- Dry-dust or brush off loose debris and pollen first
- Mix a few drops of mild dish soap into a bucket of warm water
- Apply with a soft cloth or sponge, working panel by panel
- Rinse thoroughly with clean water
- Squeegee top-to-bottom in overlapping strokes, wiping the blade after each pass
- Buff edges and hardware dry with a microfiber cloth
Outdoor railings near pools or the coast need attention fairly frequently, while standard indoor panels can go longer between full washes, though spot-cleaning with a damp microfiber cloth handles fingerprints in between.
Key Takeaways
Cleaning glass railings consistently with mild soap, a squeegee, and a schedule matched to your environment prevents mineral etching, protects hardware, and keeps panels clear for decades.
| Point | Details |
|---|---|
| Squeegee after every wash | Removing water before it dries prevents mineral spots; wipe the blade after each pass. |
| Match frequency to exposure | Standard residential every 4–8 weeks; coastal or pool-adjacent every 2–4 weeks. |
| Avoid abrasives and ammonia | Abrasive pads scratch tempered glass; ammonia degrades protective coatings. |
| Check hardware quarterly | Loose connectors and cracked gaskets caught early are simple fixes; ignored, they become safety issues. |
| Call a pro for deep etching | Haze that doesn’t respond to baking soda paste or a commercial remover may need restoration or panel replacement. |
Table of Contents
- Why regular glass railing maintenance saves you money and headaches
- What tools and cleaners do pros actually recommend?
- How to clean glass railings step by step
- How to remove hard-water stains and cloudy haze safely
- How do you prevent scratches and protect your railing long-term?
- What’s the right cleaning schedule for your railing?
- Safety tips and common mistakes to avoid
- Pro techniques that actually make a difference
- Why routine care beats occasional heavy scrubbing
- Sources
Why regular glass railing maintenance saves you money and headaches
Routine care does more than keep panels looking good. Hard water, salt spray, and airborne pollen bond to glass over time, and once mineral deposits etch the surface, no amount of scrubbing fully restores the original clarity. Catching buildup early, before it bonds, is far cheaper than restoration or replacement.
Glass panels maintained properly last 25–50+ years, while hardware and gaskets need periodic replacement regardless. That gap in lifespan is exactly why glass care and hardware checks belong on the same schedule.
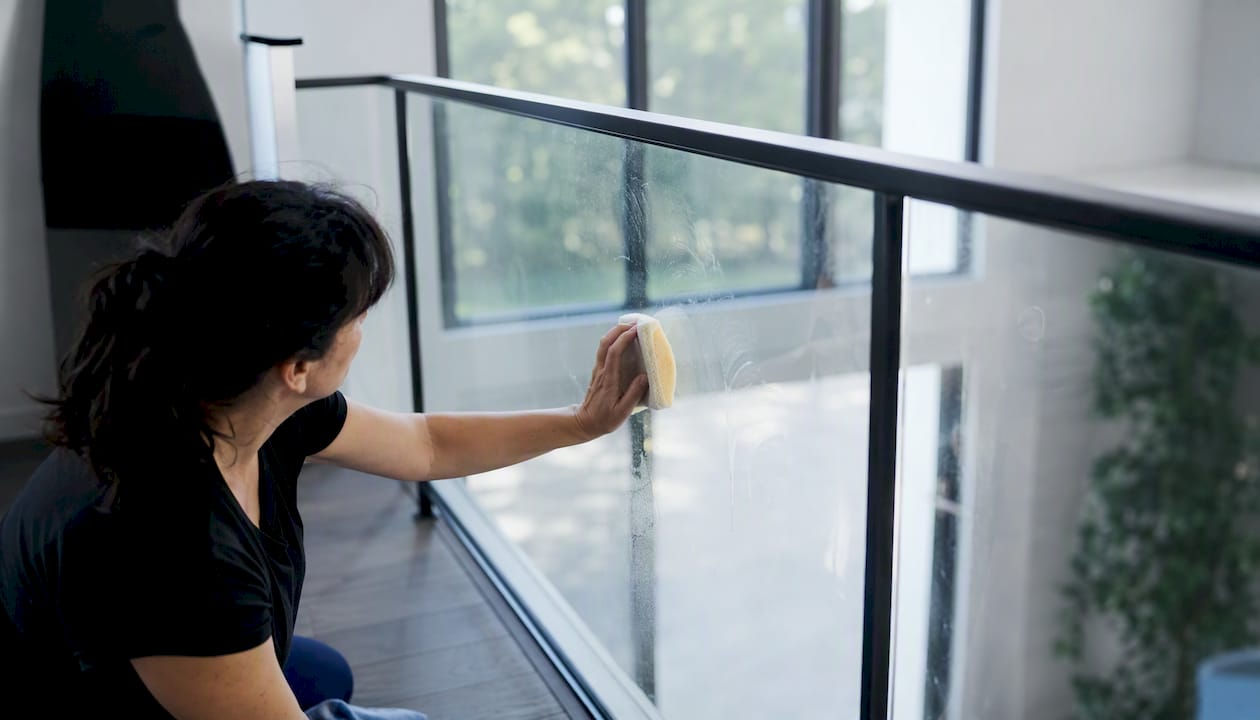
Indoor railings face a different set of problems: fingerprints, cooking grease, and smudges from daily contact. They rarely deal with mineral haze, but they show every mark. Outdoor panels contend with hard water deposits from sprinklers, salt spray in coastal settings, and pollen seasons that coat everything in a fine yellow film. Each environment calls for a slightly different cleaning frequency and, in coastal cases, a corrosion-aware approach to hardware.
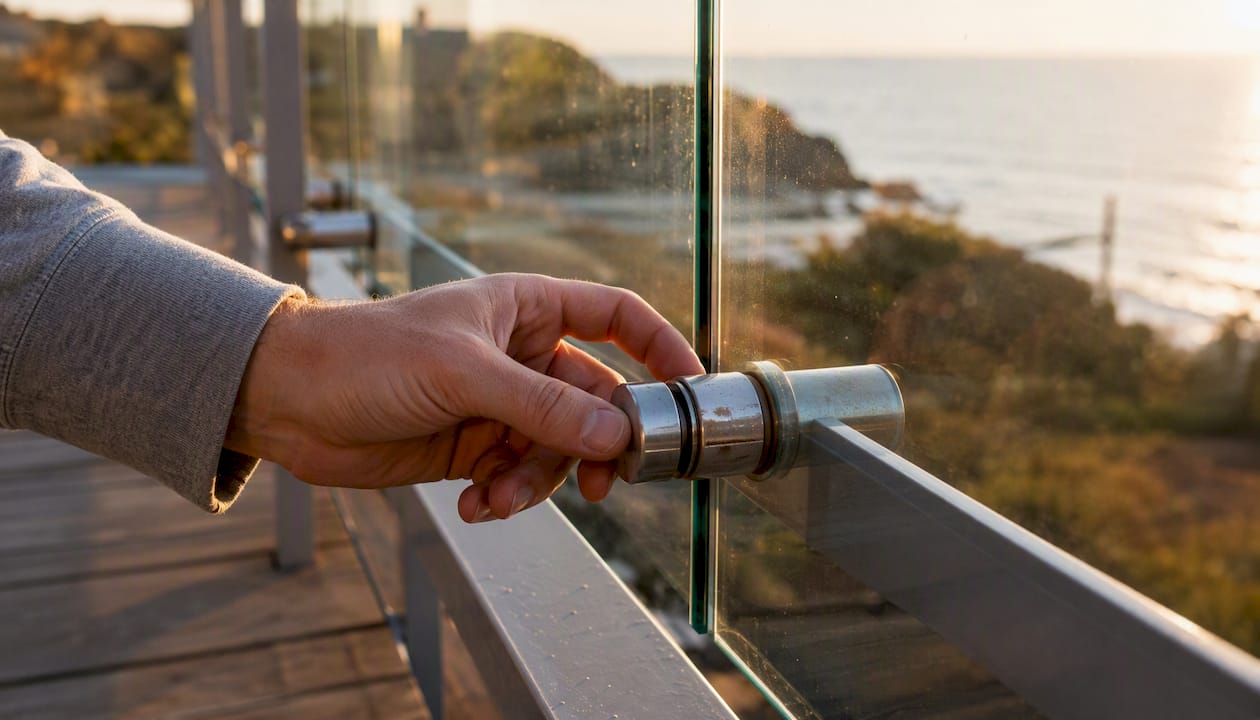
Routine cleaning also gives you a chance to spot loose posts, cracked gaskets, or corroding connectors before they become safety issues. A quarterly hardware check takes five minutes and can catch a problem that would otherwise go unnoticed until a panel shifts. Glassrailingstore’s preventive maintenance guidance reinforces this point: proactive inspection reduces long-term wear and keeps warranty conditions intact.
What tools and cleaners do pros actually recommend?
The right kit is short. You don’t need a cabinet full of specialty products.
Essential tools:
- Rubber-blade squeegee (hand size for standard panels, pole-mounted for larger spans)
- Several microfiber cloths, grit-free and washed separately from shop rags
- Soft-bristled brush for edges, channels, and hardware
- Bucket and a garden hose with a spray nozzle for outdoor panels
Safe cleaners:
- Diluted white vinegar (roughly 1 part vinegar to 3 parts water) for streak-free outdoor cleaning, per year-round maintenance guidance
- Ammonia-free commercial glass cleaner for stubborn indoor smudges
What to avoid:
- Abrasive pads, steel wool, or scouring powders — these cause micro-scratches that trap dirt and dull the surface permanently
- Ammonia-based cleaners on coated glass; if your panels carry a hydrophobic coating such as EnduroShield, ammonia degrades the coating and voids its protective benefit
- Undiluted acids or strong degreasers near stainless steel or aluminum hardware
For a deeper look at product-specific options, Glassrailingstore’s glass railing cleaners guide covers what works on architectural glass without damaging coatings.
| Tool | Best use | Advantage | Watch out for |
|---|---|---|---|
| Hand squeegee | Standard panels, indoor | Precise control, streak-free | Blade must match panel width |
| Pole squeegee | Large or elevated panels | Reach without a ladder | Requires steady pressure |
| Microfiber cloth | Spot-clean, buffing hardware | Lint-free, scratch-safe | Wash separately; grit ruins them |
| Soft-bristled brush | Edges, channels, base mounts | Clears debris from tight spots | Never use stiff or wire bristles |
Pro Tip: Size your squeegee blade to match the panel width as closely as possible. Fewer strokes mean fewer chances for streaks, and a blade that spans the full panel width clears water in one clean pass instead of leaving overlap lines.
How to clean glass railings step by step
A basic wash with warm soapy water, a thorough rinse, and a squeegee finish handles the vast majority of cleaning jobs. Here is the full sequence.
- Prep the area. Move furniture, planters, or anything that could get splashed. For elevated outdoor railings, set up a stable ladder and confirm footing before you start.
- Dry-dust first. Use a soft brush or dry microfiber cloth to knock off loose pollen, dust, and debris. Skipping this step drags grit across the glass when you apply liquid, which causes micro-scratches.
- Pre-rinse outdoor panels. A low-pressure hose rinse removes surface salt and loose particles. For coastal installations, this step alone prevents a lot of bonding.
- Apply your cleaning solution. Work one panel at a time. Apply warm soapy water with a soft cloth or sponge using light, circular motions. For indoor smudges, a damp microfiber cloth with a drop of dish soap is enough.
- Scrub edges and channels. Use your soft-bristled brush along the base channel, around hardware, and at the top rail. Debris accumulates here and gets missed in a standard wipe-down.
- Rinse thoroughly. Leave no soap residue. Residue dries into a film that looks worse than the original smudge.
- Squeegee top-to-bottom. Start at the top corner and pull in overlapping horizontal strokes toward the bottom. Wipe the blade with a clean cloth after every single pass. The squeegee is the most important tool for a streak-free finish; removing droplets before they dry is what prevents mineral spots.
- Buff hardware and edges dry. Use a dry microfiber cloth on posts, connectors, and the top rail. Water pooling on hardware accelerates corrosion.
Variations worth knowing:
- Clean on a cloudy day when possible. Direct sun dries solution before you can squeegee it off, leaving streaks.
- For indoor spot-cleaning, skip the bucket entirely: a microfiber cloth dampened with diluted vinegar and a dry buff handles fingerprints in under a minute. Avoid paper towels, which leave lint.
- After a coastal storm, rinse panels within 24–48 hours to prevent salt from bonding to the surface.
Pro Tip: Use lukewarm water, not hot. Hot water evaporates faster and increases streaking risk. A soap concentration of roughly one teaspoon per gallon of water is enough — more soap means more residue to rinse off.
How to remove hard-water stains and cloudy haze safely
Mineral deposits form when water evaporates and leaves calcium and magnesium behind. The longer they sit, the harder they bond. The fix is a nonabrasive chemical or light mechanical approach, never scrubbing with anything that scratches.
Step-by-step mineral removal:
- Wet the affected area with clean water first to soften the deposit
- Apply a baking soda and water paste (roughly 2 parts baking soda to 1 part water) directly to the stain and let it sit for 5–10 minutes
- Gently work the paste with a soft, nonabrasive pad using circular motions
- Rinse completely and inspect; repeat if needed
- For heavier buildup, a commercial hard-water glass remover formulated for architectural glass works faster than baking soda and is still safe on tempered panels
Safety precautions:
- Always test any new product on a small, hidden area of the panel first
- Keep acid-based removers away from adjacent aluminum or stainless steel hardware; even mild acids accelerate corrosion on metal
- Protect rubber gaskets and seals from prolonged chemical contact; rinse the base channel thoroughly after treatment
When to call a professional: if the haze doesn’t respond to two or three treatment cycles, the glass may be etched rather than just stained. Etching is a physical change to the surface, not a deposit sitting on top of it. A glass restoration service can sometimes polish out light etching, but deep etching usually means panel replacement. Glassrailingstore carries replacement tempered glass panels if an inspection reveals damage beyond what cleaning can fix.
How do you prevent scratches and protect your railing long-term?
The single most effective scratch-prevention measure is using only soft tools. Abrasive pads, rough sponges, and even dirty microfiber cloths (ones that have picked up grit from a previous job) can leave fine scratches that catch light and accumulate dirt faster than clean glass.
Hardware care:
- Clean stainless steel posts and connectors with a mild soap solution and wipe dry; avoid chlorine-based cleaners that pit the surface
- Aluminum hardware benefits from a light coat of protective wax once or twice a year, particularly in humid or coastal environments
- Check all connectors, base mounts, and wall attachments quarterly for early signs of corrosion or loosening
Protective coatings:
Hydrophobic coatings bond to the glass surface and cause water to bead and run off rather than sit and evaporate. This reduces mineral deposit formation and cuts cleaning frequency noticeably. They don’t eliminate cleaning, but a well-applied coating means you’re maintaining rather than remedying. Always confirm a coating is compatible with your glass before applying, and follow the manufacturer’s reapplication schedule.
Gaskets and seals:
Check rubber gaskets at the base channel and around hardware annually. Cracked or dried gaskets let water infiltrate the mounting system, which accelerates corrosion underneath where you can’t see it. A silicone protectant spray applied to gaskets once a year keeps them pliable.
Do/don’t quick list:
- Do use a rubber squeegee and clean microfiber cloths
- Do rinse after storms, heavy pollen, or sprinkler overspray
- Don’t use ice-melt products containing calcium chloride near glass base channels; they corrode hardware and stain glass
- Don’t lean metal tools or ladders directly against tempered panels
What’s the right cleaning schedule for your railing?
Frequency depends almost entirely on what the railing is exposed to. A sheltered indoor stair railing and a pool-deck railing in Florida are not the same maintenance problem.
These intervals come from recommended cadence guidance for glass railing environments. Coastal and pool-adjacent railings need more frequent attention because salt and chlorine accelerate both glass staining and hardware corrosion.
Seasonal triggers to add to your calendar:
- Spring: full rinse after pollen season peaks; check base channels for debris
- Summer: increase rinse frequency after pool use or sprinkler overspray
- Fall: clear leaves and organic debris from base channels before they trap moisture
- Winter: remove salt and grit promptly after ice events; check weep holes and drainage at base mounts
Extra cleans are warranted after any heavy storm, a period of high bird activity, or a construction project nearby that generates dust. Don’t wait for the scheduled date if the glass is visibly dirty.
Safety tips and common mistakes to avoid
Work safely before you work efficiently. Glass railing cleaning on elevated decks or stairs carries real fall risk, especially when surfaces are wet.
Before you start:
- Wear slip-resistant shoes, nitrile gloves when using any chemical cleaner, and eye protection if you’re spraying solution overhead
- Confirm ladder feet are on stable, level ground; use a standoff to keep the ladder away from the glass panels
- On elevated decks or balconies, work with a partner when possible
Don’t do these:
- Don’t aim a high-pressure washer directly at glass edges or hardware seals; the force can drive water behind gaskets and loosen fittings
- Don’t lean heavy tools or a ladder directly against a tempered glass panel; tempered glass is strong under distributed load but vulnerable to point impact
- Don’t mix cleaning chemicals; bleach and ammonia together produce toxic fumes, and acid plus bleach is worse
Coastal and winter-specific cautions:
Salt spray and ice-melt runoff are the two biggest threats to hardware longevity in harsh environments. Glassrailingstore’s resources on coastal glass railing care cover hardware selection and finish choices that hold up better under those conditions. After any ice event, rinse the base channel and hardware with fresh water before the melt product dries.
Pro techniques that actually make a difference
Correct tool use matters more than which cleaner you choose. A professional window cleaner with a $15 squeegee and dish soap will outperform an amateur with a $40 specialty spray and a paper towel every time.
Squeegee technique specifics:
- Hold the blade at roughly a 30-degree angle to the glass, not flat
- Pull in one continuous stroke without stopping mid-panel; stopping leaves a line
- Wipe the blade with a clean, dry cloth after every single pass — this is the step most people skip, and it’s why streaks reappear
- Match blade length to panel width; a blade that’s too short requires extra strokes and extra overlap lines
Finishing details:
- After squeegeeing, run a dry microfiber cloth along the bottom edge of each panel to catch drips before they dry
- Detail hardware with a separate cloth; never use the same cloth on glass and metal without washing it first, since metal polish residue smears glass
Glassrailingstore’s expert cleaning guide reinforces the 24–48 hour rinse window after storms as a key maintenance habit. Rinsing before salt or pollen bonds to the surface means your next scheduled clean stays quick rather than turning into a remediation session.
Pro Tip: For large panel spans, a pole squeegee with a swivel head lets you work from the deck surface without a ladder. Pair it with a long-handled soft brush for the wash step and you can clean a full balcony railing in under 20 minutes.
Why routine care beats occasional heavy scrubbing
Most people clean their glass railings reactively: they notice the haze, spend an hour scrubbing, and then ignore the railing for another six months. That cycle is harder on the glass, harder on the hardware, and harder on you than a quick rinse every few weeks would ever be.
Mineral deposits don’t just sit on glass. Over time they chemically bond to the surface, and once that happens, removal requires either an acidic treatment that risks adjacent hardware or mechanical polishing that risks the glass itself. A two-minute rinse within 48 hours of a sprinkler cycle or a coastal storm prevents that bonding entirely.
Hardware tells the same story. A loose connector caught at a quarterly check is a five-minute fix. The same connector ignored for a year can work itself into a structural problem. Proactive inspection isn’t overcaution; it’s the difference between maintenance and repair.
The long-term maintenance guidance from Glassrailingstore makes this case plainly: a documented inspection schedule, consistent cleaning cadence, and early hardware attention keep glass railings performing safely for decades. Write down what you find at each check. A simple note with the date and any observations takes 30 seconds and gives you a record that’s genuinely useful if a warranty question ever comes up.
Sources
The following resources informed this guide and are worth bookmarking for ongoing reference.
- Glass Railing Cleaning 101: Year Round Tips
- How to Maintain and Clean Glass Railings for Long-Lasting Beauty - Glasscrafters
For stain removal, start with the Glassrailingstore hard-water guide. For hardware replacement after an inspection, the tempered glass panel and custom glass railing product pages cover standard and non-standard sizes.
Recommended
- Glass Railing Cleaning Guide: Expert Tips for Spotless Results – The Glass Railing Store
- Best Cleaning Products for Glass Railings – The Glass Railing Store
- DIY glass stair railing: A complete homeowner’s guide – The Glass Railing Store
- Removing Stubborn Stains from Glass Railings Without Damaging the Surf – The Glass Railing Store