

Glass Railing Stair Rake Angle: Measure and Install Right
What Is the Glass Railing Stair Rake Angle and Why Does It Matter?
The glass railing stair rake angle is the slope angle your staircase makes with the horizontal, and every glass panel, post, and cap rail you install must follow it exactly. Get it wrong by even a few degrees and you’re looking at visible gaps, failed inspections, and a railing that wobbles under load. Get it right and the glass sits flush, the handrail height stays code-compliant from the first tread to the last, and the whole installation looks intentional.
The industry term for this measurement is the stair pitch, though “rake angle” is the phrase most installers use on the job. Both refer to the same thing: the angle formed between the stair slope and a level plane, typically expressed in degrees.
Three numbers drive every rake angle calculation:
- Rise: the vertical height of a single step, measured from nosing to nosing
- Run: the horizontal depth of a single tread
- Slope: the ratio of rise to run, which converts directly to degrees
For most residential stairs in the United States, IBC Section 1011.11 requires handrails to have a compliant angle range from horizontal, ensuring safe and comfortable use. Pre-cut glass panels are typically manufactured for specific pitch tolerances, so knowing your exact angle before you order is the difference between a clean install and an expensive reorder.
How to Measure Your Stair Rake Angle Step by Step
Accurate measurement starts at the stair nosing, not the floor. Floors are rarely perfectly level, and measuring from them introduces error that compounds across every step.
Step 1: Measure rise and run with a tape measure. Hold the tape vertically from one nosing to the nosing directly above it for the rise. Then measure horizontally from the face of one riser to the face of the next for the run. Do this on at least three steps and average the results.
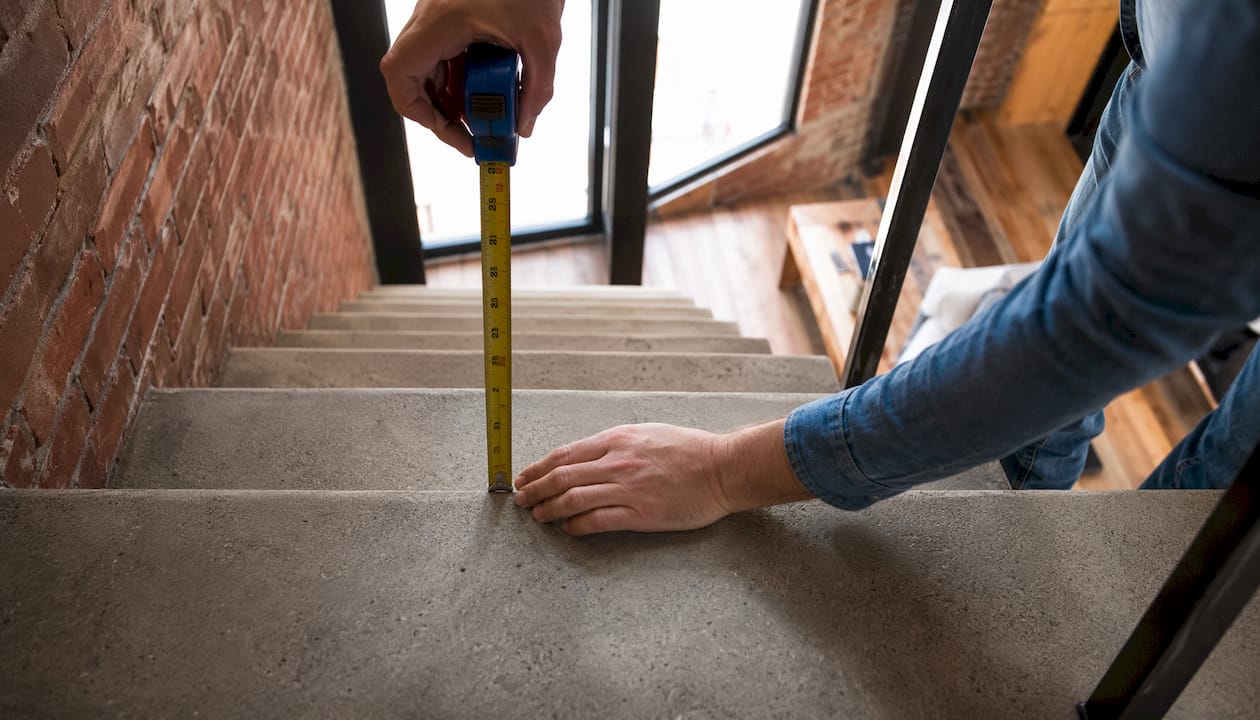
Step 2: Use a digital angle finder on the tread surface. Place the tool flat on the tread, parallel to the direction of travel, and read the angle directly. A digital angle finder or a quality combination square with an angle gauge gives you a reading in degrees without any math. Check three or four treads and average them.
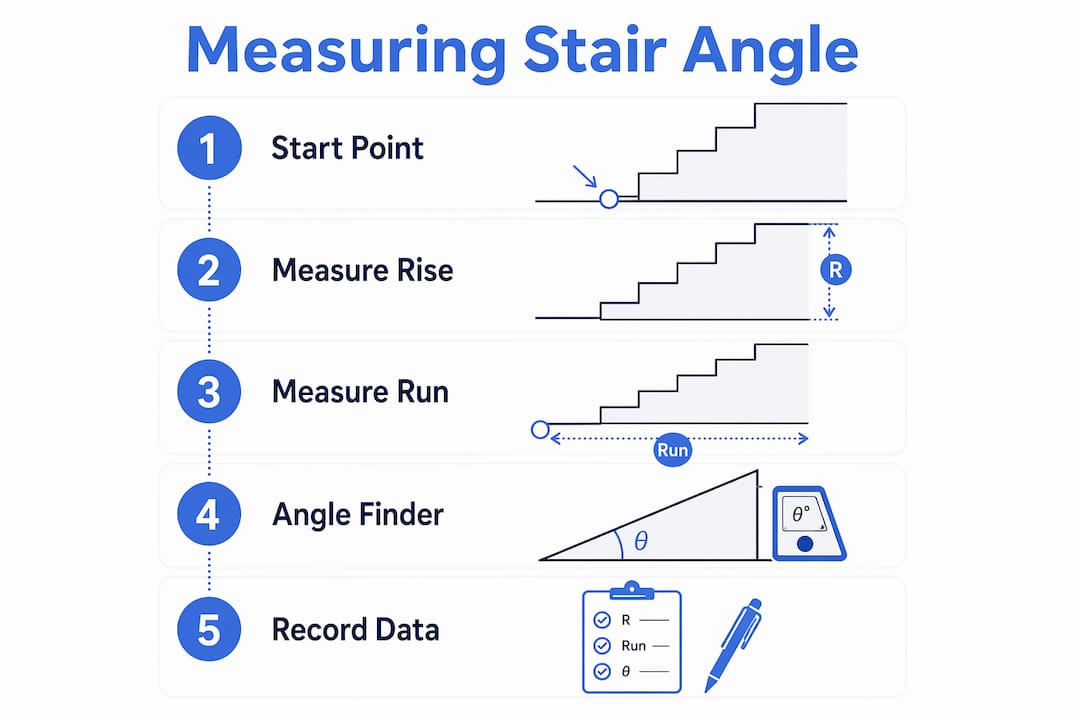
Step 3: Use your smartphone as an inclinometer. Placing your phone flat on a tread and reading the pitch in degrees mode is often faster and more accurate than manual rise-and-run calculations. Apps that use the phone’s built-in accelerometer display the angle in real time. Avoid placing the phone on the riser or the nosing edge itself.
A few things to document before you order anything:
- Average rise and run measurements from at least three steps
- The angle reading in degrees from your digital tool or phone
- Any variation between steps (irregular stairs need special attention)
- The total rise and total run of the full stair run for handrail length calculations
Pro Tip: Photograph your tape measure and angle finder readings in place. That photo record protects you if a measurement gets questioned during inspection or when panels arrive and need verification.
How to Calculate the Rake Angle from Rise and Run
Every stair forms a right triangle: the rise is the vertical leg, the run is the horizontal leg, and the stair slope is the hypotenuse. The rake angle sits at the base of that triangle, between the run and the slope.
The formula for the angle is:
Angle (Degrees) = atan(Rise ÷ Run) × (180 ÷ π)
Use consistent units throughout. Mixing inches and millimeters in the same calculation produces a wrong answer every time.
| Rise (in) | Run (in) | Angle (°) | Code-compliant? |
|---|---|---|---|
| — | 11 inches | — | No (below 30°) |
| 7 inches | 11 inches | — | Yes |
| — | 11 inches | — | Yes (near midpoint) |
| — | — | — | Yes |
| — | — | — | No (above 38°) |
Online stair handrail calculators automate this formula and also compute handrail length using the Pythagorean theorem: Rail Length = √(Rise² + Run²) + extensions. Manual calculation is worth doing at least once to verify a digital result, especially on non-standard stairs where the calculator’s assumptions may not hold.
Once you have the primary rake angle, the secondary rake angle is simply 90° minus the primary. If your stairs run at 34°, the secondary angle is 56°. You’ll need both numbers when making miter cuts where the rake rail meets a level landing or a plumb post.
Building Code Requirements for Stair Railing Angles
IBC Section 1011.11 is the governing standard for most residential and commercial stair handrails in the United States. It requires handrails to run parallel to the stair slope, maintaining a height of 34" to 38" measured vertically from the stair nosings. The permitted angular range of 30° to 38° from horizontal corresponds directly to the stair pitches IBC allows under Section 1011.5, which limits riser height to 4–7 inches and tread depth to a minimum of 11 inches.
Falls on stairs account for roughly 12,000 deaths per year in the United States, according to CDC data. A handrail at the wrong angle or the wrong height breaks the continuous grip geometry that makes railings protective in the first place.
Best practices for code compliance:
- Verify the stair pitch falls within 30°–38° before setting a single bracket
- Measure handrail height at the first, middle, and last tread, not just at one point
- Document all measurements with photos for the inspection record
- Note that OSHA 1926.1052(b)(1) allows a wider 30°–50° range for temporary construction site stairs, so the applicable code depends on the project type
Non-compliance means reinspection, rework, and real liability exposure if someone falls. A railing that looks right but sits at 41° fails the IBC test regardless of how clean the installation looks.
Tips for precision and fit when installing glass railing on stairs
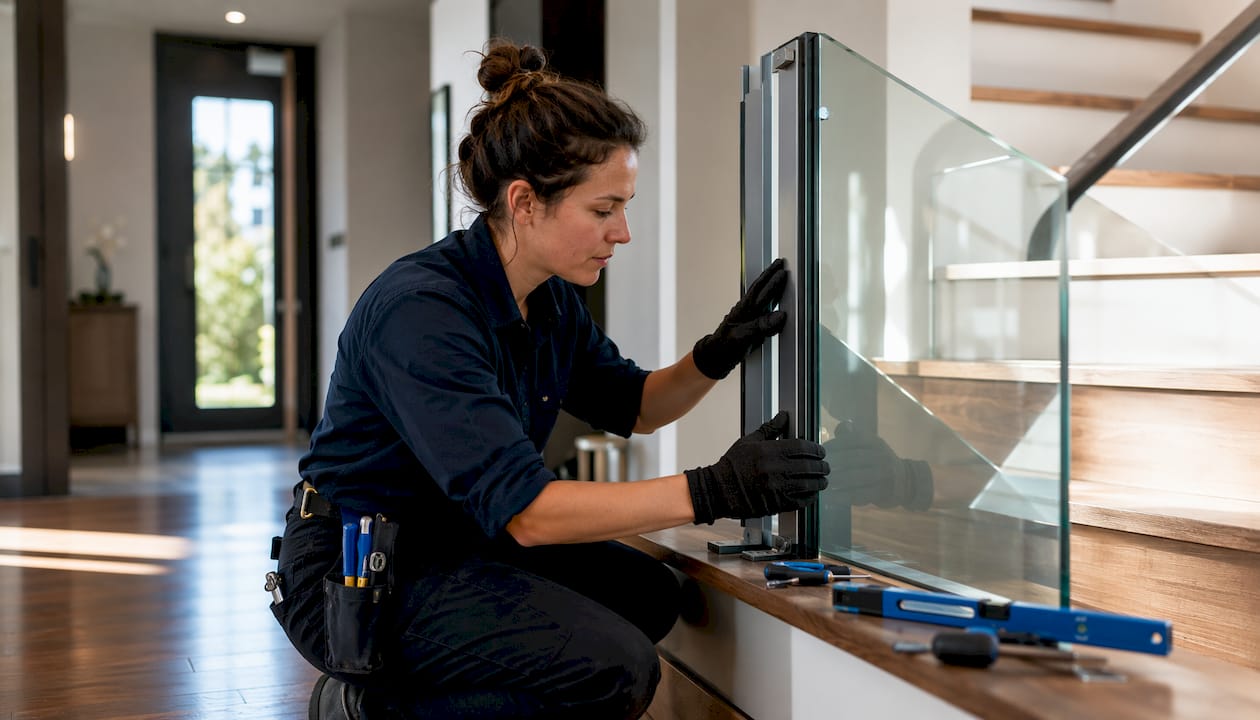
Precision in glass railing installation comes down to two things: knowing both your rake angles before you touch a saw, and verifying fit before anything gets fastened permanently.
The “Up” number is the key measurement for consistent handrail height. Calculate it by subtracting the rail cross-section height from your target finished rail height above the nosing. Calculate the Up number by subtracting the rail cross-section height from your target finished rail height above the nosing to maintain consistent handrail height. Mark that distance on every post from the tread nosing level, and your handrail height stays consistent across the full stair run without constant re-measuring.
Pro Tip: Treat your stair layout as a formal drafting exercise. Draw the primary rake angle, the secondary angle, and the Up number on paper before cutting anything. Label both angles prominently on the drawing so you don’t confuse them mid-installation.
A few more things that separate clean installs from problem ones:
- Calculate the primary and secondary rake angles before any miter cuts. Use the primary angle where the rail meets a plumb surface, and the secondary where it meets a level surface.
- Dry-fit glass panels and test-mount hardware before final fastening. Temporary positioning reveals fit problems before you’ve committed.
- Verify that your selected glass panels accommodate your specific pitch. Pre-cut panels are typically manufactured for pitches between 38° and 45°, so confirm the tolerance range matches your measured angle.
- Check the slope adaptation guide for your specific system before ordering panels, especially on stairs that fall near the edge of a tolerance range.
Common Errors When Measuring Stair Rake Angle
The single most common mistake is measuring the angle from the floor or from a level surface rather than from the stair nosing. Floors are almost never perfectly level, and that small deviation gets multiplied across every bracket you set.
Cutting before test-fitting is the second most expensive error. Accurate angle measurement prevents gaps and miscuts, but only if you verify the fit with a dry run first. The extra 15–20 minutes spent test-fitting saves material and avoids the frustration of a panel that’s a quarter-inch off.
Other errors worth avoiding:
- Measuring only one step: Steps on the same staircase often vary slightly. Average at least three readings.
- Ignoring handrail orientation: Square and rectangular cap rails have a defined top and bottom. Mark which edge faces up before cutting so the angle orients correctly.
- Confusing primary and secondary angles: Using the secondary angle (90° minus pitch) where the primary is needed produces a miter cut that’s visibly wrong. Label both on your drawing and double-check before the saw touches the material.
- Skipping height verification after angle is set: Angle correct plus height wrong still fails inspection. Check height at the first, middle, and last tread.
How Different Glass Railing Systems Affect Rake Angle Measurement
Not all glass railing systems handle the rake angle the same way, and the system you choose changes what you actually need to measure and order.
-
Post-and-panel systems: Use vertical posts set into the stair structure, with glass panels fitted between them. The rake angle determines the height at which each post gets cut and the angle of the top rail. Measurement accuracy matters most at the post-cutting stage, because a post cut at the wrong angle throws off every panel and connector above it.
-
Channel-mount (shoe) systems: Run a continuous aluminum U-channel along the stair slope, and the glass panels drop into it. The channel itself must be set at the exact rake angle, which means the substrate it mounts to needs to be cut or shimmed to that pitch. These systems are less forgiving of measurement error because the channel locks in the angle for the entire run at once.
- Frameless top-mount systems: Clamp glass panels directly to the stair structure with no visible posts. Here, the rake angle affects the clamping hardware angle and the panel cut at the top edge. Panels for these systems are often custom-cut to the specific pitch, so submitting the correct angle to the fabricator is the most critical step. Glassrailingstore’s tempered glass panels and handrail installation guide cover the measurement specs needed for each system type.
The connector hardware also varies by system. A rake-to-level transition on a post system uses a different connector geometry than the same transition on a channel system. Knowing your system type before you measure lets you record the right data points from the start.
Key Takeaways
Getting the glass railing stair rake angle right requires measuring from the stair nosing, calculating with the arctangent formula, and verifying every angle against IBC Section 1011.11 before ordering panels or cutting hardware.
| Point | Details |
|---|---|
| Measure from the nosing | Always measure rise, run, and pitch from the stair nosing, not the floor, to avoid compounding errors. |
| Use the arctangent formula | Angle = atan(Rise ÷ Run) × (180 ÷ π); use consistent units and average at least three steps. |
| IBC compliance range | IBC Section 1011.11 requires handrails at 30°–38° from horizontal, with height 34"–38" above nosings. |
| Know both rake angles | Primary angle drives rail and panel cuts; secondary angle (90° minus primary) handles rake-to-level transitions. |
| Match panels to pitch tolerance | Pre-cut glass panels are typically made for pitches between 30° and 38° to align with IBC compliance; confirm your angle fits before ordering. |
Recommended
- Glass Stairs Railing: Handrail Height, 12mm Glass & Specs – The Glass Railing Store
- Working with Uneven Surfaces: Tips for Glass Railing Installation – The Glass Railing Store
- DIY glass stair railing: A complete homeowner’s guide – The Glass Railing Store
- Glass Railing Tools & Measurement Checklist for DIY Kits – The Glass Railing Store