
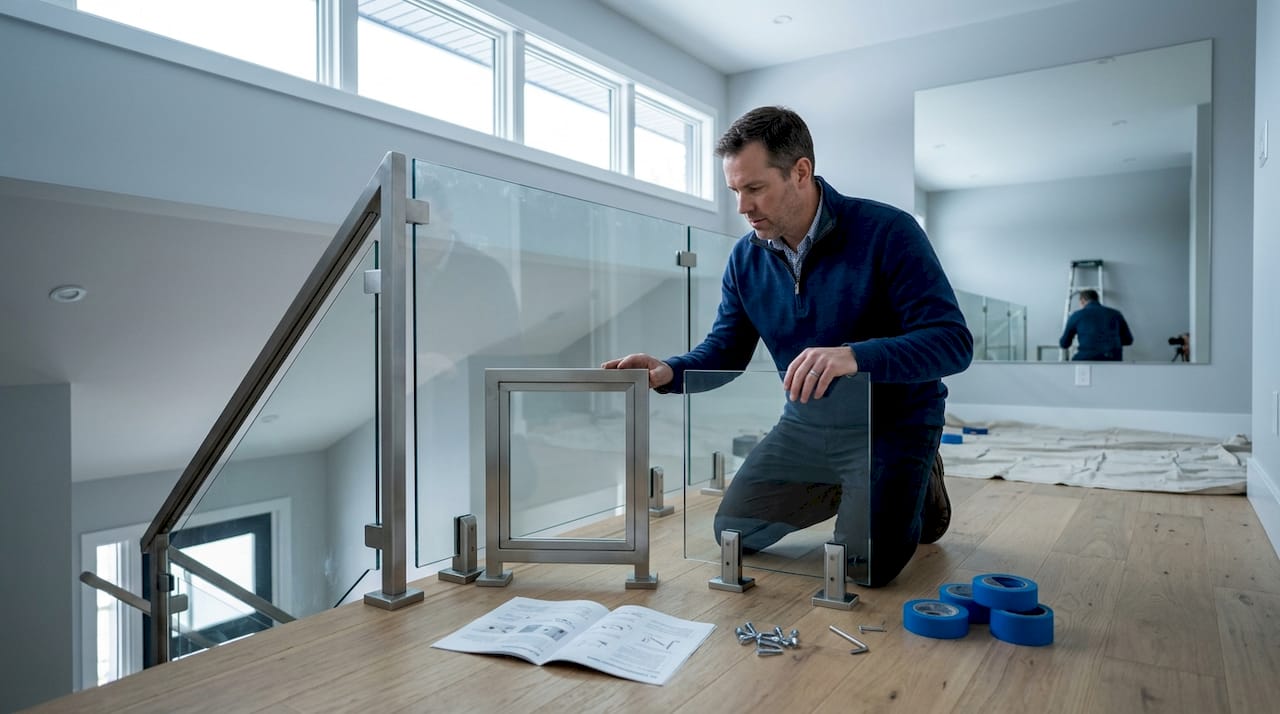
DIY glass stair railing: A complete homeowner's guide
Replacing outdated wood or iron balusters with a sleek glass railing can transform a staircase from a purely functional feature into a genuine design statement. But a lot of homeowners hit the brakes the moment they imagine dealing with safety codes, heavy panels, and glass railing hardware they’ve never seen before. The good news: a DIY glass stair railing is absolutely achievable, and thousands of homeowners complete these projects every year without hiring a contractor. What separates a smooth install from a frustrating one is preparation. This guide walks you through every phase, from understanding what the code actually says to driving the final fastener.
Table of Contents
- What to know before you start
- Tools, materials, and planning your project
- Step-by-step installation: DIY glass stair railing
- Troubleshooting and avoiding common mistakes
- Why most DIY glass railing failures are preventable
- Get the right glass railing materials and code guidance
- Frequently asked questions
Key Takeaways
| Point | Details |
|---|---|
| Use safety glass only | Always choose tempered or laminated safety glass at the right thickness for your stairs. |
| Know your codes | Check building codes for your region before buying glass, to avoid costly mistakes or replacements. |
| Framed is best for DIY | Framed systems are more forgiving, easier to level, and safer when first installing glass railings as a homeowner. |
| Avoid common pitfalls | Double-check measurements, use quality hardware, and always isolate glass with gaskets. |
| Take your time planning | Many installation errors can be prevented in the planning stage with careful layout and research. |
What to know before you start
With your goal in mind, it’s vital to understand what makes for a successful and safe DIY glass railing before you pick up a tool.
Glass types and thickness
Not all glass is legal or safe for stair railings. Building codes in the U.S. require either tempered or laminated safety glass for railing applications. Tempered glass is heat-treated to break into small, relatively harmless pebbles rather than dangerous shards. Laminated glass bonds two panels around a plastic interlayer, so it holds together even if it cracks.
For framed interior systems, glass must be tempered or laminated safety glass, with a minimum thickness of 10 to 12mm for framed installations and 12 to 13.5mm for residential stair applications. Going thinner than the minimum isn’t just a code violation; it’s a genuine structural risk. Always confirm the glass spec with your supplier before ordering.
Required railing heights
Height requirements exist for a simple reason: they prevent people from falling over. Most jurisdictions follow guidelines where railing height must be 36 to 42 inches measured from the stair tread nosing (the front edge of each step), while the handrail itself must sit between 34 and 38 inches. The handrail is the part you grip; the guard is the full barrier. Both measurements matter and both are inspected.
Framed vs. frameless systems
This is the most important decision you’ll make before purchasing anything.
| Feature | Framed system | Frameless system |
|---|---|---|
| DIY difficulty | Beginner to intermediate | Intermediate to advanced |
| Glass thickness needed | 10 to 12mm | 12 to 13.5mm |
| Aesthetic | Traditional, structured look | Clean, open, modern |
| Hardware visibility | Posts and rails visible | Minimal hardware |
| Cost | Lower | Higher |
| Margin for error | More forgiving | Very precise |
Framed systems are more forgiving for DIY and give beginners more structural support, while frameless systems offer a premium modern look but demand greater skill and precision. If this is your first glass railing project, a framed or semi-frameless system is the smarter starting point.
Key code factors to check locally
Building codes vary by city and county. Before you buy a single panel, check your local jurisdiction for:
- Minimum glass thickness for your specific stair type
- Baluster spacing rules (most codes prohibit a 4-inch sphere from passing through)
- Post anchoring requirements, especially for concrete or tile substrates
- Permit requirements for interior stair modifications
Reviewing the building codes for glass railings that apply to your region is a step you cannot skip. It’s also worth familiarizing yourself with essential DIY safety guidelines before you start, particularly around handling heavy glass and drilling into structural materials.
Important: Local amendments can be stricter than the International Residential Code (IRC). Your city’s building department is the final authority. When in doubt, call them directly.
Tools, materials, and planning your project
Once you understand the system and requirements, it’s time to gather everything you’ll need to complete the project from start to finish.
Complete tools and materials checklist
| Item | Purpose |
|---|---|
| Tempered or laminated glass panels | Main barrier panels |
| Post bases or spigots | Anchor glass to floor or stringer |
| Stainless steel hardware and fasteners | Structural connection |
| Rubber gaskets and neoprene shims | Protect glass from metal contact |
| Handrail (wood, steel, or aluminum) | Graspable top rail |
| Drill with masonry or wood bits | Anchoring posts |
| Torpedo level and 4-foot level | Plumb and level checks |
| Measuring tape and chalk line | Accurate layout |
| Pencil and painter’s tape | Marking and protecting surfaces |
| Wrench set and socket set | Tightening hardware |
| Safety glasses and work gloves | Personal protection |
| Glass suction cups | Handling panels safely |
Avoid substituting standard bolts for hardware-grade stainless steel fasteners. Cheap zinc or plated fasteners corrode, loosen, and can fail under load. Framed systems are easier and more cost-effective than frameless, but either way, hardware quality directly affects how long your railing stays safe and tight.
Planning your layout
Accurate measurement before you order glass is the single most valuable hour you’ll spend on this project. Measure your stair run carefully, accounting for:
- Stair angle (rake angle): Glass panels on stairs are cut at an angle. You need to know the exact pitch of your stair stringer to order correctly cut panels.
- Panel spacing: Leave a consistent reveal (gap) between panels and between panels and posts to account for glass expansion.
- Post placement: Posts typically land every 36 to 48 inches, but check your system’s specs.
- Newel post locations: Top and bottom newel posts anchor the whole system.
Pro Tip: Use cardboard mockups cut to the shape of your glass panels before you order. Tape them in place on your staircase for a full day. You’ll spot clearance issues, height concerns, and aesthetic problems before a single panel is cut.
Checking common glass railing mistakes before ordering can save you hundreds of dollars in remade panels and wasted hardware.
Step-by-step installation: DIY glass stair railing
Now that you’re organized and equipped, here’s a tool-by-tool walkthrough to install your glass stair railing with confidence.
Installation steps
-
Mark your post locations. Use a chalk line to mark where each post base will land. Double-check spacing against your layout plan and verify with a level.
-
Drill pilot holes. Use the correct bit for your substrate: wood, concrete, or tile each requires a different approach. Drill slowly to avoid cracking tile or splitting wood near edges.
-
Secure post bases. Anchor each base using the correct fastener for your substrate. For wood, use structural lag screws. For concrete, use expansion anchors rated for the load. Torque each fastener to spec.
-
Plumb your posts. Insert the posts into their bases and check plumb (perfectly vertical) on two axes using a torpedo level. Do not skip this step. A post that’s 2 degrees off will cause every panel above it to look crooked.
-
Dry-fit your glass panels. Before final installation, place each panel in position without tightening. Confirm fit, spacing, and alignment. Adjust shims as needed.
-
Install gaskets. Place rubber gaskets or neoprene pads in every channel or clamp that will contact glass. This is non-negotiable.
-
Set and secure glass panels. With gaskets in place, carefully lower each panel into position using glass suction cups. Tighten clamps or channel bolts to the manufacturer’s specified torque. Do not overtighten.
-
Install the handrail. Attach your top rail to the post caps or directly to the glass using the specified hardware. Check that it sits at the correct height (34 to 38 inches) throughout the run.
-
Final torque check. Go back over every fastener one more time. Glass panels can shift slightly during installation, and a final check catches any loosened connections.
-
Clean and inspect. Remove any tape, adhesive residue, or fingerprints. Inspect each panel for chips, scratches, or cracks before calling the project complete.
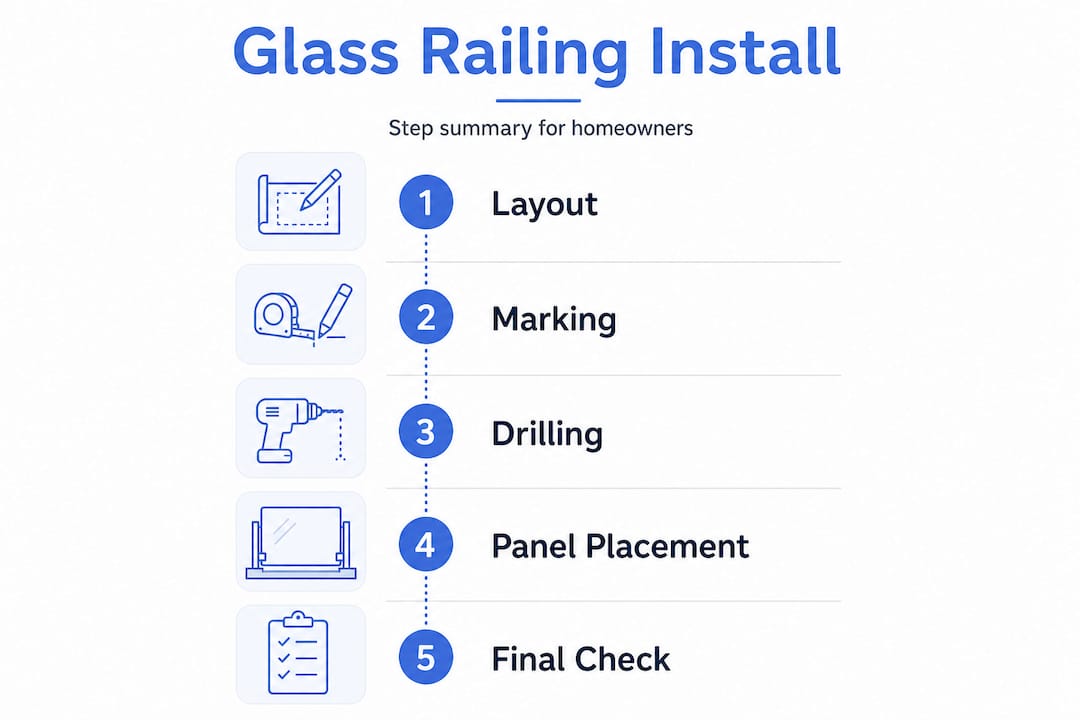
Installation step summary
| Step | Estimated time | Key caution |
|---|---|---|
| Layout and marking | 30 to 60 min | Measure twice, mark once |
| Post base drilling and anchoring | 1 to 2 hours | Use correct anchors for substrate |
| Post plumbing | 30 min | Check plumb on both axes |
| Glass dry-fit | 30 to 45 min | Never force a panel |
| Gasket installation | 15 to 30 min | Cover every metal contact point |
| Panel installation | 1 to 2 hours | Use suction cups; two people recommended |
| Handrail installation | 45 to 90 min | Confirm height at multiple points |
| Final inspection | 30 min | Test every connection for movement |
Compliant glass railing installation means checking your work against code at every stage, not just at the end.
Pro Tip: Always use rubber gaskets or neoprene shims wherever glass contacts metal. Direct glass-to-metal contact creates stress points that can cause panels to crack weeks or even months after installation, especially during temperature changes.
Among the most common installation pitfalls are inaccurate measurements, poor leveling, cheap fasteners, direct glass-to-metal contact, and ignoring local code requirements. Every one of these is preventable with proper planning.
Troubleshooting and avoiding common mistakes
Installation doesn’t always go perfectly. Here’s how to sidestep issues before they happen, or fix them if they do.
The most frequent DIY errors
- Off measurements: Even a 1/8-inch error in a panel dimension can prevent proper seating in a channel or cause visible gaps.
- Skipping the level: A post that looks straight to the eye may be 2 to 3 degrees off. Always use a level, not your eyeball.
- Wrong fastener type: Using standard hardware store bolts instead of stainless steel or zinc-rated structural fasteners leads to corrosion and loosening over time.
- No gaskets: Glass sitting directly in a metal channel will develop stress cracks. Use rubber or neoprene at every contact point.
- Ordering before measuring: Many homeowners measure once quickly and order. Then the glass arrives and doesn’t fit.
Fixing panel misalignment
If a panel sits visibly crooked after installation, loosen (do not remove) the clamps or channel bolts on that panel. Insert plastic shims at the base of the panel to adjust its angle. Re-check plumb, then re-tighten to spec. Do not try to force the panel straight while fully clamped; you risk cracking the glass near the hardware.
Safety warning: Never use a cracked or chipped glass panel. Even a small edge chip can propagate into a full break under load or thermal stress. Replace any damaged panel before the installation is used.
For a thorough final inspection before calling your project done, use this checklist:
- Every post is plumb on both axes
- All fasteners are tightened to spec
- No glass-to-metal contact anywhere
- Railing height is 36 to 42 inches at all points
- Handrail height is 34 to 38 inches throughout
- No panel gaps wider than 4 inches
- No visible chips, scratches, or cracks in any panel
Reviewing glass railing mistakes to avoid one more time before your final walkthrough is worth it. A quick reference to construction mistakes and tips can also reinforce good habits for any home improvement project.
Why most DIY glass railing failures are preventable
Here’s a perspective you won’t find in most installation tutorials: the vast majority of DIY glass railing failures have nothing to do with the actual installation work. They happen before anyone picks up a drill.
The real difficulty in this project is not cutting glass or tightening clamps. It’s spending the time upfront to measure carefully, read the applicable code sections thoroughly, and lay out your system on paper before you order anything. Most DIYers who struggle with glass railings rushed this phase. They measured quickly, skipped the permit research, or assumed their local code matched the general guidelines they read online.
One missed detail can jeopardize the entire project. Forgetting gasket spacers in a 30-panel frameless system means replacing hardware on every single panel. Using the wrong anchor for a concrete substrate means your post bases won’t meet load requirements, and the whole system may need to be torn out and redone. These aren’t edge cases; they’re the stories behind most negative DIY outcomes.
The counterintuitive advice is this: slow down aggressively during planning. Build cardboard mockups. Spend an afternoon on the phone with your local building department. Order your glass only after you’ve verified every dimension twice against the actual staircase, not a drawing. Use expert glass rails mistakes as a pre-purchase checklist, not just a post-install reference.
The homeowners who complete beautiful, code-compliant glass railings on their first attempt are not necessarily more skilled. They’re more patient. They treat the planning phase with the same seriousness as the installation, and they ask for help before cutting anything. That mindset shift is worth more than any single tool or technique in this guide.
Get the right glass railing materials and code guidance
You’re equipped for your project. Here’s where to go for materials, code answers, and extras that make the process smoother, safer, and more reliable.
At Glass Railing Store, you’ll find engineering-tested glass panels and hardware specifically designed for stair applications, so you’re not guessing at specs. If you’re still working through code questions, the building code guidance resource covers residential requirements by application type. And when you’re ready to order, custom stair glass panels are available cut to your exact rake angle and dimensions, which eliminates the most common source of DIY error entirely. Free shipping on orders over $3,000 and direct support from a team that handles these projects daily means you’re not figuring it out alone.
FAQs
1. What glass thickness is safe and legal for stair railings?
For interior stairs, use at least 12mm tempered or 9/16-inch laminated glass panels to meet most residential building codes. Always confirm the exact requirement with your local authority before ordering.
2. How tall should a glass stair railing be for code compliance?
Typical code requires 36 to 42 inches for the guard height and 34 to 38 inches for the graspable handrail, both measured from the stair tread nosing. Local codes may be stricter than the national standard.
3. Is it possible to install a frameless glass stair railing as a DIY project?
Frameless systems are harder, require thicker glass, and demand precise alignment; most first-time DIYers get better results starting with a framed or semi-frameless system. Frameless is achievable but not the ideal starting point.
4. What’s the biggest mistake DIYers make installing glass railings?
The most common installation pitfalls are inaccurate measurements, poor leveling, and skipping rubber gaskets between the glass and metal hardware. All three are preventable with careful planning before installation begins.