
Glass Panel Measurement Explained: A Practical Sizing Guide
Glass panel measurement is the methodical process of capturing exact width, height, thickness, and fabrication details required for a proper fit before any installation begins. Get it wrong and you face stress cracks, rejected orders, or panels that simply won’t seat in their frames. Get it right and every downstream step, from fabrication to final installation, runs without surprises. This guide covers the core techniques, common pitfalls, and fabrication-ready documentation practices that both homeowners and contractors need to order with confidence.
What does glass panel measurement explained actually mean?
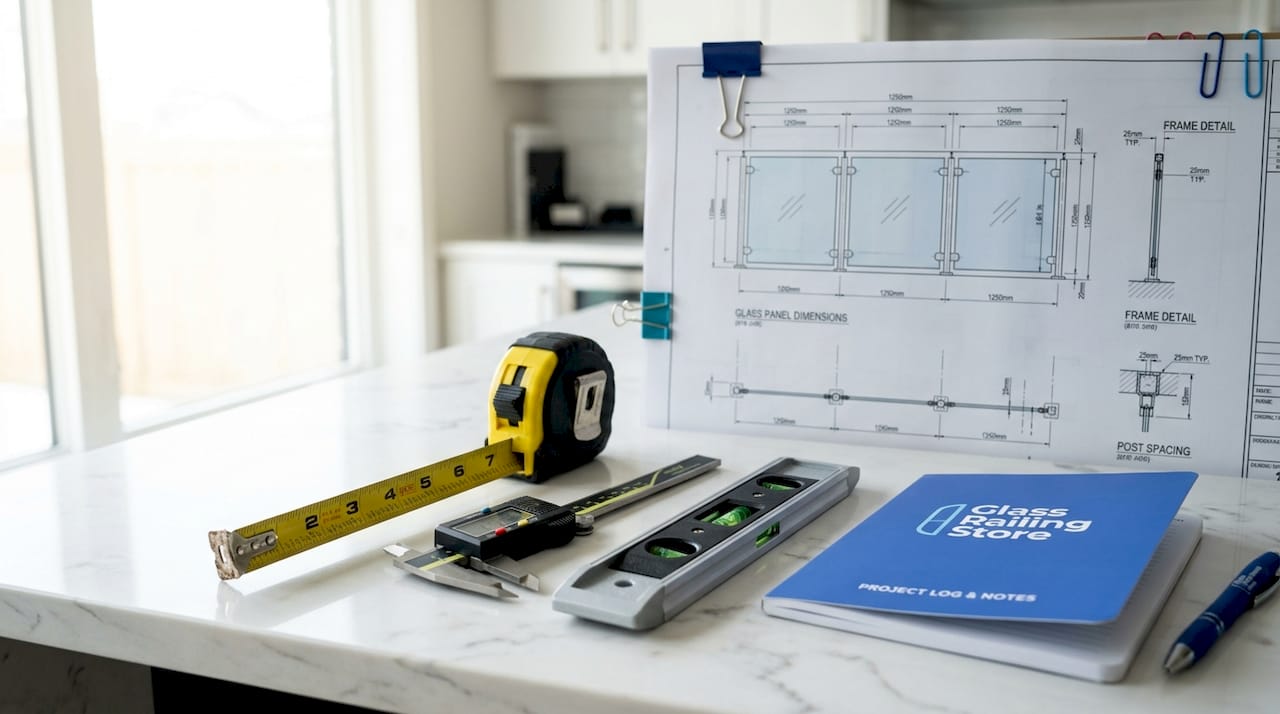
Glass panel measurement, known in the trade as glazing dimensioning, is the practice of recording every specification a fabricator needs to cut, temper, or coat a panel to exact requirements. It goes well beyond pulling a tape measure across an opening once. Accurate tools are essential for proper measurement and squareness verification, specifically a metal tape measure, digital calipers for thickness, and a spirit level to confirm plumb and level before you record a single number.
The reason multiple tools matter is that frames are rarely perfect. A deck post may have shifted slightly after a winter freeze. A wooden sash may have swelled from humidity. Any of those conditions changes the usable opening, and a panel ordered to the wrong dimension will either bind under load or rattle loose in its channel. Measuring with the right tools from the start eliminates that guesswork entirely.
How to measure width, height, and thickness correctly
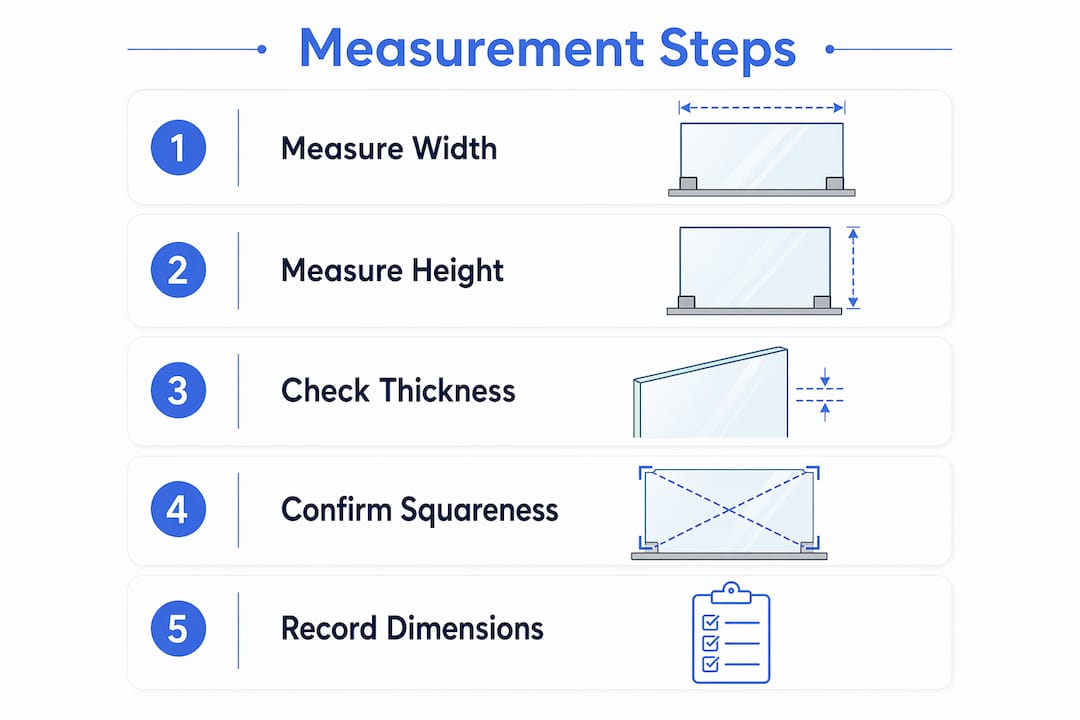
Accurate glass panel dimensions come from measuring each axis at three separate points, not one.
- Measure width at the top, middle, and bottom of the opening.
- Measure height at the left side, center, and right side of the opening.
- Record the smallest value from each set of three readings.
- Round down to the nearest 1/8 inch, then subtract an additional 1/8 inch for clearance.
- Measure diagonals from corner to corner in both directions to verify squareness.
Using the smallest measurement from multiple points is the single most important rule in glass panel sizing because frames narrow in unexpected places, and a panel sized to the widest reading will jam at the tightest point. The 1/8 inch clearance allowance on both width and height gives the glass room to expand with temperature changes and leaves space for sealant or glazing tape.
For squareness, diagonal measurements should differ by no more than 1/4 inch. A larger discrepancy means the frame is out of square and may need shimming or professional adjustment before glass is ordered. Skipping this step is one of the most common reasons panels arrive on site and still don’t fit.
Thickness deserves its own attention. Single-pane glass is typically 1/8 inch or 3/16 inch thick, while insulated glass units (IGUs) stack two panes around a spacer bar and reach total thicknesses of 1/2 inch to 1 inch. Measuring thickness with digital calipers rather than a tape measure gives you the precision needed to match the existing glazing channel or order the correct channel depth from your supplier.
Pro Tip: Write your three width readings and three height readings directly on a labeled diagram of the opening before you step away from the job site. Relying on memory or a single scribbled number is how transposition errors happen.
How does frame type change your measurement approach?
The frame type determines where you place your tape measure, and getting that starting point wrong produces a panel that fits the trim but not the actual glass pocket.
- Wood sash windows: Measure the rabbet, which is the stepped recess where the glass actually sits, not the outer decorative molding. Measuring the opening rabbet-to-rabbet rather than the trim gives you the true glass pocket size.
- Metal frames: Metal channels are more dimensionally stable than wood, but still measure at three points per axis. The channel depth matters as much as the opening width because metal frames are often designed for a specific glass thickness.
- Frameless and post-mounted installations: For frameless glass railings on decks or balconies, the “frame” is the channel or clamp hardware itself. Measure the clear span between posts or channel walls, then consult the hardware manufacturer’s specification for the required panel width and the amount of glass that must seat inside the channel.
- Glass cabinet doors: Measure the interior of the door frame opening, not the door itself. Cabinet glass typically uses thinner single-pane stock, so thickness measurement is especially critical here.
- Cracked or damaged panels: Tape both sides of a cracked panel before measuring to stabilize the break and prevent shifting that would distort your readings. Safety glasses are non-negotiable during this step.
When glazing beads or stops are present, remove them carefully before measuring. Leaving them in place forces you to estimate the hidden rabbet depth, which introduces error. A stiff putty knife and a few minutes of careful work gives you a clean, unobstructed measurement surface.
Common mistakes that cause poor fit or project delays
Most measurement failures trace back to a short list of repeatable errors. Knowing them in advance is the fastest way to avoid them.
- Measuring the trim, not the pocket. Measuring trim instead of the glass pocket is the most frequent mistake and produces panels that are too large to seat properly.
- Skipping clearance. Ordering glass to the exact opening size with no clearance allowance creates a tight fit that generates stress cracks as the frame moves seasonally.
- Ignoring squareness. A frame that looks square to the eye can be off by more than 1/4 inch diagonally. That gap forces the panel to rock or bind at opposing corners.
- Mixing up width and height. Always label which dimension is which on your notes. A transposed pair produces a panel that is the right size but oriented incorrectly for the opening.
- Omitting specification details. Missing details on coatings, edgework, or hole locations cause costly rework even when the size is correct. A panel with the right dimensions but the wrong edge finish or no pre-drilled holes for hardware is still unusable.
Pro Tip: Before submitting any order, have a second person independently re-measure the opening and compare numbers. A five-minute cross-check catches the kind of single-digit error that costs days of lead time to fix.
For railing projects specifically, reviewing common glass railing mistakes before you start measuring gives you a project-specific checklist that goes beyond basic dimensioning.
What fabrication details does your measurement sheet need?
Submitting dimensions alone is not enough for custom or tempered glass. A complete fabrication ticket tells the shop everything required to produce a panel that arrives ready to install.
| Specification | What to include |
|---|---|
| Glass type | Tempered, laminated, or IGU with spacer color and gas fill noted |
| Dimensions | Width and height in both inches and millimeters, using smallest measured values minus clearance |
| Thickness | In inches and millimeters; confirm channel depth accommodates the specified thickness |
| Edgework | Flat polish, seamed, or beveled; specify all four edges individually if they differ |
| Holes and hardware | Diameter, center location from each edge, and corner radius for each hole |
| Coatings | Low-E coating side, tint, or frit pattern with visual match requirements for IGUs |
| Code basis | Reference standard such as ASTM C1048 or applicable local building code |
Fab tickets require dimensions, thickness, edgework, hole schedule, corner radii, coatings, and code basis before production begins. Precise, fixed specs minimize remakes and misunderstandings between the measurer and the fabricator.
The most critical rule for tempered glass is that post-tempering modifications are not allowed. Cutting, drilling, or grinding a tempered panel after the heat treatment process shatters it. Every hole location, notch, and cutout must be specified before the panel enters the tempering oven. ASTM C1048 and related standards govern minimum edge clearance for holes, minimum corner radii, and placement tolerances. Referencing the applicable standard on your order sheet signals to the fabricator that you understand the requirements and reduces the chance of a non-compliant panel arriving on site.
For railing applications, glass panel thickness standards and local building codes determine the minimum thickness required for a given span and load. Confirming that your measured thickness matches the code-required minimum before ordering prevents a second round of fabrication. Your local building codes for glass railings are the authoritative reference for those minimums.
Measurement deliverables should mirror fabricator tickets in every detail to avoid misunderstandings and reorders. Treat your measurement sheet as a legal document for the order, not a rough sketch.
Why the “measure twice” rule still underestimates what’s needed
Most people have heard “measure twice, cut once.” After working through dozens of glass railing and window replacement projects, I’d push that further: measure three times, at three points each, and then document everything as if the fabricator has never seen your job site.
The factor most people underestimate is frame warp. A deck frame that looks perfectly level in summer can shift enough over one winter to change the usable opening by 3/16 of an inch. That’s enough to turn a well-fitted panel into a binding one. I always re-measure any opening that was measured more than two weeks before the order date, especially for exterior installations.
The second underappreciated factor is environmental expansion. Glass expands and contracts with temperature, and so does the frame around it. The 1/8 inch clearance allowance isn’t just a fabrication buffer. It’s the gap that prevents the panel from transferring thermal stress into the frame and cracking under a hot afternoon sun. Skipping it to get a “tighter” look is a decision that shows up as a stress crack six months later.
For complex projects, I recommend pairing your field measurements with architectural drafting services to produce dimensioned drawings that go directly to the fabricator. A scaled drawing eliminates the verbal ambiguity that causes most specification errors on multi-panel installations.
The professionals who get this right consistently are not the ones with the most experience. They’re the ones who treat every measurement as if it’s the first time and document every condition, including frame warp, out-of-square readings, and existing coating types, before they close their notebook.
— Fuanne
Get precise glass panels from Glassrailingstore
Glassrailingstore supplies tempered glass panels fabricated to the exact dimensions your project requires, with hardware and accessories designed to match. Whether you’re installing a frameless deck railing or an interior balcony barrier, the panels are produced to meet safety standards and building code requirements from the start. The glass railing engineering testing program validates fit and load performance so your installation meets both structural and code requirements without guesswork. Browse standard sizes like the 46-inch tempered glass panel or contact the team for a custom quote based on your field measurements.
Key takeaways
Accurate glass panel measurement requires three readings per axis, a 1/8 inch clearance deduction, diagonal squareness verification, and a complete fabrication ticket before any order is placed.
| Point | Details |
|---|---|
| Measure at three points per axis | Take width and height readings at top, middle, and bottom (or left, center, right) and use the smallest value. |
| Always subtract clearance | Deduct 1/8 inch from both width and height to allow for thermal expansion and proper sealant application. |
| Verify squareness with diagonals | Corner-to-corner diagonal readings must differ by less than 1/4 inch before ordering glass. |
| Specify all fabrication details | Submit glass type, thickness, edgework, hole schedule, coatings, and code reference with every custom order. |
| Tempered glass cannot be modified | All holes, notches, and cutouts must be specified before tempering; post-tempering alterations shatter the panel. |
FAQs
1. What tools do I need to measure glass panels accurately?
A metal tape measure, digital calipers, and a spirit level cover the three core measurement tasks: opening dimensions, glass thickness, and frame plumb. Calipers are especially important for thickness because tape measures lack the precision needed to distinguish between 1/8 inch and 3/16 inch stock.
2. How much clearance should I leave when measuring glass for installation?
The standard clearance is 1/8 inch on both width and height, subtracted from your smallest measured value. This gap accommodates thermal expansion and provides space for glazing tape or sealant.
3. Why do I need to measure at three points instead of one?
Frames are rarely perfectly parallel. Measuring at three points per axis and using the smallest reading prevents you from ordering a panel that fits the widest part of the opening but jams at the narrowest point.
4. Can I cut or drill tempered glass after it arrives?
No. Post-tempering modifications are prohibited and will shatter the panel. All holes, cutouts, and edge details must be specified on the fabrication ticket before the glass enters the tempering oven.
5. What is the maximum diagonal difference allowed for a square frame?
A diagonal difference of less than 1/4 inch confirms the frame is square enough for glass installation. A larger gap requires shimming or frame adjustment before the panel is ordered.
Recommended
- Glass Panel Thickness: What You Need to Know – The Glass Railing Store
- Glass Panels for Value Enhancement: A Smart Investor’s Guide – The Glass Railing Store
- How to Cut Glass Panels Safely and Precisely – The Glass Railing Store
- 46" Height Tempered Glass Panel for Glass Railing – The Glass Railing Store