

Match 6mm–12mm Glass to the Right Clamp: Sizing, Spacing, Safety for DIYers
Glass clamps are commonly matched to standard glass thicknesses used in architectural projects: small clamps fit thinner glass typically used for interior and low-impact applications; medium clamps suit mid-range thickness glass for showers, partitions, and light railings; larger clamps are used for thicker glass panels in structural railings and exterior installations. Match the clamp cavity exactly to your glass thickness and adhere to the manufacturer’s load rating.
TL;DR:
- The industry typically offers clamps for 6mm to 8mm, 10mm, and 12mm or thicker glass, with adjustable gaskets serving mixed-thickness projects.
- For exterior or coastal environments, 316 stainless steel clamps are recommended over 304 due to better corrosion resistance, especially for long-term durability.
- Minimum of two clamps per unsupported edge is necessary for panels under 900mm, with additional clamps for taller, heavier, or high-wind installations.
- Accurate measurement of glass thickness and matching it precisely to clamp cavity sizes prevent micro-fractures and ensure safety.
- Always verify load ratings, spacing, and fit before final tightening, and consider consulting a structural engineer for large or complex glass railing projects.
Table of Contents
- Glass Clamp Size Chart: Thickness to Cavity Mapping
- Clamp Types, Materials, and Finishes That Change What Fits
- How Many Clamps and How Far Apart They Should Sit
- How to Measure Glass and Confirm the Clamp Fits
- Pre-Install Safety Checklist Before You Call the Job Done
- What DIYers Get Wrong About Clamp Sizing
- Where to Buy Matched Glass Panels and Clamps
- Sources
- FAQ
Glass Clamp Size Chart: Thickness to Cavity Mapping
Most clamp manufacturers build their hardware around a handful of standard glass thicknesses, and once you know the bands, choosing glass clamps stops being a guessing game. The industry generally works in quarter inch (6mm), 3/8 inch (10mm), and half inch (12mm) increments, with some makers also stocking clamps for 8mm and 16mm panels and offering adjustable gasket clamps that flex across a small thickness range.
Here’s how the bands typically break down:
- 6mm to 8mm glass: Small clamps, roughly 20 to 40mm cavity. Fine for tabletops, cabinet panels, and other low-impact interior fixtures, not for anything a person could fall through.
- 10mm glass: Medium clamps, around 40 to 60mm. This is the workhorse size for shower enclosures, interior partitions, and light-duty railings that see foot traffic but no serious fall risk.
- 12mm and thicker: Large clamps, 60mm and up. Quarter inch clamps handle lightweight interior work, while 3/8 inch clamps are widely stocked for interiors and light railings, and half inch hardware is the standard for structural balustrades like balconies and stair railings.
Tempered glass around 12 millimeters thick is commonly used in fall-protection railings as it generally satisfies residential guard rail load requirements while maintaining a minimal visual profile. Our guide to choosing the right glass thickness breaks down when 12mm is enough and when a project needs to step up to 16mm.
Adjustable gaskets earn their place on projects that mix panel thicknesses, say, a run of 8mm interior glass alongside a 10mm partition, since swapping a gasket beats stocking three separate clamp sizes. Reserve dedicated-size clamps for anything load-bearing or exterior. A clamp built for one exact thickness grips tighter and resists slip better than a gasket stack doing double duty.

Clamp Types, Materials, and Finishes That Change What Fits
Square, round, adjustable, and heavy-duty clamps are the four families you’ll run into, and the choice isn’t purely aesthetic. Square clamps read as modern and architectural; round clamps soften a railing’s look and tend to disappear against traditional trim; adjustable clamps trade a little visual crispness for flexibility across thicknesses; heavy-duty clamps trade compact size for the deeper body and stronger screw engagement that thicker, taller panels demand.
Material grade matters just as much as shape. 304 stainless steel handles indoor installations fine, but 316 stainless is the better call anywhere near saltwater, pool chemicals, or heavy weather, since it resists pitting and corrosion far longer than 304 in coastal or high-moisture environments.
- Square clamps: clean lines, common on contemporary balconies and decks.
- Round clamps: subtler profile, popular for stair railings and interior glass.
- Adjustable clamps: gasket ranges cover multiple thicknesses in one fitting.
- Heavy-duty clamps: deeper bodies and more screw engagement for exterior and structural loads.
Clamp depth and screw engagement aren’t just spec-sheet numbers. A deeper clamp body with robust screw engagement distributes load across more contact area, which is exactly what a 12mm exterior panel needs that a decorative 6mm tabletop clamp never will.
Pro Tip: If you’re outfitting a pool fence or a coastal deck, pay for 316 stainless up front. The price difference between 304 and 316 clamps is small compared to the cost of replacing corroded hardware in three years.
How Many Clamps and How Far Apart They Should Sit
Clamp count and spacing follow the load, not just the look. A minimum of two clamps per unsupported edge is the baseline rule almost every manufacturer builds into their specs, and it’s not a suggestion you can skip on a railing.
- Start with two clamps per unsupported edge. This is the floor, not the ceiling, for any panel that isn’t fully framed.
- Add clamps once a panel exceeds roughly 900mm in height. Taller panels see more leverage from wind and impact, so extra clamps spread that load.
- Add clamps for heavier half inch glass, even at standard heights, since the weight alone increases stress on each fitting point.
- Tighten spacing further for balconies, high-wind exposure, or public-use areas. A backyard deck railing and a rooftop bar railing don’t carry the same risk profile, and your clamp spacing shouldn’t treat them the same.
- Check the manufacturer’s load rating before finalizing spacing. Every clamp family has its own published rating, and that number, not a rule of thumb, is the final word for structural work.
Our post spacing safety guide covers how clamp spacing interacts with post placement on a full railing run, which matters once you’re designing more than a single panel.
How to Measure Glass and Confirm the Clamp Fits
Before purchasing clamps, accurately measure the thickness of your glass panels at multiple points, using proper tools like calipers. Also measure the clamp cavity and gasket thickness to ensure compatibility. Verify the manufacturer’s tolerance specifications and perform dry-fit tests. Never force glass into clamps that are too small, as this can damage the glass.
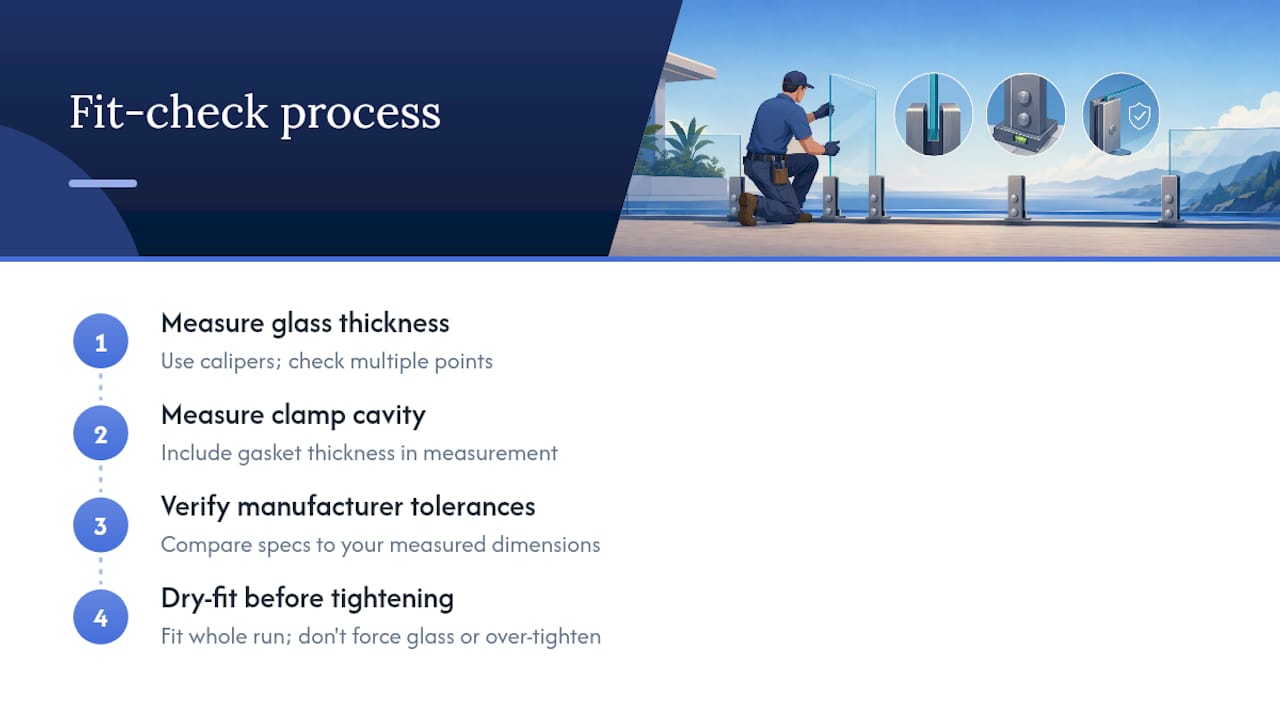
Matching glass thickness exactly to the clamp specification is the single habit that prevents most clamp failures. Forcing an 8mm panel into a 6mm clamp cavity, or over-tightening to compensate for a loose fit, stresses the glass edge and can cause micro-fractures that surface weeks later. Manufacturer spec sheets list cavity width and gasket thickness for exactly this reason. Read them before you drill.
Pro Tip: Dry-fit the whole run of panels before you tighten a single screw. Catching a half-millimeter mismatch on panel three is a lot cheaper than discovering it after every clamp is torqued down.
Pre-Install Safety Checklist Before You Call the Job Done
Run through this list before you consider any glass railing finished, whether it’s a weekend deck project or a commercial storefront.
- Confirm the glass spec sheet: thickness, temper status, and lamination if applicable.
- Match the clamp’s rated thickness range to the glass, not the other way around.
- Verify stainless grade against the installation environment, 316 for exterior or coastal, 304 for interior.
- Check clamp spacing and level across the full panel run.
- Torque fasteners to the manufacturer’s spec, then check gasket seating for gaps.
- Add backing plates where the substrate requires extra support.
Panels under about 900mm typically clear two clamps per edge at standard spacing, but taller or heavier glass needs additional fasteners to stay within published load ratings. When a project involves second-story balconies, commercial foot traffic, or any span outside standard residential dimensions, bring in a structural engineer or licensed glazier before you finalize hardware. Glassrailingstore’s load-bearing capacity guide and engineering testing documentation are worth reviewing alongside your local code requirements, which our building codes overview summarizes at a high level.
What DIYers Get Wrong About Clamp Sizing
The most common mistake isn’t picking the wrong clamp. It’s pairing the right clamp with the wrong gasket, or undercounting clamps on a panel that’s taller or heavier than the last one that “worked fine.” Environment gets ignored too often, coastal buyers reach for 304 stainless because it’s cheaper, then wonder why hardware pits within two seasons.
The pro shortcut worth stealing: keep adjustable clamps on hand for mixed-thickness runs, but never let them substitute for exact-size hardware on anything load-bearing. Dry-fit the entire panel run before final attachment, every time, even on repeat jobs. It costs you ten minutes and saves you a callback.
— Fuanne
Where to Buy Matched Glass Panels and Clamps
Buying the glass and the hardware from the same source solves the fit problem before it starts. Glassrailingstore’s 46 inch tempered glass panels come in the standard thicknesses this guide covers, so you’re not cross-referencing spec sheets from three different vendors and hoping the tolerances line up.

Once your panel thickness is locked in, round out the hardware with connectors built for the same system. The 90 degree connector and wall connector both pair with standard clamp setups for corner and wall-mounted runs, while square caprail straight connectors finish off a caprail system cleanly. Before you place an order, confirm your exact glass thickness against the mill certificate and ask for the clamp cavity spec in writing, not just the nominal size. A five-minute email now beats a returned shipment later. Browse the full panel and hardware lineup at Glassrailingstore to get a quote matched to your project’s exact dimensions.
Sources
- Glass Clamps: The Complete Guide to Types, Sizes, and Installation - Aleader Machinery
- The Complete Guide to Glass Clamps - DKhardware
- Stainless Steel Glass Clamps: Types, Materials & Uses | AODSON
- Choosing the Perfect Glass Clamp for Your Railing – Muzata
FAQs
1. What clamp size fits 12mm glass?
Twelve millimeter glass needs a large clamp with a cavity in the 60mm-plus range, the standard for structural railings on balconies, decks, and pool enclosures.
2. Can one adjustable clamp work for both 8mm and 10mm glass?
Yes, within the gasket’s specified tolerance, but dedicated-size clamps hold more securely on structural or exterior applications where adjustable gaskets aren’t recommended.
3. How many clamps does a single glass panel need?
Plan for a minimum of two clamps per unsupported edge, adding more for panels taller than roughly 900mm or built from heavier half inch glass.
4. Should I use 304 or 316 stainless steel clamps outdoors?
Choose 316 stainless for coastal, poolside, or heavy-weather exterior installations, since it resists corrosion significantly better than 304 in those conditions.
5. What happens if I force glass into an undersized clamp?
Forcing glass into a too-small cavity stresses the edge and can cause fractures that appear weeks after installation, so always confirm the exact thickness before fitting.