

6 Inches Minimum: Core Drilled Post Installation for DIYers & Pros
Core drilling is the right call for setting posts into existing concrete when the slab runs thick enough and clear of post-tension cable, since it seats the post flush and let’s grout or epoxy transfer load into solid material around the full perimeter. Surface-mounting is the faster fallback when the slab is thin, cracked, or unknown. Before you rent anything, scan for rebar and plan for wet cutting to keep silica dust down.
TL;DR:
- Core drilling provides the most load transfer stability for posts embedded in thick, unreinforced, or post-tensioned slabs, especially over 6 inches thick.
- It is recommended to avoid core drilling in slabs thinner than 6 inches or if post-tension cables are present, unless specialized detection confirms safe zones.
- Adequate rig anchoring is critical for stability, with stand anchors preferred over vacuum bases on rough or weathered surfaces to prevent mid-cut failure.
- Wet cutting and proper PPE reduce silica dust hazards, with GPR used for slabs over 8 inches or suspected reinforcement to prevent damaging rebar or post-tension strands.
- DIYers should limit core drilling to clear slabs with no reinforcement; otherwise, hiring professionals ensures safety and proper load transfer in complex situations.
Table of Contents
- What’s the Difference Between Core Drilling and Surface Mounting?
- When Should You Choose Core Drilling for Post Installation?
- Tools, Consumables, and Prep Checklist
- How Do You Core Drill and Set a Post Step by Step?
- How Do You Avoid Hitting Rebar and Control Dust?
- What Goes Wrong on a Core Drill Job?
- GlassRailingStore’s Practical Notes on Core-Drilled Posts
- DIY or Hire a Pro: An Editor’s Take on the Real Tradeoff
- Get the Right Hardware for a Core-Drilled Glass Railing Post
- Sources
- FAQ
What’s the Difference Between Core Drilling and Surface Mounting?
Core drilling cuts a round hole straight into the slab, drops the post in, and locks it with grout or epoxy. The base disappears below the surface, which is why it’s the go-to for glass railing spigots and bollards where a clean look matters. Surface mounting bolts a base plate to the top of the slab with anchors, no penetration required.
- Stability: A properly grouted core hole distributes lateral load around the entire embedment depth, often outperforming a bolted base plate on thin or aging concrete.
- Look: Core drilling hides the connection; surface mounts leave a visible plate and bolt heads.
- Time and cost: A wet core rig runs $75 to $150 a day to rent, plus bit wear, versus a surface kit you can buy outright for less. Coring takes longer per post but skips repeat anchor failures on cracked slabs.
- When surface-mount wins: thin slabs, unknown reinforcement, or jobs where you can’t risk cutting into a structural element.
When Should You Choose Core Drilling for Post Installation?
Slab thickness decides most of this. Contractor guidance on bollard retrofits puts the minimum at roughly 6 inches for a standard core, with thinner slabs pushing you toward shallower embedment or a different method entirely.
- Check slab thickness first. Below about 6 inches, core drilling risks breaking through or leaving too little surrounding material to hold the grout.
- Watch for post-tension cable. Parking structures, elevated decks, and some residential slabs use post-tensioned strand that a magnetic locator won’t reliably find. That’s when you need ground-penetrating radar and, often, a specialist.
- Match the use case. Retrofit bollards, glass railing posts on concrete, and removable pool fence posts are textbook coring jobs.
- Call a pro when reinforcement is dense, the hole needs to exceed roughly 3 to 4 inches in diameter or 12 inches deep, or GPR scanning turns up anything ambiguous, according to coring safety guidance from Penhall.
Tools, Consumables, and Prep Checklist
You need a wet core drill, either electric for smaller residential jobs or gas-powered for remote sites without power access, paired with a diamond core bit sized to your post plus clearance for grout, typically 1/2 to 1 inch larger in diameter than the post itself.
- Drill stand anchored to the slab, or a vacuum baseplate on smooth, clean concrete
- Magnetic rebar locator for routine slabs; GPR rental for anything suspect
- Continuous water feed and a wet vacuum or slurry pump
- Non-shrink grout (something like Sika 212 or Quikrete Non-Shrink Precision) or a two-part epoxy anchor system
- Safety glasses, hearing protection, gloves, and a respirator rated for silica dust
- Plumb laser or level, shims, and a depth gauge
Rig anchoring matters more than most DIYers expect. Anchor stands are recommended for any hole over roughly 60 millimeters, per Tyrolit’s core drilling technique guide, because vacuum baseplates only hold reliably on smooth, clean concrete. On a weathered patio slab or rough exterior surface, that suction can fail mid-cut. Bit and rig rental for a weekend job typically runs $60 to $200 depending on bit diameter and drill type.
How Do You Core Drill and Set a Post Step by Step?
Layout comes first. Mark your post centers, then run the magnetic locator over the entire footprint before you commit to a spot. If you find rebar close to your mark, shift the layout a few inches rather than fighting it.
- Scan and mark. Sweep each location, flag any rebar hits, and adjust your centerline to avoid them where possible.
- Set the rig. Anchor the drill stand into the slab (or seat a vacuum baseplate on clean concrete) and confirm the bit is plumb before you engage the motor.
- Start the cut. Turn on the water feed first, then begin drilling at a slow, steady feed rate. Increase pressure gradually once the bit bites.
- Listen for trouble. Chatter or a sudden vibration spike usually means you’ve hit rebar or the rig has shifted. Stop immediately rather than pushing through.
- Pull the core. Once you hit target depth, back the bit out slowly and remove the concrete plug, then vacuum out slurry and debris.
- Seat the post. Drop the post so it sits slightly above the hole floor, leaving room for grout to flow underneath the base for full bearing, following the same principle used in bollard retrofit installs.
- Pour in lifts. Add non-shrink grout or epoxy in stages, working a rod around the post to release trapped air pockets as you go.
- Check the stop-fill depth. Manufacturer instructions for anchor cup installation call for a depth gauge to prevent overfilling and wasted adhesive.
- Brace and cure. Hold the post plumb with temporary braces or shims until the grout or epoxy reaches full cure, per the product’s data sheet.
- Verify and finish. Recheck plumb with a laser, clean any residual slurry off the surface, and seal the top perimeter so water can’t pool against the post base.
Pro Tip: Rotate the post slightly as you seat it into fresh epoxy, the same way anchor cups are turned during insertion. It spreads adhesive evenly around the base instead of leaving one side starved.
How Do You Avoid Hitting Rebar and Control Dust?
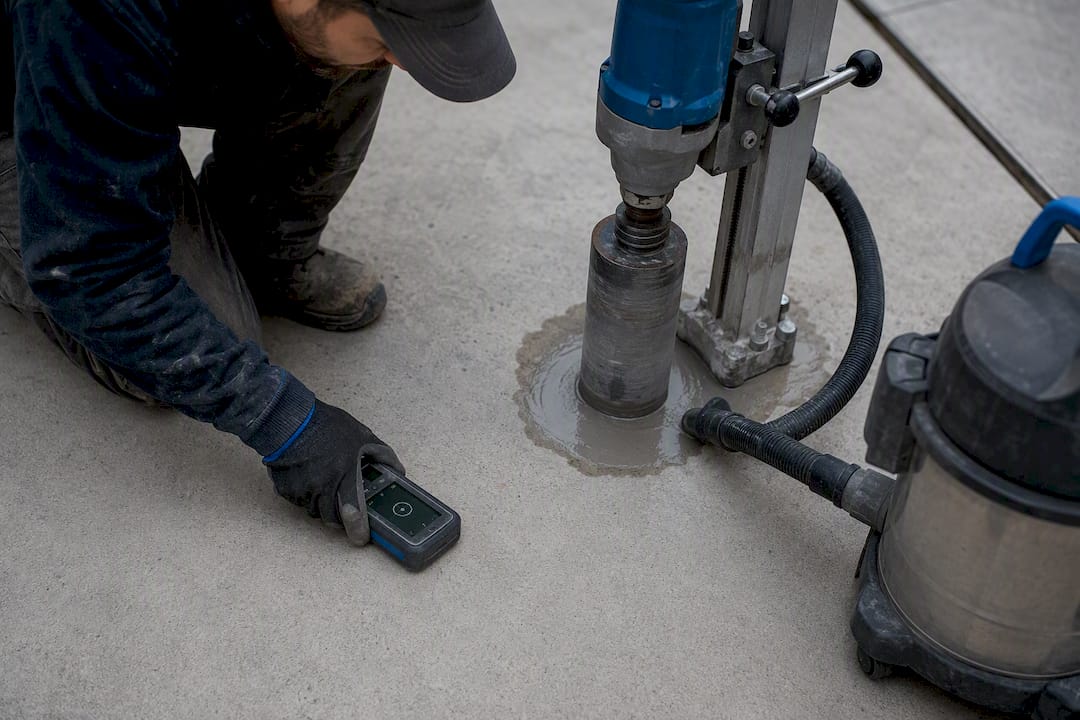
A magnetic rebar locator handles most residential and light commercial slabs, but it has limits. Once a slab runs past 8 inches thick, or you suspect post-tensioning, switch to ground-penetrating radar. GPR rental costs substantially more than magnetic locators, but it’s the only reliable way to spot deep or embedded hazards before you cut, according to Cojo’s retrofit guidance.
Cutting through rebar isn’t just a bit-killer. It weakens the surrounding concrete and can compromise the slab’s load path, especially in structural or elevated applications. If your locator flags a hit, stop and shift the hole rather than drilling through.
- Wet cutting suppresses silica dust at the source, which matters because airborne silica is a documented occupational hazard.
- Pair wet cutting with a wet vacuum or slurry pump to keep the work area clear and reduce cleanup.
- Wear a properly rated respirator and eye protection even when cutting wet, per silica control guidance from Penhall’s coring safety overview.
- If GPR shows dense reinforcement or possible post-tension strand, stop and bring in a structural engineer or specialist coring contractor before proceeding.
What Goes Wrong on a Core Drill Job?
Tilt and chatter almost always trace back to an unstable rig. If your vacuum baseplate is losing suction on a rough slab, switch to an anchored stand instead of trying to muscle through it.
- Hit rebar mid-cut: stop immediately, back the bit out, and either shift your layout or switch to a metal-cutting bit designed for light rebar contact.
- Overfilled epoxy: use a depth gauge before you pour, not after. A gauge check takes seconds and prevents a wasted batch.
- Bad grout pour with voids: chip out the compromised section and rep our in lifts, working a rod to clear trapped air this time.
- Hole too close to a slab edge or joint: if the cut visibly compromises structural integrity, stop and get a structural engineer to assess before setting the post.
GlassRailingStore’s Practical Notes on Core-Drilled Posts
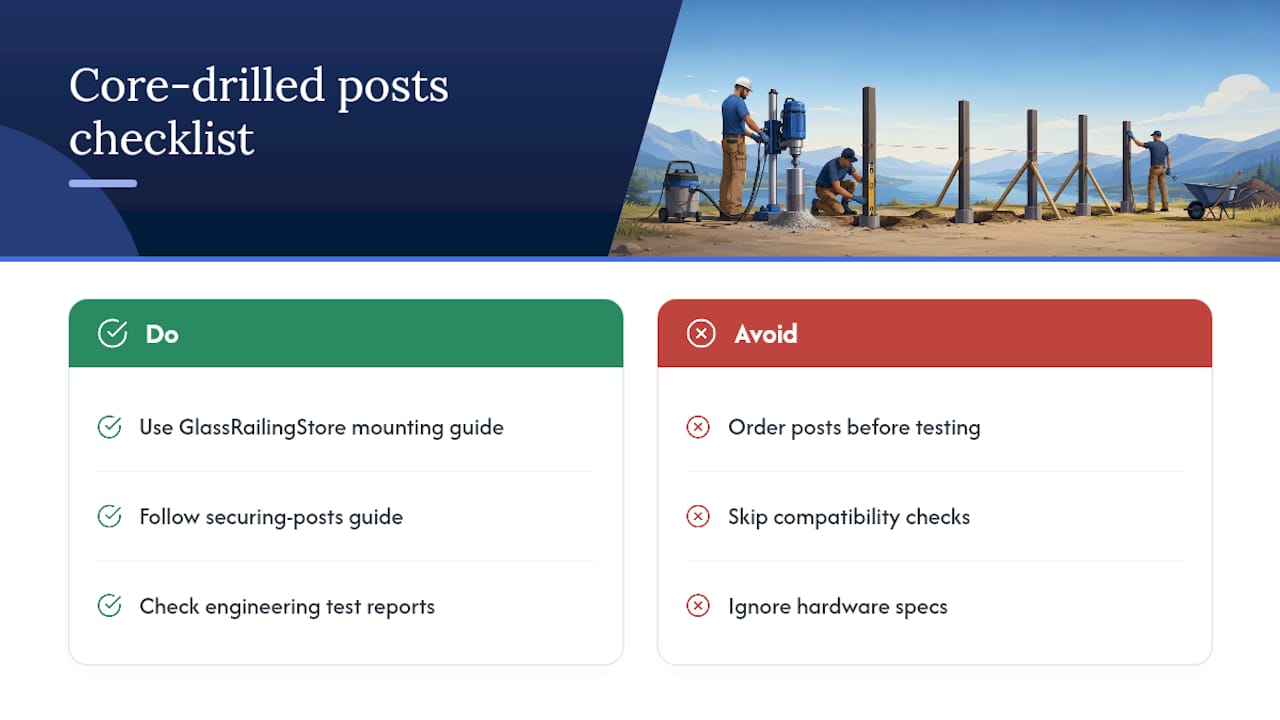
If your project involves setting glass railing spigots into concrete, GlassRailingStore’s guides on mounting railing to a concrete slab and securing posts correctly walk through hardware compatible with core-drilled installs. Pair those with the engineering testing resources before ordering posts for a load-bearing application.
DIY or Hire a Pro: An Editor’s Take on the Real Tradeoff
Hire a pro when you’re dealing with dense rebar, post-tension slabs, K-rated bollards, or cores deeper than a foot. Shallow, clear-slab jobs with a rented rig and proper PPE are fair game for an experienced DIYer. The real cost isn’t the rental. It’s what a missed cable or a cracked slab costs to fix afterward.
— Fuanne
Get the Right Hardware for a Core-Drilled Glass Railing Post
Specialized suppliers sell frameless and framed hardware designed to pair with core-drilled spigots, helping ensure the post base matches the railing system on top of it.

If you’re setting glass railing posts into an existing slab, the hardware choice matters as much as the coring technique. GlassRailingStore’s frameless glass railing quote page walks you through getting sized, priced hardware for your specific post layout, and the glass railing cost guide breaks down pricing across framed, semi-frameless, frameless, and DIY panel kit options, from $60 per linear foot for a DIY kit up to $250 per linear foot for semi-frameless systems. Request a quote before you finalize your core layout so the post spacing and hardware line up on the first pour, not after.
Sources
- How to Install Bollards in Existing Concrete (Core-Drill Method) | Cojo
- Core drilling with diamond blades | Penhall
- City Post installation guide (anchor cup) | TMP Solutions
FAQ
Do You Core Drill From Inside or Outside?
Most core drilling happens from the top surface of the slab, drilling straight down at the post location. Rig placement depends on access, but vertical top-down coring is standard for post installation.
How Deep Should a 7-Foot Post Be in the Ground?
That question applies to buried fence posts, not core-drilled installs. Core drilling into concrete uses embedment depth in the slab itself, typically matched to post diameter and grout manufacturer specs rather than total post height.
What Are Common Core Drilling Mistakes?
The most frequent errors are an unstable rig causing tilt or chatter, skipping the rebar scan, and overfilling the hole with epoxy instead of using a depth gauge to control the pour.
Will a Concrete Core Drill Go Through Rebar?
A standard diamond core bit can nick light rebar, but cutting through it damages the bit and weakens the surrounding slab. Stop drilling the moment you feel increased vibration or chatter and reroute around the reinforcement instead.