

Can You Drill Tempered Glass? What to Do Instead
You cannot drill tempered glass. Once a glass panel goes through the tempering process, it holds too much internal stress to survive a drill bit, and even a tiny surface nick can make it shatter into hundreds of pebble-sized pieces. The only safe way to get a hole in tempered glass is to have it drilled before tempering, at the factory, by the fabricator that’s about to temper it. That’s not a workaround. It is the only order of operations that exists.
If your project needs holes, standoffs, or spigot cutouts, here’s what actually works:
- Order the panel pre-drilled from the start, with hole locations specified before it goes into the furnace.
- Ask your supplier, whether that’s Glassrailingstore or a local glazier, to confirm hole diameters and edge distances during the quoting stage, not after delivery.
- If you’re prototyping or testing a layout, do your drilling on annealed (untempered) glass, then send that exact spec to the fabricator for tempering.
- Confirm whether your glass is tempered or annealed (there’s a quick way to check below).
- If it’s tempered, stop. Order a replacement panel with the holes built in.
- If it’s annealed, you can drill it yourself with the right bits and technique, covered later in this guide.
Key Takeaways
Tempered glass cannot be drilled safely once it has been heat treated, so every hole, cutout, or hardware clearance has to be specified and cut before tempering happens.
| Point | Details |
|---|---|
| No post-tempering drilling | Any attempt to drill finished tempered glass risks immediate, total shattering. |
| Holes must precede tempering | Fabricators drill annealed glass first, then temper it into its final, permanent form. |
| Test before you drill anything | Use a polarized light check or ask the supplier if you’re unsure whether glass is tempered. |
| Annealed drilling needs the right setup | Diamond or carbide bits, water cooling, and a supported work surface prevent cracked holes. |
| Order pre-drilled for structural work | Glassrailingstore fabricates custom tempered panels with hole locations finalized before production. |
Table of Contents
- Can Tempered Glass Be Drilled? Why It Shatters Instead
- Are There Any Exceptions or Specialist Services That Can Drill Tempered Glass?
- Safe Alternatives When You Need Holes in a Tempered Panel
- How to Drill Holes Safely in Annealed (Untempered) Glass
- How to Tell If Your Glass Is Tempered or Annealed
- When to Hire a Professional Fabricator and What to Ask
- Shop-Tested Advice from Glass Railing Store on Ordering Pre-Drilled Panels
- Lessons from Installation Work: The Mistakes That Cause Rework
- How Glass Railing Store Helps You Get It Right the First Time
- Sources
Can Tempered Glass Be Drilled? Why It Shatters Instead
Tempered glass gets its strength from a manufacturing process, not from the glass itself being a stronger material. Fabricators heat the glass to around 1,150°F and then blast it with cold air. The outer surfaces cool and contract fast, locking into a state of compression, while the inner core cools slowly and ends up under tension. That opposing tug of war, compression on the outside, tension in the middle, is what makes tempered glass roughly four to five times more resistant to impact and bending than standard annealed glass.
It’s also exactly why you can’t touch it with a drill bit. The surface compression layer is doing the work of holding the whole panel together. Breach it, even with a hairline scratch, and the tension trapped inside the core has nowhere to go. The energy releases all at once, and the panel disintegrates into small, relatively harmless pebbles almost instantly rather than cracking politely like a dropped drinking glass.
You’ve probably heard of the Prince Rupert’s Drop, a novelty glass teardrop that can survive a hammer blow to its bulbous end but explodes into powder if you so much as nick its thin tail. It’s an extreme, dramatic version of the same physics at work in your shower door or deck railing panel. Tempered glass is engineering a controlled version of that same stress trap, on purpose, for safety. Drilling it defeats the entire point of tempering it in the first place.
Pro Tip: If you’re staring at a tempered panel wondering whether a “gentle” pilot hole might work, don’t test it. There’s no slow, careful, or lubricated version of drilling tempered glass that ends well. The failure mode is binary: it holds, or it explodes.
Are There Any Exceptions or Specialist Services That Can Drill Tempered Glass?
The only legitimate exception isn’t really an exception at all: holes get drilled into the glass while it’s still annealed, before it ever sees a tempering furnace. Once a fabricator confirms hole size, placement, and edge clearance, the glass is drilled, then sent through heat treatment. The tempering process locks in the finished, pre-drilled shape permanently. There’s no legitimate service anywhere that drills glass after it’s already been tempered.
You’ll occasionally run into DIY forum advice claiming a diamond bit, a slower RPM, or constant water cooling can beat the odds. It can’t, reliably. According to ToughGlaze’s guidance on toughened glass, tempered glass will shatter if you attempt to drill it after tempering, and none of the common DIY workarounds change that outcome in any dependable way. A slower drill speed might buy you a few extra seconds before failure. It won’t prevent it.
- Myth: Diamond bits are gentle enough to avoid triggering failure. They cut glass faster and cleaner than other bits, but they still puncture the compression layer, which is the actual trigger.
- Myth: Water cooling prevents the shatter. Cooling reduces heat buildup during a cut, which matters for annealed glass. It does nothing to neutralize the internal stress in tempered glass.
- Myth: Going slowly reduces risk. Slower drilling reduces chipping on soft materials. Tempered glass doesn’t fail from friction heat. It fails from stress release, and that happens the moment the surface is breached, fast or slow.
Legitimate glass fabricators drill holes and cutouts before the panel goes into the tempering oven, then temper it as a finished, permanent shape. Any hole location, hardware clearance, or edge distance has to be locked in at that pre-tempering stage.
There is one edge case worth knowing: laminated glass, which sandwiches a plastic interlayer between two glass sheets, can sometimes tolerate limited post-fabrication drilling through one layer under controlled shop conditions, though this is a specialty job, not something to attempt at home. If a company tells you they can drill your already-tempered railing panel on-site with a handheld drill, treat that as a red flag, not a convenience.
Safe Alternatives When You Need Holes in a Tempered Panel
Since drilling finished tempered glass isn’t an option, your real choices come down to three practical paths, and each one has different trade-offs depending on what you’re building.
Order pre-drilled tempered panels. This is the standard route for railing systems, pool fences, and any application where the glass needs to bolt to a spigot or standoff. You give the fabricator your hole diameters, centers, and edge distances, and they drill before tempering. Cost is generally similar to other panels since drilling happens in the same production run. Turnaround is usually the only real trade-off, since custom pre-drilled orders take longer than stock sizes.
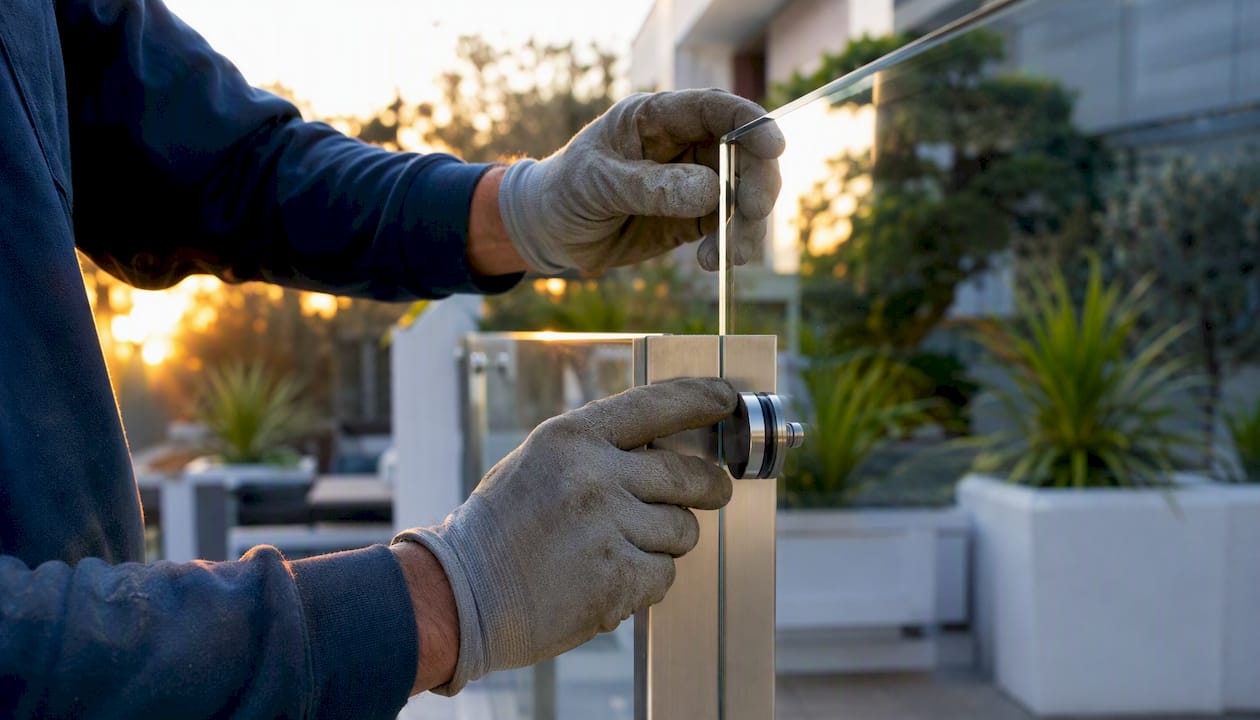
Use annealed glass drilled in advance, then temper it. This matters mainly for fabricators and larger commercial jobs where a custom hole pattern needs testing before committing to a full production batch. It’s not a practical option for a homeowner who just wants a shower door modified.
Switch to frame-mounted or clamp-style hardware instead of drilling at all. A lot of railing systems don’t need drilled glass. Base shoe channels, top-mount clamps, and caprail systems grip the glass edge mechanically instead of passing bolts through it. For many deck and stair railing projects, this is actually the simpler and cheaper path, since it sidesteps the whole tempering-and-drilling conversation entirely. Our guide on selecting the right hardware for glass railing systems breaks down which mounting styles avoid drilled holes altogether.
Laminated glass is worth mentioning too. It won’t shatter into pebbles the way tempered glass does, since the interlayer holds fragments together, but it’s rarely used alone for structural railing applications and comes with its own cost premium.
Pro Tip: Before you finalize any pre-drilled order, ask the fabricator for a printed or digital template showing exact hole centers and diameters, then physically hold it against your posts or spigots. Catching a half-inch measurement error on paper costs you nothing. Catching it after a tempered panel arrives means ordering a whole new piece of glass.
How to Drill Holes Safely in Annealed (Untempered) Glass
If your project genuinely calls for drilling, glass for a DIY cabinet insert, a custom mirror, a prototype panel headed for tempering later, you need annealed glass specifically. Never attempt any of this on a panel you know or suspect is tempered.
Confirm the glass first. Check for manufacturer markings, ask your supplier directly, or run the identification tests in the next section. If there’s any doubt, treat it as tempered and don’t drill.
Tools you’ll need:
- Diamond-coated drill bits for small to medium holes (under half an inch)
- A carbide-tipped bit as a budget option for occasional small holes
- A diamond core hole saw for anything larger, such as spigot cutouts or plumbing pass-throughs
- A variable-speed drill or, ideally, a drill press for consistent pressure
- A steady water source or spray bottle for cooling
- Plywood or a sacrificial backing board to support the glass and prevent blowout on the exit side
According to Tivoly’s glass drilling guide, diamond-coated bits and diamond core hole saws are the standard tools for glass work, and which one you reach for depends mostly on the hole’s diameter and the glass thickness you’re cutting.
- Mark your hole center precisely, then use a center punch or a small piece of masking tape to give the bit a starting bite instead of skating across the surface.
- Lay the glass flat on the plywood backing, fully supported with no gaps or overhang near the drill point.
- Clamp the glass gently with padding between the clamp and the glass to avoid pressure cracks.
- Start the drill at low speed, holding it close to vertical, and keep the bit tip wet with water the entire time.
- Apply light, steady pressure. Let the diamond coating do the cutting rather than forcing the bit through.
- Once you’re partway through, flip the piece if working freehand without a backing board, and finish from the other side to avoid a blown-out exit hole.
- Deburr the edges with fine sandpaper or a diamond hand pad, then inspect closely under good light for hairline cracks radiating from the hole.
Home Depot’s guide to drilling glass is explicit that this method applies to annealed glass only, and that a variable-speed drill with carbide-tipped bits and water cooling is the safe approach for that material, not for anything already tempered. Lowe’s how-to guidance adds that flowing water keeps the glass cool during the cut, since temperature spikes from friction are what cause breakage in annealed material, and recommends practicing on scrap glass before touching your actual project piece.
Safety checklist, non-negotiable:
- Safety glasses or a full face shield, since glass dust and chips can fly
- Cut-resistant gloves
- A dust mask or respirator, particularly for extended drilling sessions
- A cleared, stable workspace with no bystanders nearby
- A dustpan and heavy-duty bag for glass shard disposal, never bare hands
Pro Tip: Glass drilling generates a fine, gritty slurry once water mixes with ground glass dust. Keep a shop towel handy to wipe the bit and hole periodically, because that slurry builds friction and heat fast if you let it pool, which is the single most common cause of a cracked hole on an otherwise careful job.
How to Tell If Your Glass Is Tempered or Annealed
Before you pick up a drill, you need certainty, not a guess. Getting this wrong is how panels shatter.
Look for a manufacturer’s etch. Most tempered glass carries a small permanent logo or stamp, often laser-etched or acid-etched, in one corner. It’s usually subtle but should be visible under angled light. Annealed glass typically has no such mark.
Try the polarized light test. Put on polarized sunglasses, or hold two pieces of polarizing film at an angle to each other with the glass between them, and look through at an angle. Tempered glass shows a faint, mottled pattern of dark and light patches, sometimes called a “leopard spot” pattern, caused by the stress locked into the surface. Annealed glass shows no such pattern.
Check the edges. Tempered glass usually has smooth, slightly rounded, polished edges because that finishing happens before tempering to prevent stress concentrations at sharp corners. Annealed glass edges are often sharper and less refined unless separately finished.
| Feature | Tempered Glass | Annealed Glass |
|---|---|---|
| Edge finish | Smooth, often polished or seamed | Can be sharp, less refined |
| Manufacturer mark | Small etched logo, usually in a corner | Typically unmarked |
| Polarized light test | Visible mottled stress pattern | No visible pattern |
| Breakage pattern | Small, pebble-sized fragments | Large, sharp shards |
| Drillable after fabrication | No | Yes, with proper technique |
If you check all of the above and you’re still not sure, don’t drill it. Call the supplier, give them the panel’s dimensions, thickness, and any visible markings, and let them confirm before you touch a bit to the surface.
Pro Tip: Keep a small photo record of any etched corner marks before installing a panel. If you ever need a replacement or a matching custom piece, having that marking on file saves the fabricator a guessing game about glass type and thickness.
When to Hire a Professional Fabricator and What to Ask
Some jobs are DIY territory. Structural railing work generally isn’t. If your project involves load-bearing glass, a pool fence, a stair railing, a balcony barrier, hire a fabricator to handle the pre-drilling and tempering as one process.
Hire a pro when:
- The glass will bear structural load or is part of a code-required safety barrier
- Local building inspection requires certified tempered glass with documented specs
- Hole placement tolerances are tight, such as matching pre-installed spigots or standoffs
- You’re working with laminated or insulated glass units
- The panel in question is already tempered and needs modification of any kind
What to give the fabricator:
- A CAD drawing or a physical cardboard template showing exact panel dimensions
- Hole diameters and center-to-center measurements
- Edge distance from each hole to the nearest panel edge, generally a minimum of twice the glass thickness according to Bear Glass’s fabrication guidance
- Glass thickness and type (tempered, laminated, or insulated)
- Hardware specs for whatever will pass through the holes, bolts, standoffs, or spigots
Questions worth asking before you order:
- Do you drill before or after tempering, and can you confirm the sequence in writing?
- What tolerance can you hold on hole placement?
- What’s your current lead time for custom pre-drilled panels?
- What warranty applies if a hole is off-spec or the panel arrives cracked?
- How is the panel packed and crated for shipping?
Pro Tip: Ask for a signed confirmation drawing before production starts, not just a verbal quote. A five-minute sign-off step catches most measurement disputes before they become an expensive reorder. Our spigot layout guide for frameless glass railings walks through typical hole spacing if you’re specifying a spigot-mounted system.
Shop-Tested Advice from Glass Railing Store on Ordering Pre-Drilled Panels
Ordering pre-drilled tempered glass isn’t complicated once you know the sequence, but small templating mistakes are the single most common source of delay and reorder costs. Glassrailingstore builds its custom panel process around locking in hole locations and hardware specs before any glass goes near a furnace, because that’s the only point in the process where changes are free.
- Finalize hole locations and hardware type before submitting your order. Changes after the panel is scheduled for tempering mean a full remake, not an edit.
- Follow the standard edge-distance rule of roughly twice the glass thickness from any hole to the panel edge, which keeps stress concentrations away from vulnerable zones.
- Request a confirmation template, either digital or a printed diagram, and physically check it against your posts, spigots, or standoffs before giving final approval.
- Ask about packing for shipping. Panels traveling any real distance should ship in dedicated glass crates with edge protection, not loose in a standard box.
Getting the hole pattern right the first time is always cheaper and faster than fixing it after tempering. That single planning step is where most avoidable delays and costs actually come from.
Turnaround on custom pre-drilled panels typically runs longer than stock sizes since they’re produced to order rather than pulled from inventory, so building in lead time matters if you’re coordinating with an installer’s schedule. If you’re also researching mounting hardware, our buyer’s guide to glass railing hardware covers which fittings pair with pre-drilled panels versus clamp-only systems.
Lessons from Installation Work: The Mistakes That Cause Rework
The single most expensive mistake in glass railing projects isn’t a bad tool choice. It’s finalizing a layout, ordering panels, and then discovering during install that a spigot sits half an inch off from where the hole actually landed. That gap usually traces back to someone measuring off an old sketch instead of the current site conditions, or a last-minute post relocation that never made it back to the fabricator’s drawing.
The second most common mistake is assuming a panel is annealed because it “feels normal” or came from an old renovation without documentation. Glass doesn’t announce its own history. Treating an unknown panel as tempered by default, and testing before drilling, costs a few extra minutes and prevents a genuinely dangerous surprise.
If there’s one behavior change that prevents most of the rework people run into, it’s this: finalize every hole location, hardware spec, and edge measurement before the glass goes to the furnace, and get that confirmation in writing from whoever’s fabricating it. Everything downstream, install speed, cost, safety, depends on getting that one step right the first time.
How Glass Railing Store Helps You Get It Right the First Time
Skip the guesswork around hole placement entirely by ordering panels that arrive already built to spec. Glassrailingstore fabricates custom glass railing panels with hole locations, hardware clearances, and edge distances locked in before tempering, so you’re never stuck trying to modify a finished piece on-site.

Whether you’re outfitting a deck with a 46-inch tempered glass panel or building out a full spigot-mounted system, submitting your hole diameters and edge measurements up front means production happens once, correctly, instead of twice. For projects that skip drilled holes altogether, connector-based hardware like a 90-degree connector or a wall connector can mount panels without a single hole in the glass. Custom orders ship crated with edge protection for transit, and turnaround runs on a predictable production schedule rather than a rush job squeezed into stock inventory.
Ready to move forward? Request a quote through the custom glass railing page and upload your template, sketch, or spigot layout, and Glassrailingstore’s team will confirm hole placement and thickness specs before your panel goes into production.
Sources
- Glass Hole Drilling: What Every Fabricator, Contractor, and Homeowner Should Know - Bear Glass Blog
- Drilling Toughened Glass | ToughGlaze | UK
- How to Drill a Hole in Glass
- Glass drilling guide
Recommended
- How to Cut Glass Panels Safely and Precisely – The Glass Railing Store
- Laminated vs. Tempered Glass: Which Is Better for Your Railing Project – The Glass Railing Store
- Glass Railing Edge Treatments List: 2026 Guide – The Glass Railing Store
- Tempered Glass Panels for Decks: Why Material Choice Matters – The Glass Railing Store